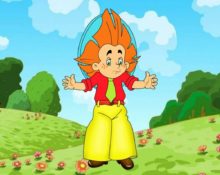
Many parents want to please their children with beautiful carnival costumes. There are simple outfits that you can make quickly enough with your own hands, even without any sewing experience. One of these outfits is the Dunno costume, the main element of which is a hat.
What is needed to make a Dunno hat?

Dunno is a very smart and brave character. He constantly finds himself in different interesting stories and never loses heart. Many children would like to be like him. For a quick transformation, you can wear exactly the same hat as this fairy-tale hero. We list the materials that may be needed for its manufacture:
- thick cardboard blue or white, with the ability to paint it (whatman paper);
- a piece of blue fabric;
- scissors;
- glue;
- Double-sided tape;
- isolon;
- gouache or other paint;
- brush;
- colored paper;
- sewing supplies.
Important! The first step is to decide on what basis the hat will be made. Cardboard is most often used.
How to make a Dunno hat with your own hands: detailed instructions
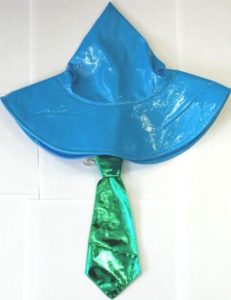
You can quickly make a base for a hat out of cardboard. It consists of two main parts: a circle and a cone. Let's look at the process step by step:
- First you need to prepare whatman paper or cardboard. If they were folded into a tube, then they should be placed under a press or, for example, several heavy books for several hours;
- Draw an even circle on cardboard with a diameter equal to the volume of the child’s head. To do this, you can measure it with a measuring tape. If you are afraid of making a mistake, then it is better to do a little less. If the head does not fit, then the circle can always be expanded;
- We make allowances for the brim of the hat of about 20-25 cm or wider. The main thing is that in the future they do not interfere with the child’s activity. After all, the main goal of the holiday is fun and participation in all kinds of games and competitions;
- Next, we draw a cone with a mandatory allowance to connect it to the fields;
- We connect the cone and the circle to each other using glue so that the allowance is on the wrong side;
- It is better to paint the details of the headdress both before making it and at the very end. The fields must be painted on both sides. You can also cover the hat with colored paper.
Attention! To work with paper and cardboard, it is recommended to use PVA glue or adhesive pencil. When carefully glued, they do not leave stains or streaks. It is better to immediately remove any remaining glue with a clean soft cloth or cotton pad.
You can also sew a beautiful hat from fabric. Crepe satin is perfect for these purposes. You will need interlining and isolon. Let's look at the process step by step:
- We cut out the necessary details. You will need 2 field pieces made of crepe-sanitine and one field piece each from non-woven fabric and isolon.We cut out 2 parts of the cap from satin and 1 part from isolon. We also cut out strips for the brush from crepe satin and isolon in the amount of 10 pieces. The principle of the pattern is exactly the same as in the paper version;
- We glue one of the details of the fields with non-woven fabric to give it greater strength;
- On the part with a layer of non-woven fabric we place the part made of isolon and secure it with pins;
- Using a pencil and a long ruler, we draw peculiar rays that should extend from the center of the workpiece perpendicular to the margins. The distance between them may vary and is determined at your own discretion;
- Next, we stitch on a machine along the pre-drawn lines;
- We fold the resulting part with the second element made of crepe-satin, pin them together with pins and connect the parts using a typewriter;
- To make the product look neat from the front side, cut off the excess isolon from the allowance with scissors;
- We turn the brim right side out and prepare it for connection to the cap. To do this, it is necessary to create additional tension on the duplicated part. This will allow the fields to have a stable shape and not sag;
- We make parts for the brushes. This can be done in various convenient ways. We sew them to the cap in advance;
- We connect together two parts of the cap - from isolon and crepe-satin. We stitch their sections on a machine;
- We cut off the brim and cap with the right sides using pins. For strong fixation, it is better to place pins vertically. Next, we stitch this section on a machine;
- Next, we sew on the inner cap. This is done for beauty and wearing comfort. When making a product in a hurry, you don’t have to do the internal part;
- We sew on an elastic band so that the hat is easy to take off and put on.
Additional elements for decoration
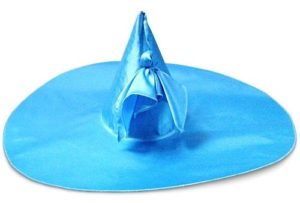
An additional striking element to create a more believable headdress is the hair of this hero. They can be easily and quickly painted using yellow paint on the product itself. You can also use colored paper or plain paper, painting it yellow in advance. It is necessary to cut strips of different lengths. You will get unique strands of hair. Next, they need to be curled with a pencil and glued to the inside of the hat.
You can quickly create an interesting hairstyle thanks to the applique. To do this, make blanks from yellow material and glue them to the headdress. You can also sew them onto the fabric in advance if the hat will be fitted to it in the future.
You can also glue a tassel to the top of the product. Skirts are cut from a sheet of corrugated paper and rolled up at the uncut end without reaching the end. Then secure with thread or tape.
Thus, you can make a spectacular and bright hat for the main character on your own in one evening. This headdress is suitable for both children and adults for any costume event.


 0
0