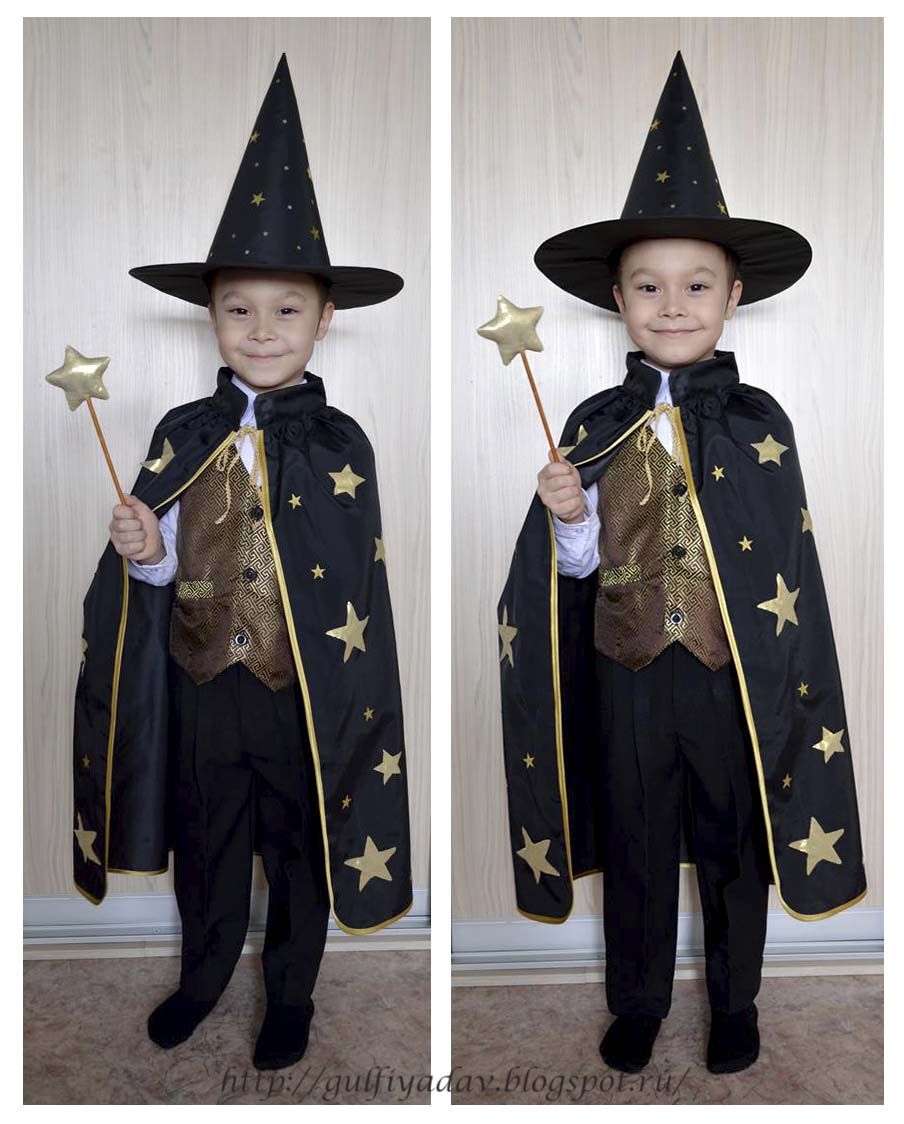
 A wizard's hat may be needed for New Year's performances, carnivals, children's entertainment programs or for a photo shoot, and at any time of the year.
It’s easy to make it yourself, using materials that almost every home has. That is, you can do without financial expenses or reduce them to a minimum.
How to make a wizard's hat with your own hands step by step?
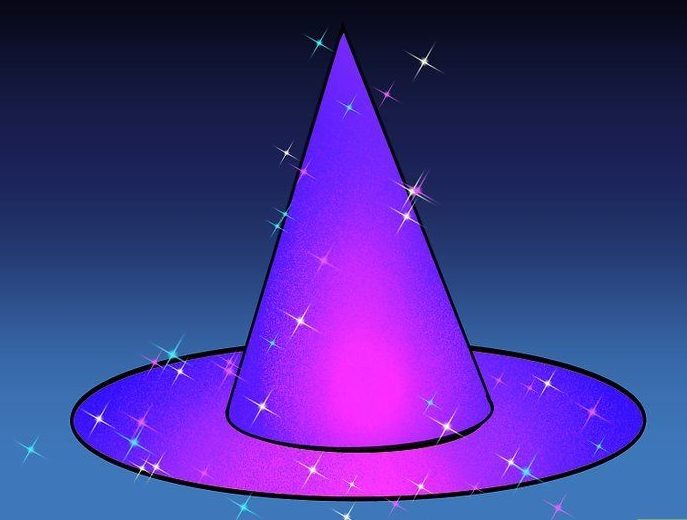
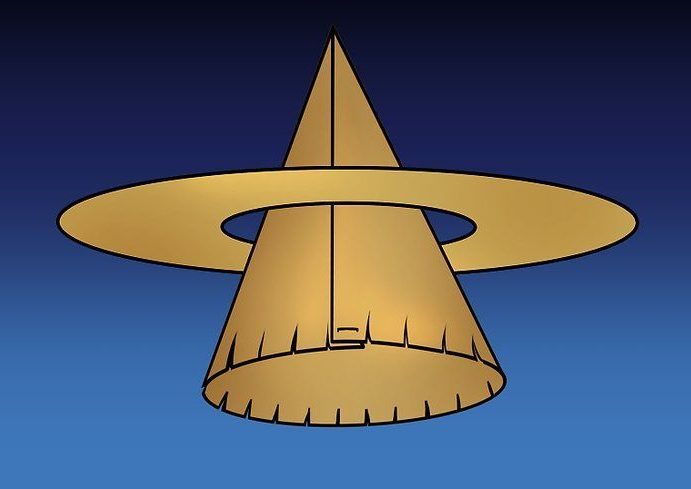
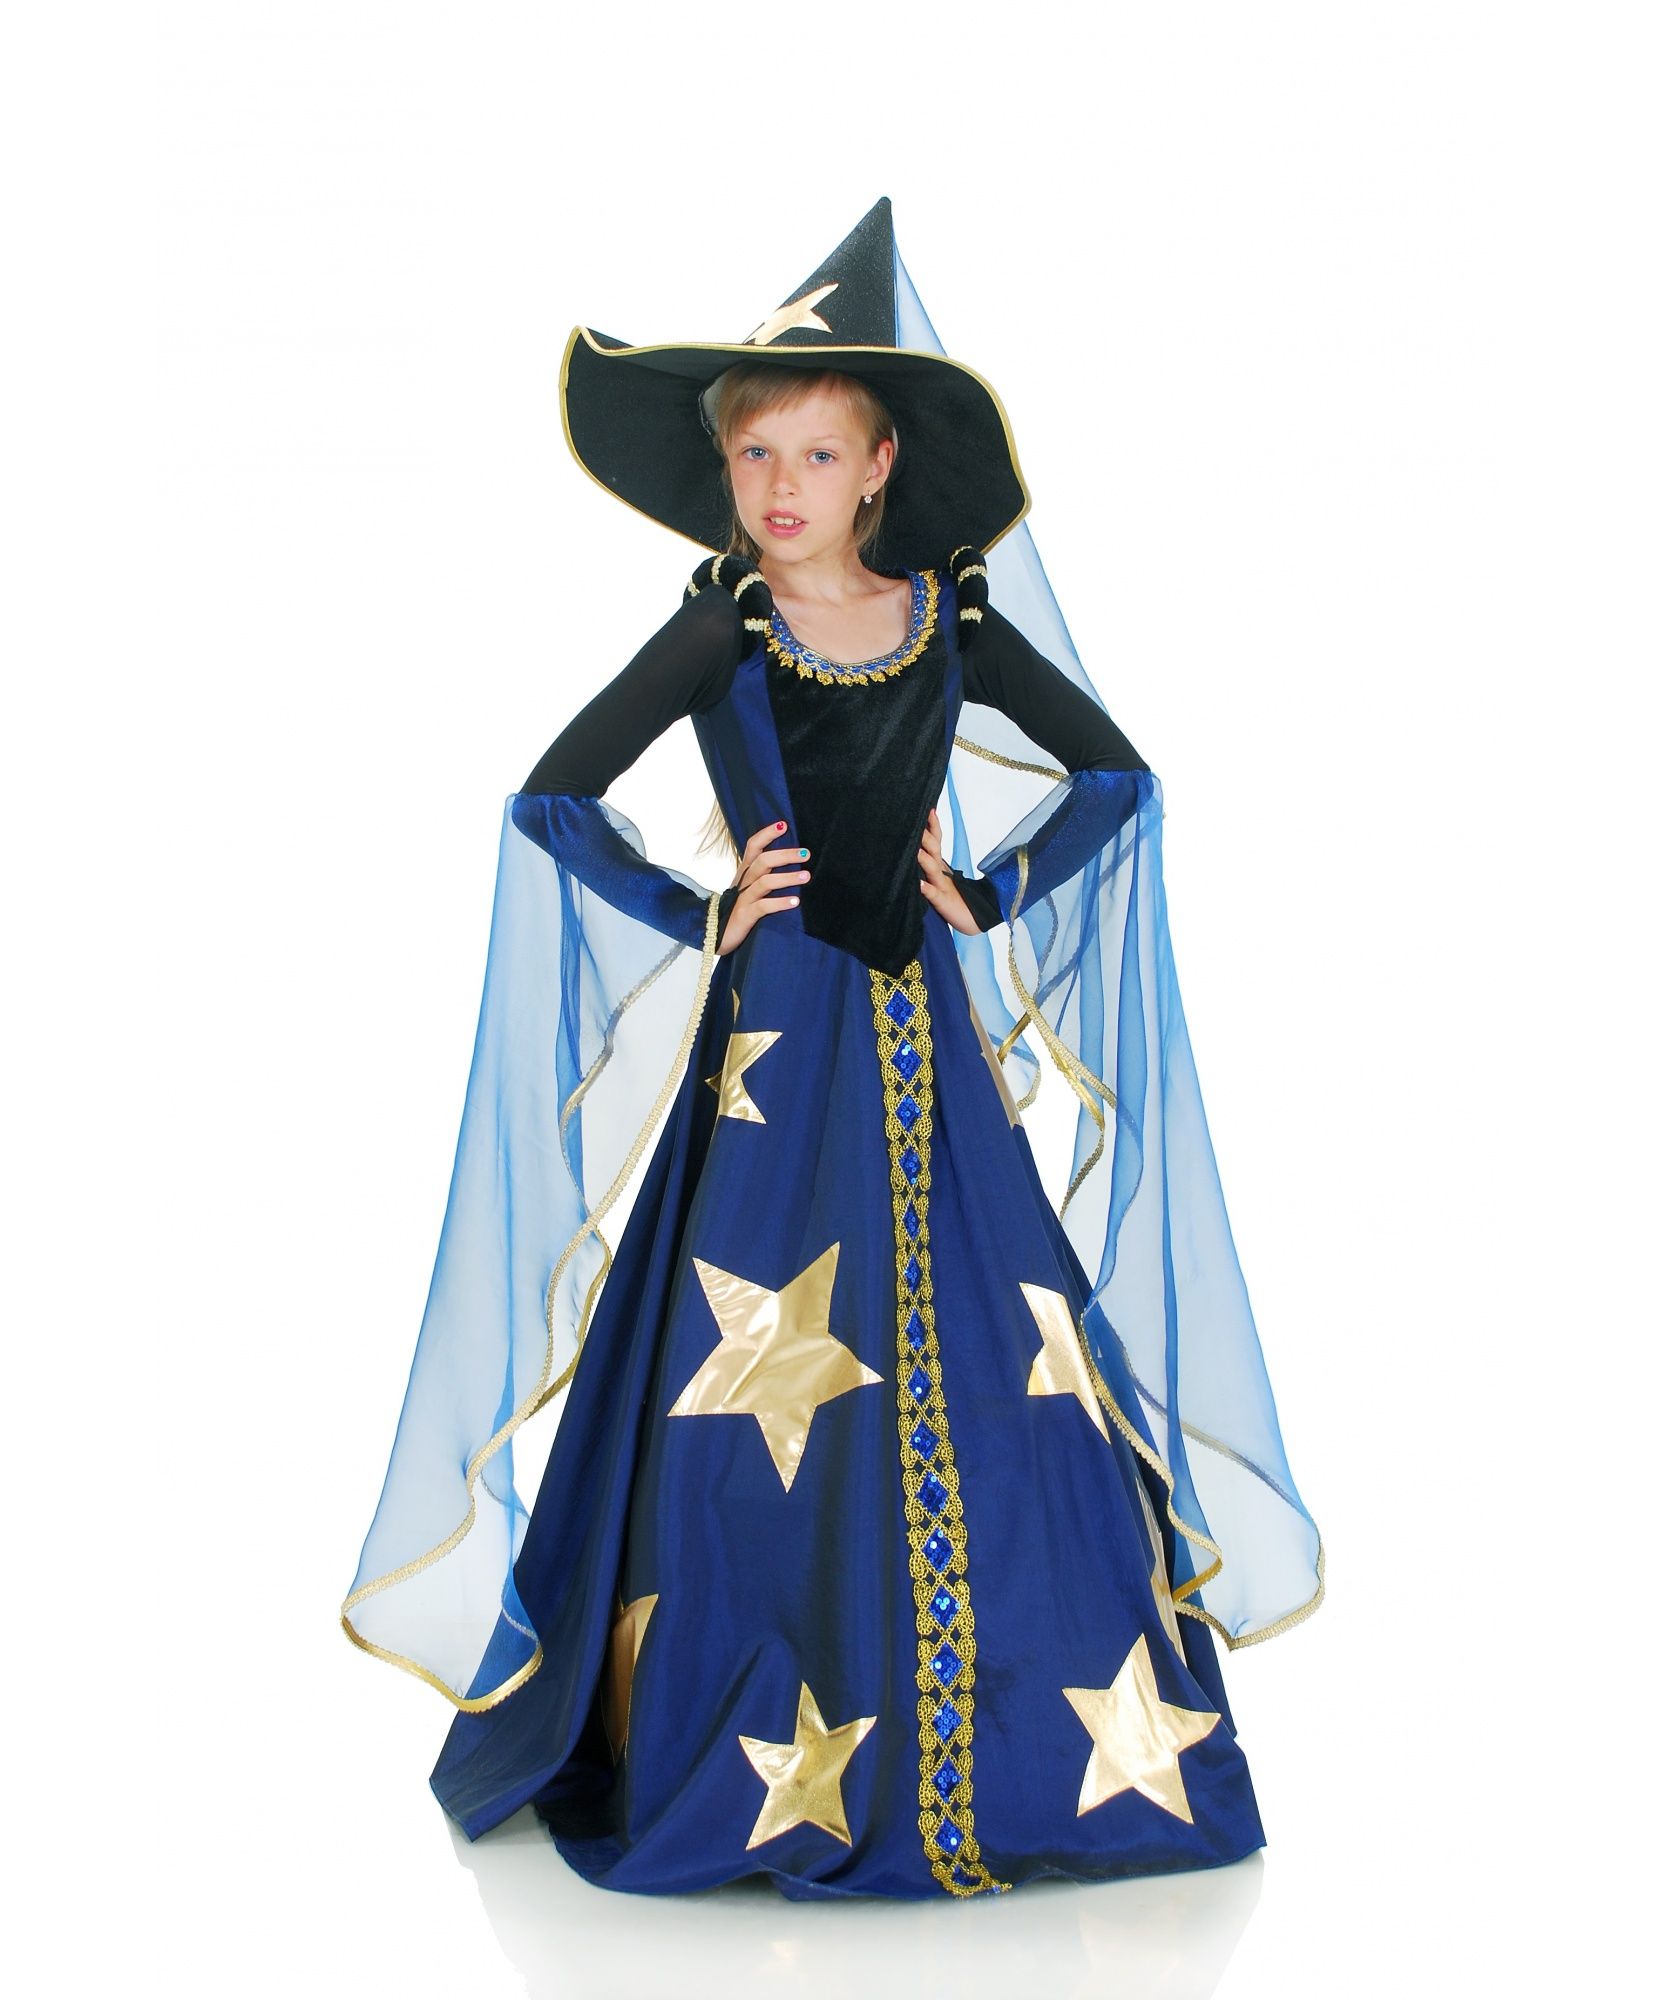
 The wizard's hat can be in several versions at once - shaped like a cone or cylinder. A cylinder does not have the same practicality as a cone, so an example of manufacturing in the form of a cone will be considered. The fact is that the top hat is more suitable for adults or boys. But a cone-shaped hat looks great on everyone without exception.
It’s worth decorating it with flowers, and you’ll get an excellent accessory option for photographing a little princess.. If decorated with stars or patterns, this hat is also suitable for boys. You can make a wizard's hat from fabric, cardboard or paper.The principle is very similar, only working with materials has its own characteristics.
From fabric
Important! You can use regular black fabric if you intend to decorate it. If you make a product from shiny or sequin fabric, then the decor will be unnecessary.
In addition to fabric for production you will need:
- cardboard of any thickness;
- binding to match the main fabric;
- decorative elements (braid, sequins, half beads);
- scissors;
- pencil;
- threads, needle;
- textile glue.
Draw a cone on a piece of cardboard. Place a piece of fabric face down under it. Trace the cardboard and trim off the excess fabric, but leave 4-5 cm for allowances.
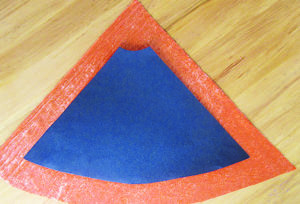 Evenly over the entire surface of the cardboard apply glue, fold the edges on the reverse side and also fix.
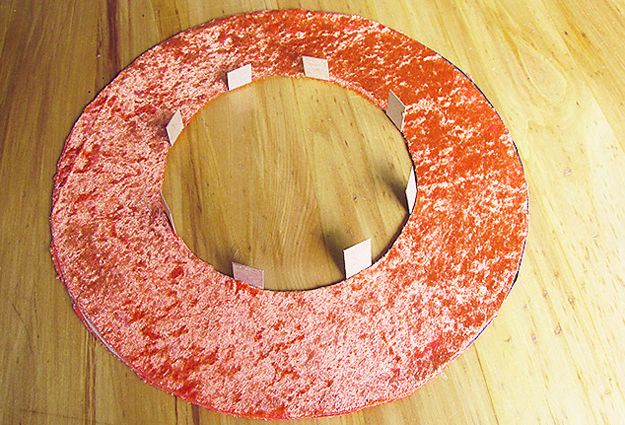 Now you need make a base blank, that is, fields. So that the fields can be secured with a cone, notches need to be made in the center of the circle. Cover the brim of the hat with fabric as well.
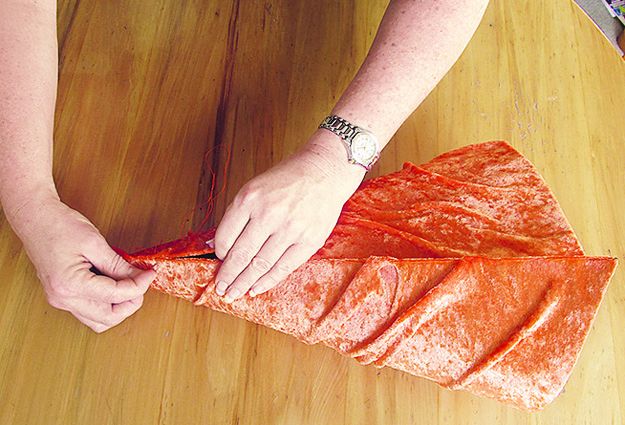 Sew bias tape around the entire outer perimeter. Fold the main part and sew it in height to form a cone. Now you need to paste in the fields. To do this, notches-segments are inserted on the inside of the cone.
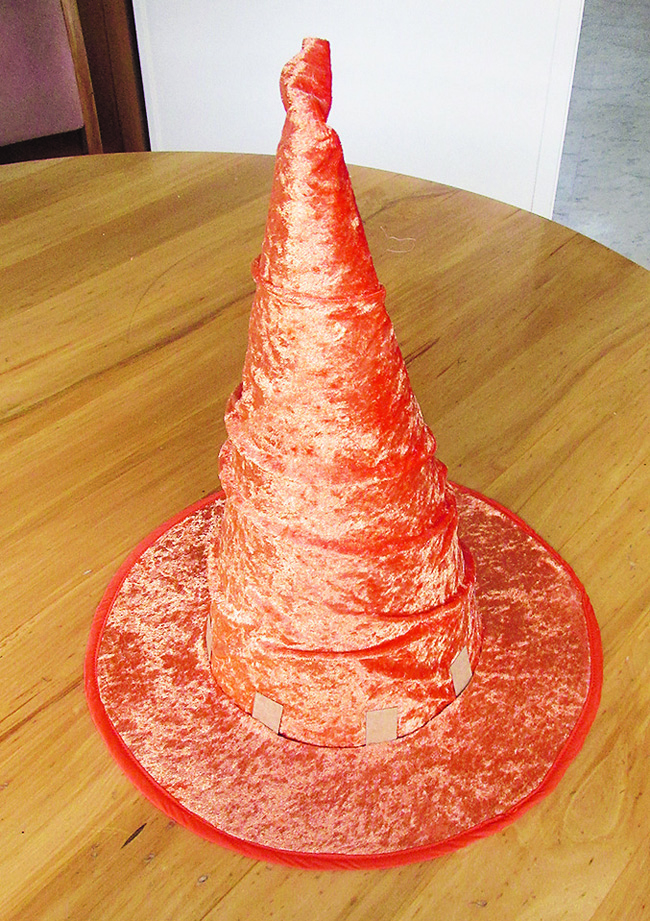 Cut a strip of fabric and wrap it around the joint area, thus masking the fastening. Sew on with hand stitches and the hat is ready!
Cardboard hat
Materials:
- sheet of thick cardboard in A1 format;
- PVA glue;
- large compass;
- scissors and stationery knife;
- acrylic paints;
- decorative elements.
Manufacturing
On a sheet of cardboard you need to draw a line of 35-40 cm, depending on how high the product is needed. This line will be the radius of the semicircle from which the cone will be made. You need to draw a semicircle using a large compass. After this, you need to draw the fields of the product on the cardboard. Draw three circles with a compass. The first one should correspond to the circumference of the head.
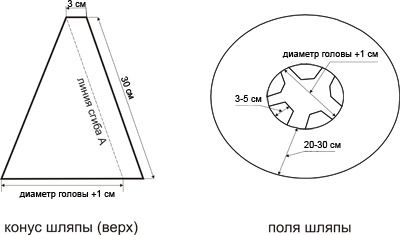 In the middle of it, draw a circle half the size for the notches. And the third circle is at a distance of 12-13 cm from the first. This will be the width of the fields. Cut out the circles and make notches on the inside; they should immediately be turned outward.
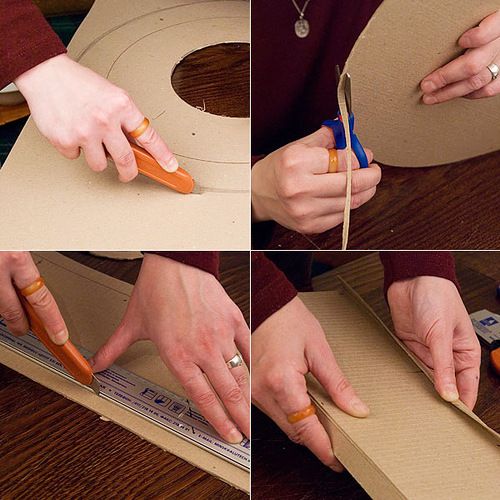
 Cone blank you need to roll it until it matches the hole of the second blank (fields). Cut off the excess cardboard and mark the gluing area with a pencil. Then apply plenty of PVA glue to the marked strip, press, secure well with paper clips and let dry.
Important! When working with cardboard, the most important thing is to achieve a strong bond. Sometimes you have to re-glue, and also not spare the glue.
 When the cone is ready, it needs to be glued to the base. Glue is applied to the notches, connected inside the cone, pressed and placed in a warm place until completely dry. After this, paint the hat black and, if desired, decorate it with fabric flowers, sparkles or stars made of colored paper.
From paper
The material you can use is colored paper, whatman paper or even newspapers. If the softness of the newspaper softens, it can be treated with one layer of PVA glue, allowed to dry and only then worked. Plus, painting with acrylic paints will also make the paper canvas more dense.
 Materials:
- paper;
- compass;
- scissors;
- braid or ribbon 2-3 cm wide;
- stapler;
- scotch;
- black paints.
Using a compass, draw a circle on paper with a diameter that will be optimal for the width of the margins. Cut it out. Measure the circumference of your head, and draw another one inside the large circle that corresponds to the measured value. Cut that out too. The base is now completely ready.
 Draw and cut out a second circle, the diameter of which is 30 cm. After this, cut it along the radius to the center. Try to fold the circle so that you end up with a cone, the base of which corresponds to the internal diameter of the fields. The edges are secured with a stapler.
 Connect the fields using tape and the cone first from the inside and then from the outside. To disguise the attachment point, you should tie the cone at the base with tape or braid.
Important! You can paint the paper black both before assembling the hat and after. If the material has too light a structure, it is better to paint it before starting work.
 Thus, spending a minimum of money, effort and time, you can get a product that will be relevant for Halloween or New Year. You can also play prizes in such a hat, use it to show children simple tricks, or hide little surprises under the Christmas tree.
 0
0