Each product made independently not only saves money, but most importantly, it gives the master a lot of emotions and a reason for pride. In this article we will look at the instructions for creating a sombrero: implementation features and basic steps.
DIY cardboard sombrero
In order to achieve an impressive result, it is recommended to follow the steps described below in a certain sequence.
What you will need
First, of course, you need to arm yourself with the necessary items. The list of necessary things directly includes:
- Double-sided tape for fixing elements;
- Several sheets of colored paper.
REFERENCE! It is better if the material is bright in color. Therefore, it is recommended to focus specifically on red, yellow or orange shades.
- Any thread and needle;
- It is also advisable to have a ruler with you;
- Gouache of the appropriate color. Ordinary paint can also be useful;
- Tools for doing the work - scissors, pencil and brushes for drawing;
- For decoration, it is advisable to purchase beads, rhinestones, and various feathers or braid.
Thus, it can be noted that the procedure will be based solely on the items available to every person who wants it.
Measurements
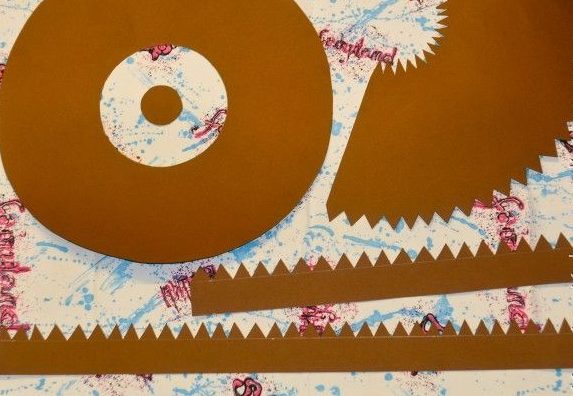
In order for the structure to fit in size, you need to make a drawing in advance:
- The first step is to prepare the field of the hat: draw a circle with a diameter of 21 cm.
- Next you need to mark the center. Then tie one end of the thread to a pencil and the other to a needle. Therefore, a complete circle can be accurately drawn in this way.
- From the same point you need to create a radius equal to 8 cm. The resulting rings are the fields of the product. To make the edges raised, you need a strip (width = 4 cm, length = 132 cm).
IMPORTANT! To achieve these parameters, you should cut out several sections and glue them together.
- Now you can start making the crown. To do this, you need to mark the center on the sheet and draw a horizontal line through this point. Then form an angle of 120 degrees.
- From the same point, create a radius = 25 cm. After this, make another one, only with 7.5 cm.
- Finally, make the base for the sombrero using a 2.5 cm radius.
Instructions
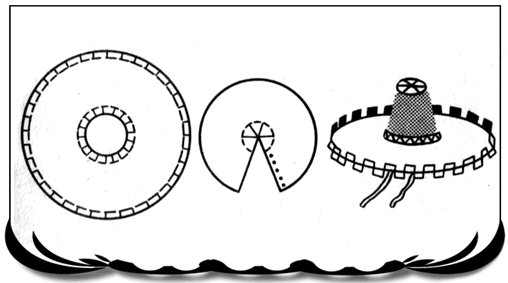
Now that the blanks have already been made, you can proceed to the main action.
- All parts, accordingly, must be cut out. After this, you can begin assembly.
- So, the crown should be glued together and the valves carefully bent.
- Next, you can glue the bottom of the structure to the base so that the valves are therefore underneath it.
- The same method should be followed when connecting the ring.
- The remaining part must be fixed in such a way that the protruding elements are covered.
Decor
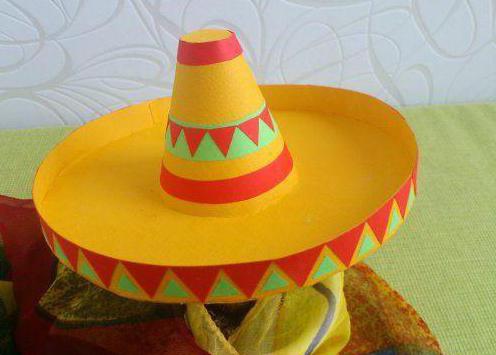
Finally, all that remains is to decorate the homemade structure.As discussed earlier, this can be done in several ways. The most common is the use of applique in your business. For this, various forms of colored paper are used, which are subsequently glued to the structure. In addition, you can use paint for these purposes. Even a child can draw, and whatever he wants. Don’t forget about satin ribbons, laces and even twine. They can be wrapped or tied around the entire circumference. Consequently, with their help you can discreetly hide the places where the fields are attached. For the same purpose, many people arm themselves with decorative braid, which can also hide an unwanted seam. Thus, you can show your individuality and create a unique accessory for your outfit and not limit yourself to your imagination.


 0
0