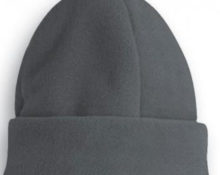
Budenovka is primarily associated with the clothing of the men of the Red Army. This hat can be given as a gift or souvenir with a focus on history for the elderly. Young people use these elements in military style. The pattern can also be used when sewing carnival costumes. There is a hero with whom many children are introduced - Malchish-Kibalchish. As a result, many people are looking for where they can buy such a hat, but they don’t always find it, so there is only one option left - to sew a budenovka with your own hands.
How to make a life-size budenovka pattern yourself
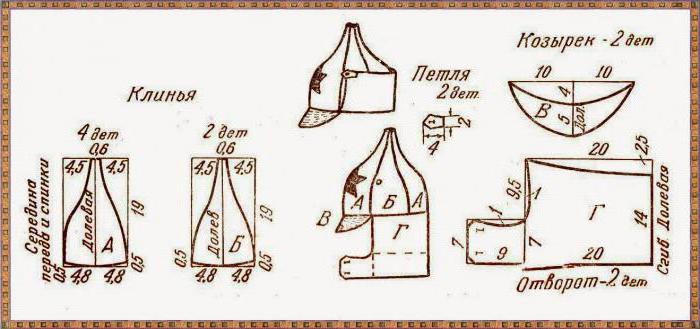
Budenovka consists of a visor, a base of wedges, and a backplate. The hat is decorated with a symbolic red star with a white trim on the front of the product. Buttons are sewn over the ears so that the lapels do not interfere.
If you look at the pattern, there is nothing difficult about making a life-size pattern on a sheet of paper by analogy. The very first thing you need to start from is the size of your head circumference.Then divide this value by the number of wedges, so we were able to find out how many centimeters are needed for the base of one wedge. The visor and backplate will also not be difficult to construct a pattern on paper, repeating the lines from the diagram.
Important! If difficulties arise with the construction, you can always enlarge the drawing on the computer to the size of the original and translate it by attaching a sheet of paper to the monitor.
Although the height of the budenovka is unchanged, to clarify, you can measure the distance from the eyebrows to the top of the head, then add 5 cm to this value for the pointed tip. The picture shows an example of a size 56 pattern; in the final form, the volume of the headdress will be 57.5 cm. Even if the dimensions of the pattern need to be changed, the construction principle remains the same. The pattern of the lining completely repeats the main product.
How to sew a budenovka with your own hands
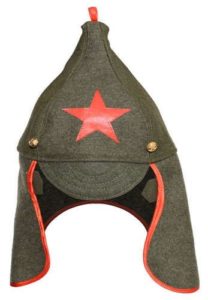
To choose a fabric, you don’t have to be so careful about the fabric and look for felt, as was the case with the original. It is important to find fabric of a suitable color - military or tourist colors, from gray-green to dark green. If the fabric has shine or shimmer, then even this nuance can make the product with some stylization and give it a zest.
If you want to sew a hat from cloth, then you need to make wider allowances for processing the edges when cutting. You can choose felt if you want to replicate the original as much as possible. In all other cases, you can use a variety of fabrics.
Important! If the fabric is loose, then after cutting you need to glue all the parts with double tape. This is necessary so that the product keeps its shape, because the hat has a height.
To sew budenovka you will need:
- A piece of fabric, 0.5 meters is enough with a width of 1.5 m;
- If the plan is to provide a lining, then there is as much lining fabric as the main fabric;
- Tailor's pins;
- Chalk or piece of soap;
- Buttons;
- Threads to match the fabric;
- Scissors;
- Dublerin if the fabric is thin.
Manufacturing. Transfer all the details of the pattern onto the fabric, outline with chalk, taking into account an allowance of 1.5 cm. The edges of all cut out parts need to be processed using an overlocker or using a zig-zag stitch on a sewing machine. Although technologically there is no need for this, since there will be a lining, it will allow for additional rigidity and make the product more neat.
The front and back wedges need to be sewn together first, and then connected to the side parts.
Important! In order for the product to look neat in the end, you must not forget about carefully ironing all the sewn parts. This applies to both the main pattern and the lining.
You can optionally insert a plastic tip onto the top of the cap, which will bring the product as close as possible to the original. At this stage, the sewn wedges need to be connected to the lining. The lining wedges are sewn on without finishing the seams. Connect the wrong side of the product and the wrong side of the lining. Pin over the entire surface with tailor's pins or sweep away. Now you need to move on to the visor and the bottom of the budenovka.
Although in the original Budenovka the visor was made only of fabric, nothing prevents it from being made more rigid by inserting a dense material, such as cardboard, between the fabric and the lining. The visor needs to be quilted to connect all three layers together. After the parts of the visor and the backplate are ready, they need to be placed between the main and lining parts of the hat, and basted around the entire circumference of the lower part of the budenovka. And only after that sew on a machine, connecting all three parts.Lastly, 1-2 buttonholes are made on the back piece.
How can you supplement budenovka?
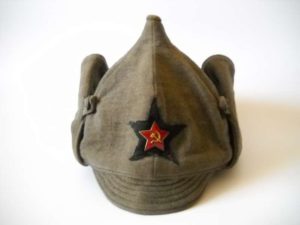
To make the budenovka stylish and attract attention, there is not much to experiment with the decor here, so all the emphasis falls on the finishing and small details. The only decorative element is a red star, but you can do it, or you can refrain from doing so, depending on the idea.
Important! If a star is required according to design, then it is sewn at the junction of the front wedges. You need to sew with the smallest zig-zag stitch.
Here are a few more options on how you can make budenovka more interesting:
- It is better to try to find bronze-colored metal buttons;
- The facing around the entire perimeter of the backplate with red trim, which harmoniously combines with the sewn star, looks very nice;
- At the stage of sewing the wedges, you can also finish all connecting seams using red threads.
If you follow all the above recommendations, you can get an original product in military style or a wonderful souvenir gift for foreign friends.


 0
0