In the process of tailoring, one of the indispensable attributes is the mannequin. You can buy it at the store or make it yourself.
Of course, creating a figure is a rather labor-intensive process, but the result will be exactly the attribute that will best meet your needs.
Create a template
Before you start making a mannequin, you need to determine its immediate purpose. In most cases, such attributes are created in order to facilitate the process of sewing and trying on clothes. Anyone can become a template. The main thing is to remember that the future mannequin will have the same shape as its “prototype”.
Models for the template, it is recommended to wear underwear that you won’t mind ruining. A film is wound on top of it in several layers. It is recommended to use food grade, as it has the optimal width and is easy to use. You should not stretch the film excessively, because otherwise the shape of the figure will be completely different. When finished, the body should be wrapped from the chin to mid-thigh.The arms are covered with film up to approximately the elbow.
 Next, tape is applied. In order for the future template to retain its shape, it is recommended to use at least 3 layers. The adhesive tape is torn off in small pieces and carefully glued to the film in such a way as to replicate the shape of the body as much as possible, as shown in the photo.
When everything is ready, you need to draw lines on the template. There should be a straight vertical strip running down the center of the back - a cut and several horizontal ones, which will become a guide for subsequent gluing. Next, the bottom line is leveled.
Now the tape and film can be carefully cut and removed. The edges are reconnected using adhesive tape. Now the template is ready and very soon you will have your own mannequin.
Fixing and creating a base
A cocoon made of film and tape is unable to hold its shape for a long time, which means it needs to be fixed. To do this, you can use regular bandages and alabaster, or special plaster casts. As practice shows, the second option is less dusty and more convenient. In order for the template to retain its shape while applying bandages, you can make several spacers inside and insert thick cardboard into the base. Glue the bottom part of the template to the table.
Plastering is done from the bottom up. Wet gauze should be applied to the bandages. When everything is ready, you need to wait for the plaster to dry completely. The recommended air temperature is 28˚C.
After about a day, you can continue working on creating a papier-mâché mannequin with your own hands. Now, its interior needs to be filled with polyurethane foam. This process includes several stages, since the substance significantly increases in volume in the first hour after pouring; among other things, it must also dry out.To save filler, you can add pieces of foam or other similar material to it.
When all the internal space is filled, you need to insert a stand into the center of the mannequin. Initially, you can use any stick wrapped in regular cellophane. After completing the work, the mannequin must be fixed and left until the foam dries. With this volume of filler, the drying process will take approximately 72 hours.
Adjusting shapes and appearance using papier-mâché
When the foam dries, the plaster must be removed. To do this, cut it into two halves using a construction knife. You also need to get rid of fragments of tape and film.
Now the mannequin is almost ready, all that remains is to make it more attractive and adjust the shape where necessary. The ideal option for solving this difficult problem would be to use papier-mâché.
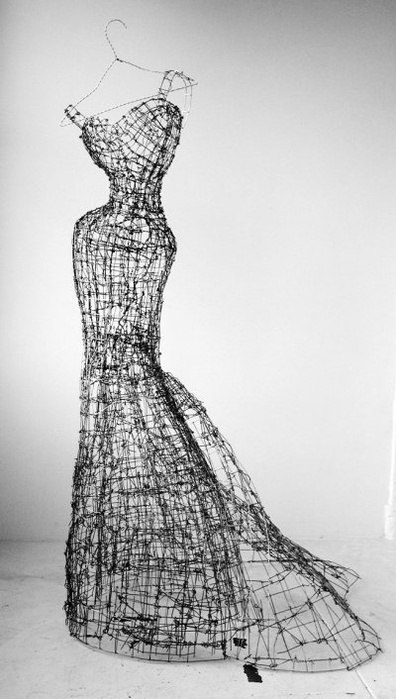
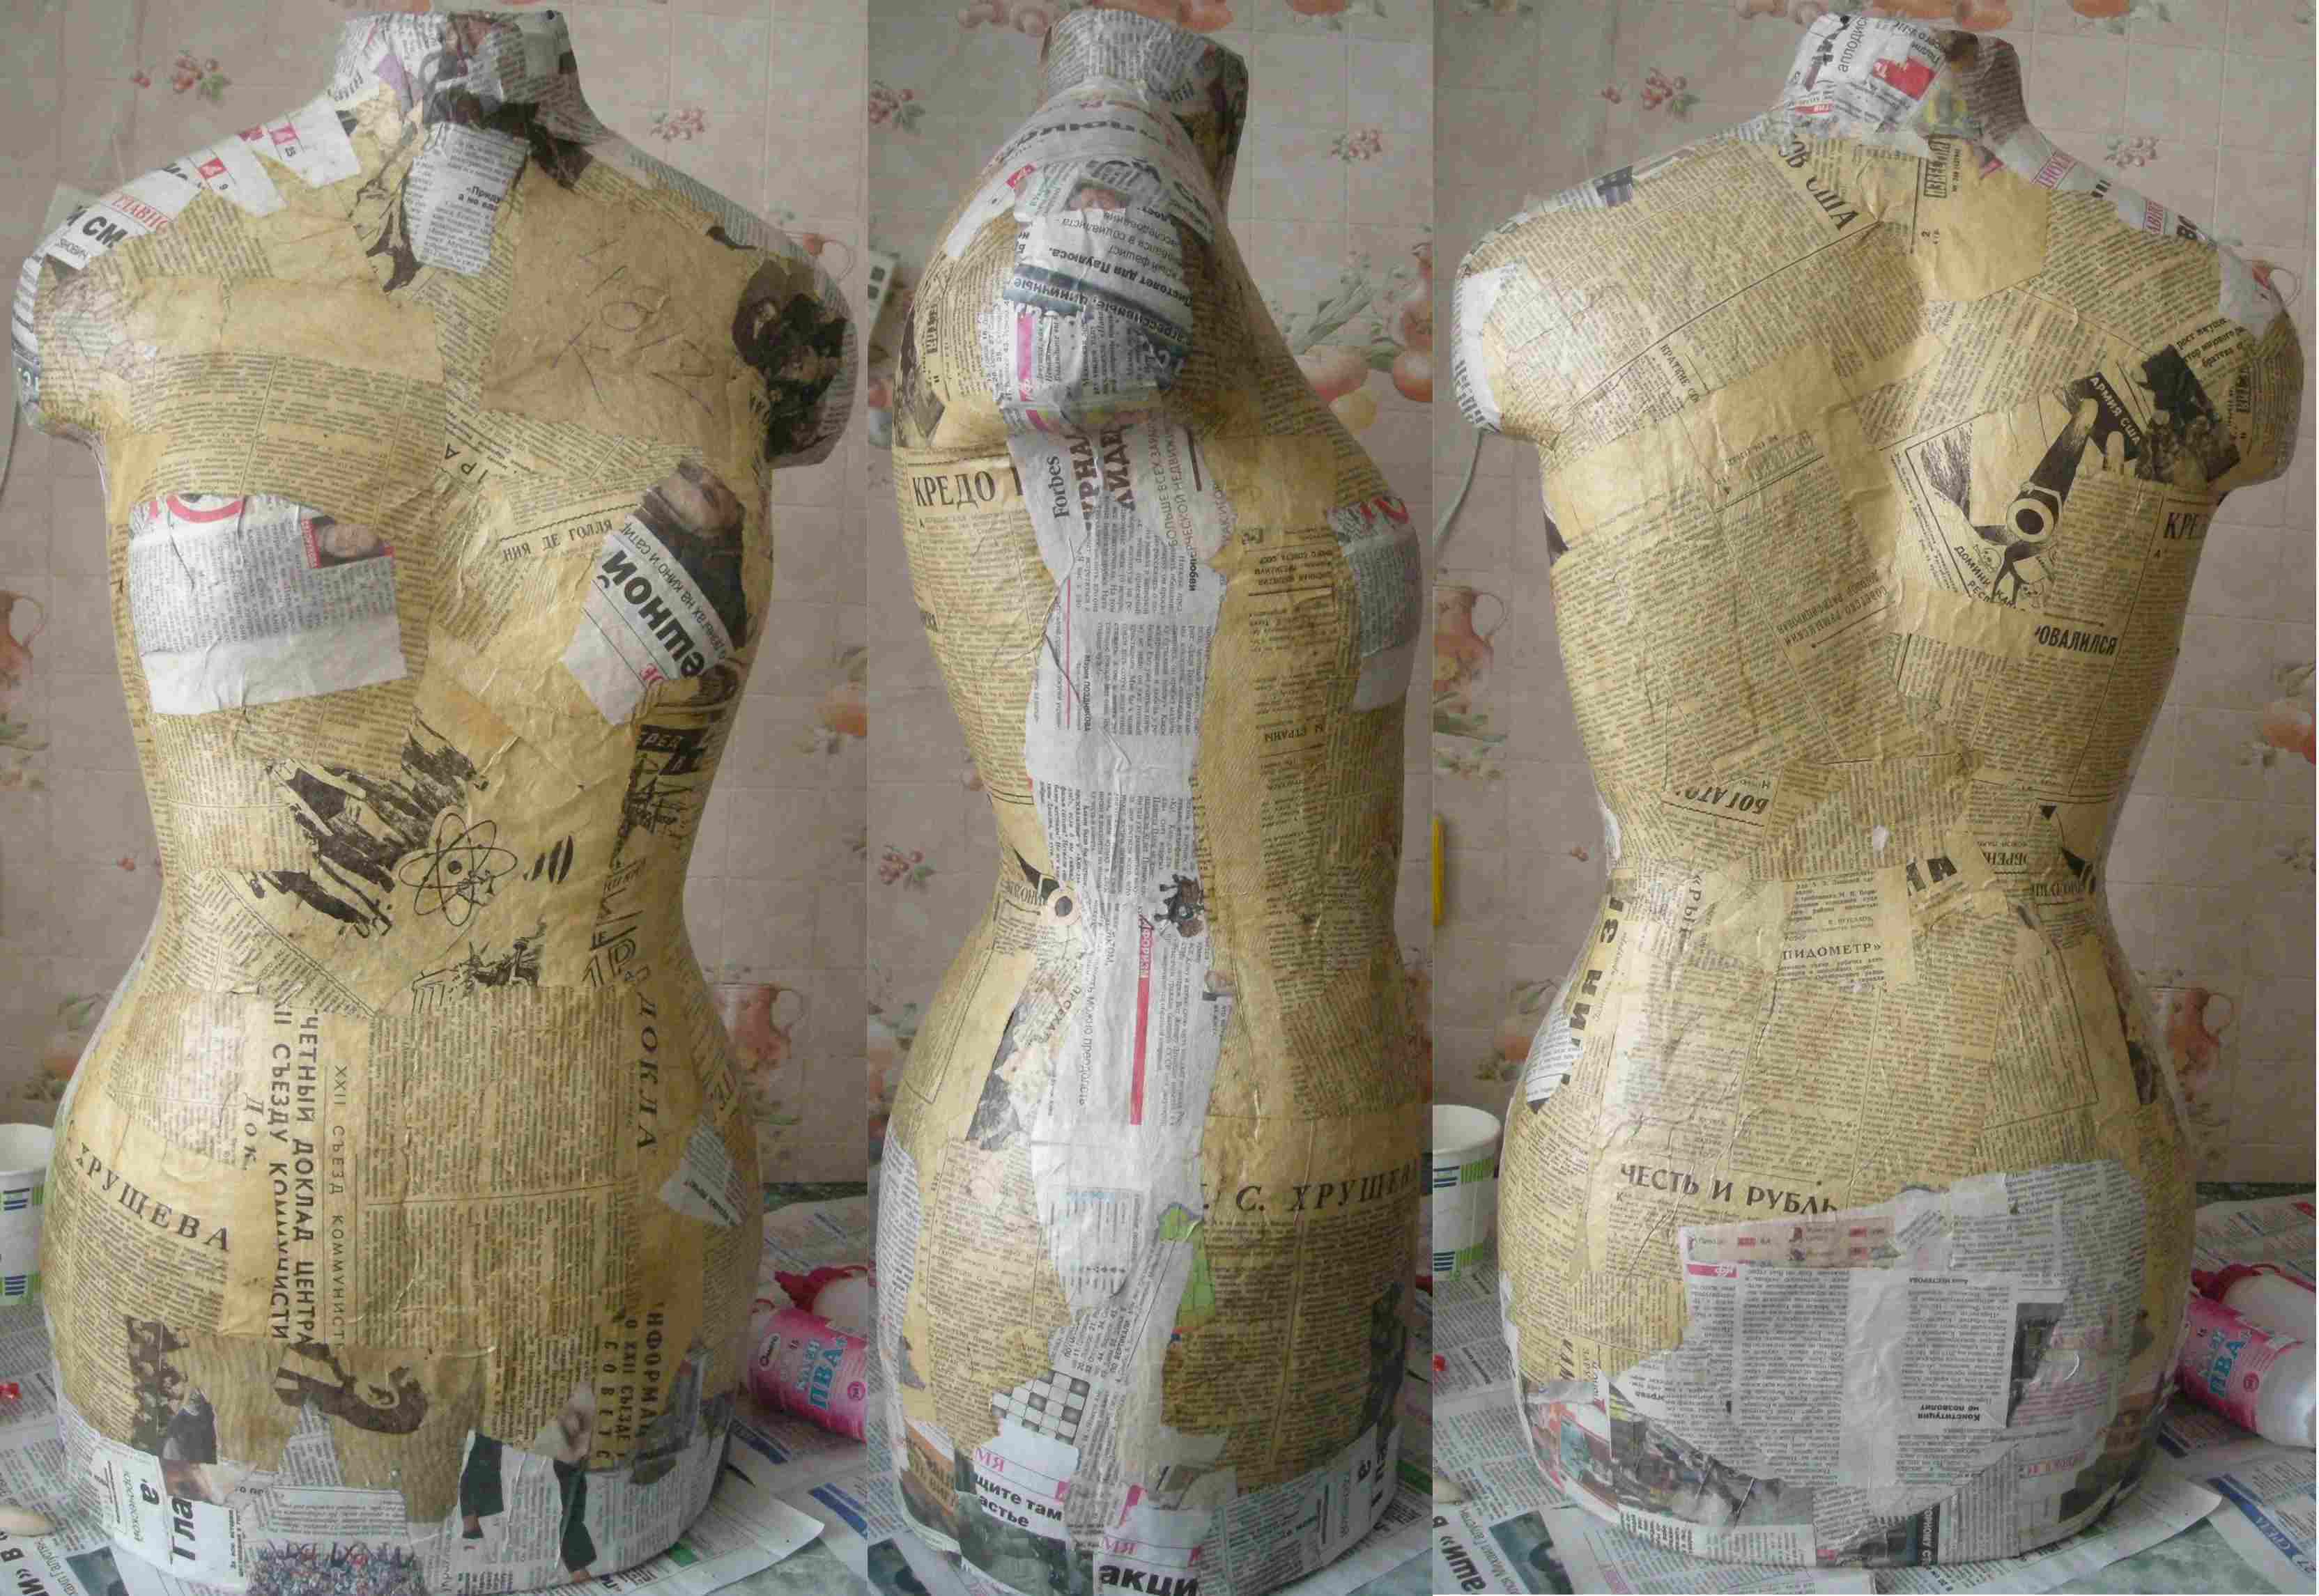 The simplest recipe for its preparation is ordinary newspapers, soaked in water for a few minutes and then mixed with PVA glue. This composition will easily stick to dried polyurethane foam and will allow you to adjust the shapes and lines of the mannequin. The result should be a figure, an example of which is shown in the photo.
Please note that papier-mâché takes time to dry. For example, a thin layer needs 48 hours, while a thicker one may require 4 days.
Once the work with papier-mâché is completed, all that remains is to equip the mannequin with a metal stand and stand, and also dress it up a little. The clothing can be a cover made of batting or other similar material. This is necessary in order to smooth out the roughness characteristic of papier-mâché.
 1
1