 Sneakers squeaking when walking or playing sports is a fairly common occurrence. There are cases of unpleasant sounds appearing after some time of use, but sometimes a new pair, bought just the other day in another country, creaks and there is no opportunity to exchange it. Buying quality sneakers will entail considerable expenses.
Therefore, in order not to run for a new pair, try to use all the methods that are in the arsenal of home craftsmen to correct the situation. Moreover, you are not risking much - you are unlikely to wear shoes that squeak anyway. What to do?
Reasons for squeaking in sneakers
There can be a great variety of them: factory defects in the sizing of parts, uneven treads, dried out glue between the sole and the foot, the sole is slightly deformed or a cavity has formed in it, and many others. With the appearance of extraneous sounds, you need to understand each situation separately:
 to do this, put on both sneakers and walk on different surfaces: laminate, asphalt, soft carpet;
- analyze the sounds you hear to determine the source;
- remove the “sick” shoe and carefully examine the area that is creaking;
- if it is from the outside, then use a flashlight to see everything in detail;
- if it doesn’t work, put the sneaker in water and see where the air comes out from or use a soap solution applied to the surface of the sole. When you press on the problem area, small bubbles will appear on the soap.
Absolutely different parts of shoes can creak:
- tread;
- insole;
- sole;
- the junction of the upper and lower parts;
- tongue;
- eyelets.
Ways to get rid of squeaking
Let's start solving problems with the simplest methods, gradually complicating them. Some solutions lie literally on the surface and are simply forgotten by us, while others require preliminary preparation.
7 ways to “treat” squeaky sneakers
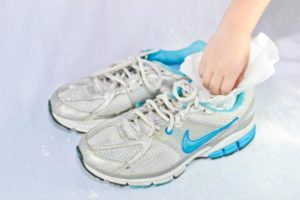
 The tongue makes sounds - lightly soap it and let it dry naturally. The same applies to eyelets and laces. Sometimes simply re-lacing or loosening the fastening helps.
- Wrap the shoes individually in a wet cloth and leave them overnight. Dry with a hairdryer in the morning. It is used only for sneakers made of artificial materials, removing the “musicality” for some time. You can repeat as long as the method works.
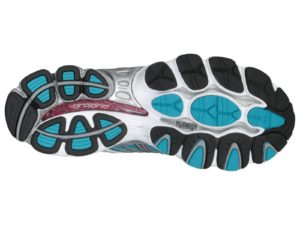
- Fill the friction area of the parts on the sole with WD-40 spray or apply graphite lubricant. This will help for a while, then do these manipulations as needed.
- Swap the insoles if sounds occur in this area. If that doesn't work, place some baby powder between the insole and sole. Be careful not to stain the outside of the pair.
- Treat creaking soles with a stream of warm air.To do this, heat it with a hair dryer for several minutes. Then knead it all over, from toe to heel, with vigorous movements. The softened composition will fill all the resulting voids and the creaking will stop.
- Trim unevenly protruding parts of the tread to the height of adjacent parts with a stationery or other knife, and sand with fine sandpaper. If the sound still remains, apply a paint marker to these parts.
- Pour colorless silicone or polyurethane glue into the resulting cavity of the sole. Aggressive compounds such as superglue or supercement are not used for sneakers to avoid damage.
Important! If the instep support in a shoe is broken or the so-called balloon in branded sneakers has emptied air, it costs nothing to repair. The best solution is to buy a new pair.
Repairing soles with shoe glue
The next method is the most difficult in the selection. You will need pliers, an awl, a 60 ml syringe, polyurethane shoe glue. Let's get started:
 cut the needle, retreating from the base by 1.5-2 cm and fill the syringe with glue with a volume of about 10 ml;
- bending the sneaker in the toe area, we look for the place that needs to be filled with glue;
- in the found voids we use an awl to pierce a hole of a couple of mm, no more, always at an angle of 45 degrees or a little less, but not at a right angle;
- insert a syringe into the puncture site and release the glue;
- If all the voids are not filled through one hole, we pierce them as many as necessary. We fill each one with glue;
- We leave the repaired shoes under pressure for a day.
Important! When using this method, proceed very carefully, use only elastic adhesives for shoes: polyurethane, rubber.
Preventing squeaking in sneakers
 To prevent the occurrence of extraneous sounds, take care of your shoes using the manufacturer’s recommendations, clean them from dirt and dust, inspect the sole and fold points more often;
- do not wear sneakers in bad weather, and if they get wet, dry them well in natural conditions, away from heating devices and direct sunlight;
- For long-term storage, wash them, dry them and fill them with newspapers to maintain their shape.


 to do this, put on both sneakers and walk on different surfaces: laminate, asphalt, soft carpet;
 The tongue makes sounds - lightly soap it and let it dry naturally. The same applies to eyelets and laces. Sometimes simply re-lacing or loosening the fastening helps.
 cut the needle, retreating from the base by 1.5-2 cm and fill the syringe with glue with a volume of about 10 ml;
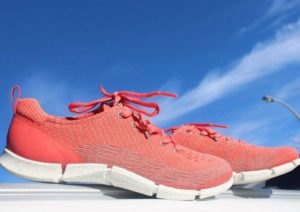 To prevent the occurrence of extraneous sounds, take care of your shoes using the manufacturer’s recommendations, clean them from dirt and dust, inspect the sole and fold points more often;
 0
0