 As fashion experts say, the right shoes are half the battle. Good and high-quality shoes can complement the image and make it memorable, but a bad pair of shoes can completely ruin the impression.
In this case, there is a great way to correct the situation - to lace it up in an original and unusual way. After all It’s the lacing that first catches your eye, as it is located on the upper part of the shoe.
How to make ordinary laces unusual
Having bought shoes, many people leave the option offered by the manufacturer and do not change it for years. You can do it this way too. But today a large number of ideas have been invented that will highlight your style.
There are options that can transform even an inexpensive pair of shoes.
- Experiment with a knot.
- Change laces from black to contrasting or leather (you can choose an option to match the color of your socks, the details of your suit, etc.).
- Shorten the laces (cut with scissors and seal the ends with either glue or thin metal tubes).
- Better instead of regular flat laces use round ones, they look more solid. And fluffy and synthetic ones are suitable for a sporty style.
- Use a different type of lacing on each shoe.
- Change lacing method.
The last method is the most diverse, so let's talk about it in more detail.
Basic methods of lacing shoes
Usually the store sells shoes whose lacing has already been done by the manufacturer. Most often it plays a decorative role. And it is aimed at making men’s and women’s shoes look more advantageous in the window and can be easily worn by the buyer. But such options are not always practical in everyday life.
Traditional methods
Parallel
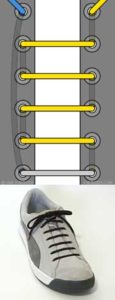
Reference. Suitable for shoes with 3 to 6 holes on each side.
It is the standard of official style, perfect for a formal meeting or business dinner.
- To the front row cord is inserted at the top.
- Then one half is brought out from below into the last hole on the same side and the second part performs a zigzag pattern.
- This figure starts in a hidden way and is threaded one hole higher, then transferred to the second part of the shoe from above into a parallel hole.
With cut knot
In this case he will be hidden between the last and penultimate passage. The lacing itself will resemble the parallel method.
First of all, one part should be left shorter than the second. Then start lacing the long end in a parallel manner all the way to the edge. Wherein both parts must meet inside the boot, then they are tied into a knot.
The main disadvantage is that you will have to put them on like slip-ons without untying them.
Cross option
Crosses visible above the tongue. The lacing goes through the bottom holes and comes out at the top at both ends.
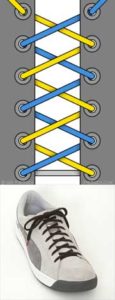
Then they intersect and run from top to bottom. Actions are duplicated to the very edge.
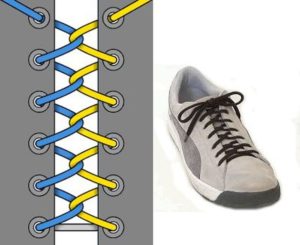
Alternative cross lacing method
It consists in the fact that each part goes along its side, interacting with the second component in the center by intersecting each other.
Classic crosses
Crosses on top
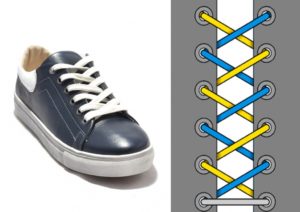
One of the most common methods that has been used since the very beginning of the appearance of laces.
It is distinguished by severity, restraint and does not catch the eye.
Universal, familiar and suitable for any type of shoe.
Diagonal
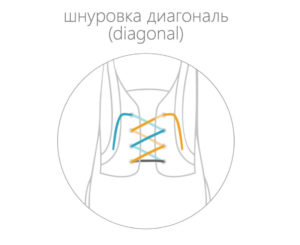
Two options are allowed:
- mirror reflection of each other;
- Same tie on each shoe.
This method looks like “crosses on top”, but if you look closely, you can see the original diagonal pattern.
To repeat this option, it is necessary to alternate the position of the lace, placing it either above or below diagonally.
Cross above and below
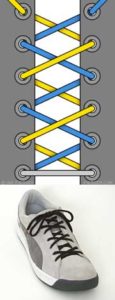
Consists of a sequence of crosses that alternate above and below the tongue.
Looks interesting on classic models (Oxfords, Derbys).
The lace is in the first row, the ends are the same size. Then they intersect and pass into the holes located above. Next, the ends intersect inside the shoe and are brought up. This pattern should be repeated all the way to the top.
Internal (hidden) lacing
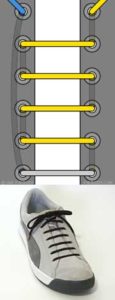
Straight
Consists of parallel lines, giving the shoes lightness.
The downside is that the lacing is difficult to tighten.
It's better to use this method on shoes with 3, 4, 5 holes from each side.
Reverse
It is practiced in the army structures of some European countries.
It is worth tying using the following method.
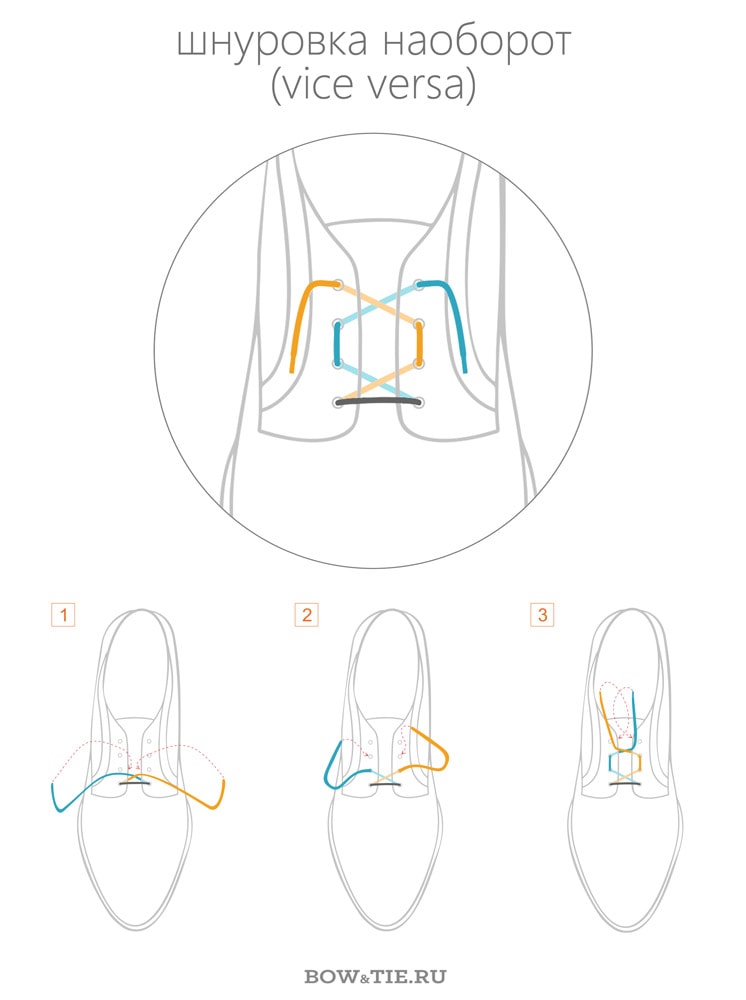
- The first holes are connected in a direct way.
- Next comes the inner cross.
- After this, the holes located on one side are connected.
- You get two lines parallel to each other.
- The composition is completed by an internal cross.
Lightweight
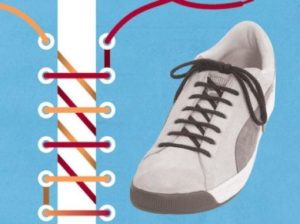
One of the simplest types of lacing.
They should be tucked in such a way that both ends are inside the boot. One part must be brought up through the adjacent hole. And let the second half snake in such a way that all the vertical lines are inside.
This option is suitable for shoes with an even number of holes (4-6).
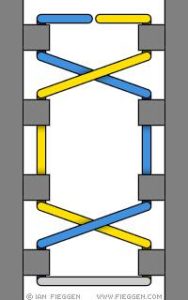
Ladder
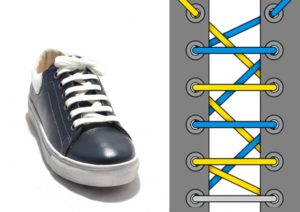
Combines straight and classic lacing.
Tying pattern for men's and women's shoes
- The lace passes through the first row and is brought up on both sides.
- Pull one part out crosswise through the top eyelet.
- The other crosswise, bypassing one hole.
- Continue lacing alternately in one and the second way.
You should get a drawing in which at the top all the laces are tied parallel to each other, and at the bottom a diagonal is visible.
Additional lacing options
Special
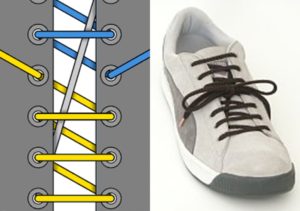
For sports shoes
The lacing is specially designed for active work. In it the knot is not tied at the beginning or end of the shoe, but in the middle.
- The first row is not tied in a standard way, but runs diagonally between the first and last hole.
- The lacing at both ends is done using a zigzag method (first diagonally, then straight).
- Both ends meet in the middle, where a knot without a bow is tied
Bicycle
Used to prevent the knot from getting into the elements of the bicycle when riding. To do this, it is located on the side.

- In the first row, both edges are brought up.
- First you need to deal with one part. It must be put through one hole, but on the same side.
- Pass it inside and bring it out on the other side and again, bypassing one hole, run it.
- The same should be done with the second part of the lace.
Original
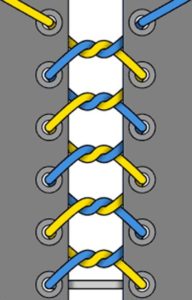
Nodules
- Both edges after the first row are brought to the top.
- Then they are twisted with each other 2-3 times or tied in any interesting way.
- Then the ends diverge in different directions and are brought out again.
This method is not the simplest, but looks impressive and holds tightly.
Lightning
Reference. Mainly used by professional hockey players or figure skaters.
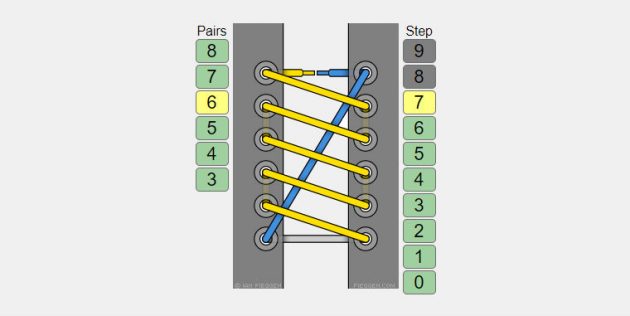
- Insert the laces into the first row.
- Pass one part from the bottom and pull it diagonally into the last hole.
- The second part should be inserted diagonally into the hole next to it.
- Then insert it into the hole that is higher on the same side and send it diagonally to the other side.
Double helix
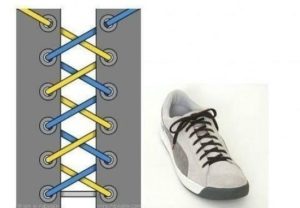
Starting from the bottom, take one part and begin to lace it diagonally to the very edge. First we pass from below, then from above.
The same must be done with the second part.
Such the method is very simple, easy and reduces wear.
Chess
This option bIt will look great if you have two pairs of laces of different colors. You can use standard white and black, or you can approach the issue in a more interesting way.
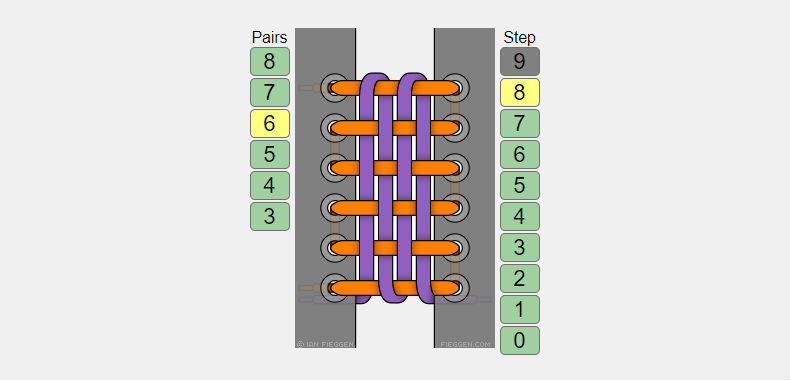
IMPORTANT! You should choose wide laces.
The first row is inserted from the bottom. In this case, one edge should be asymmetrical to the second, since all work will be done only with the second part of the lace.
- It needs to be tied in a parallel way.That is, you should launch it from below and lead it into a hole located on the same side, but higher.
- Send the lace from above into the hole opposite, which is parallel.
- These steps should be done all the way to the edge.
- Next, take a lace of a different color and send the tip to the end of the first lace, they can be tied together and hidden.
- After this, in a chessboard manner, you need to first draw it over the first one, then from below.
- To complete the work, turn around and do these manipulations with all the holes to the end.
Cobweb
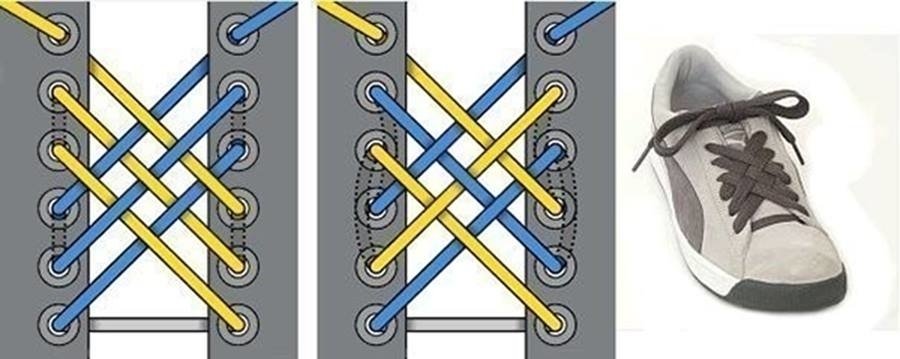
- For this option, you need to put the lace on the first row from the bottom, let the edges out and cross both parts.
- Insert diagonally into the holes, skipping two rows.
- Then pass the lace through the bottom into the adjacent hole on the same row and put it diagonally on the other side.
- For greater beauty, the second part must be placed between the already stretched ropes.
Butterfly
This method looks stylish and original.
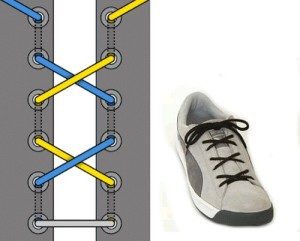
- It is necessary to thread the lace into the first row and bring the ends inward.
- Next, you should thread each end into the grommet located on the same side, only higher.
- Cross the laces over each other.
How to lace shoes with loops
There are many ways to lace shoes with loops in a beautiful and original way. Here are some of them.
Infinity
One part of the lace must be pulled through two loops, which are located one above the other. Go to the second side.
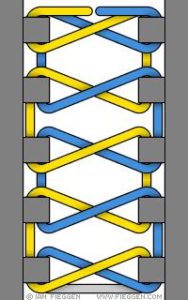
Such actions should be done to the end and with the second part too.
Zigzag
Run one end diagonally to the last loop. And wrap the other end around each loop diagonally.
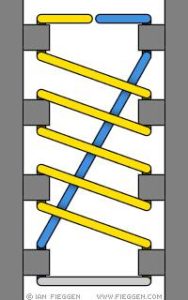
Double reverse
Pass both ends through the loops. Cross over each other and secure on the next row.Next, pass each end on the same side through two loops and cross again.
Now you've learned a lot of new ways to tie your shoes. Some of them look fashionable and unusual, while others serve to solve practical issues. Don't be afraid to experiment!


 1
1


