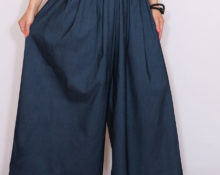
Culottes are cropped trousers that are fitted at the top and flared from the hip. They were invented in the 18th century for women practicing horse riding, since riding in a skirt was not very comfortable, and it was not customary to use men's clothing, i.e., trousers. It was then that this style was invented, which combines the comfort of trousers and the appearance of a skirt.
REFERENCE! In English, culottes mean skirt-pants.

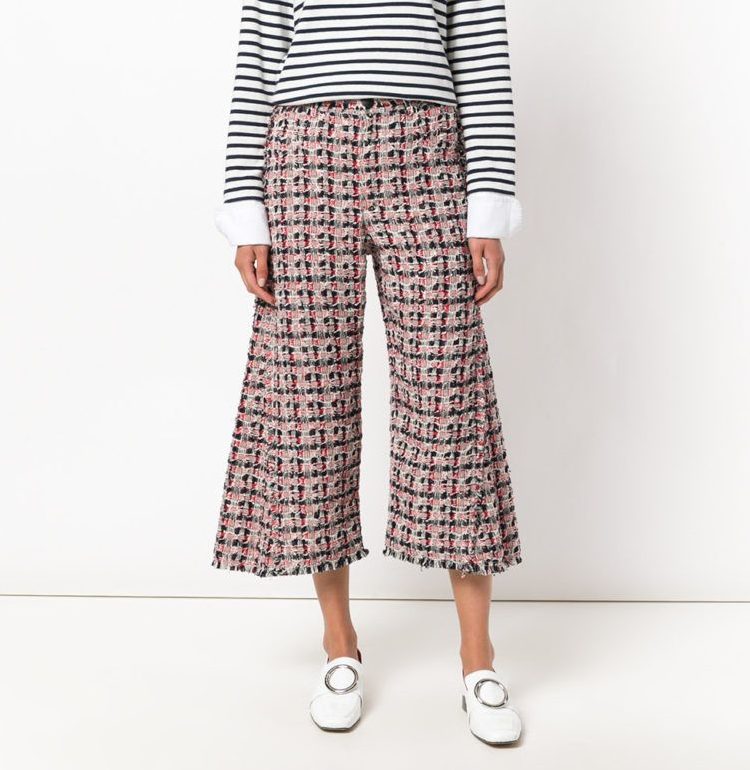
Recently, culottes have received a rebirth. Designers do not skimp on inventions and present the public with a variety of models: classic, sporty, heavily flared, pleated, etc. The length of the trousers ranges from below the knee to above the ankle.
Sewing such trousers is not the most difficult task. Let's try to do this together.
Culottes: cutting and sewing with your own hands
We only need to take a few measurements of the figure.
Let's determine the waist and hip circumference, thigh circumference and seat height, and, of course, the length of our culottes.
Preparatory process
Before sewing the product, we will decide what kind of trousers we want to see on ourselves. If culottes involve draping from numerous folds, then you should choose a light, flowing material. Pants made of thick fabric will keep their shape.
The model we chose is made of dense material and is secured on the side with a secret zipper.
You will also need a standard set of tools:
- sewing machine;
- scissors;
- pins;
- needles for machine and hand sewing;
- sewing machine foot for sewing in a hidden zipper;
- centimeter;
- ruler;
- pencil;
- chalk or soap.
Pattern
There are several ways to create a pattern for such trousers:
- The easiest way is to use a pattern from a sewing magazine, choosing your size from those presented.
- Second option applicable If you have a pattern for a straight skirt, you can use it and slightly model it.
- Third, build a pattern from start to finish “for yourself.”
When choosing from ready-made patterns, you should first of all focus on the waist circumference measurement. If the other dimensions are not entirely accurate for your figure, this can easily be attributed to the loose style of the product.
We will build a culotte pattern based on the straight skirt pattern.
REFERENCE! The seat height measurement is taken while sitting on a chair, with a measuring tape running from the waist line to the horizontal surface of the chair. The hip circumference is measured horizontally, 5 centimeters below the subgluteal fold.
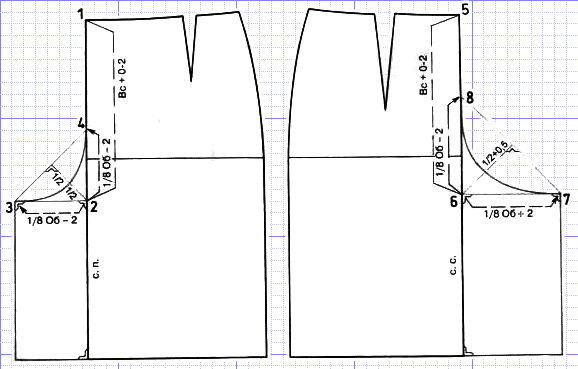
We build a pattern for the front part:
Take the skirt pattern and from point 1 down set the seat height (point 2) + a couple of centimeters. From it to the left and up we put a length equal to 1/8 of the hip circumference minus 2 cm (points 3 and 4, respectively), connect these points. We draw the bisector of the angle formed by segments 3.2 and 2.4.Through the middle of the bisector we build a smooth line, which forms a step cut.
We build a pattern for the back part:
From point 5 downwards we set aside the same length as from point 1 on the front panel (point 6). From it we set aside to the right and upward the length of 1/8 of the hip circumference plus 2 cm (points 7 and 8, respectively), and connect them. We draw a bisector from point 6. We divide it into two equal parts: 1/2 and 1/2+0.5 cm. Through the resulting point we draw a smooth line of the back step cut.
We will make the belt pattern directly on the fabric.
Cutting the material
Since almost all fabrics shrink after washing, Before opening, wash and iron the material thoroughly.
We fold the fabric face to face and attach the details of the front and back parts of the trousers. We pin them for convenience and outline them with chalk. Then we set aside allowances of 2 cm on each side, and 5 cm at the bottom and also outline with chalk. We cut out the parts along the allowance line.
We are creating a belt pattern. The length of the belt is equal to the waist circumference plus 3 cm, and the width is 8 cm.
Sewing
- We process all cuts of parts using an overlocker. If you don't have one, you can use the zigzag stitch on your sewing machine.
- Baste and then grind down the darts. The stitching starts from the top edge, a tack is done at the beginning of the seam, but not at the top of the dart. Iron the darts towards the center.
- We sew up the crotch seams, the middle seam and the side seams, leaving room for the fastener. All seams on trousers are made from top to bottom. To make a middle seam, you need to insert one pant leg into the other, right side inward. We iron the side and step lines completely, the middle one - from the top to the beginning of the curve. Let's try it on. If the trousers fit well, you can sew all these seams on a machine.
Let's move on to processing the belt:
- To give it rigidity, we glue it on the wrong side with doubler tape. Then fold it in half lengthwise, inside out, and iron the fold line.
- We pin one side of the belt to the waistline, face to face. We turn away the edges of the belt. Baste and then machine stitch.
- Iron the allowances down.
- Fold the belt in half, insert it inside and sew in a hidden zipper.
ATTENTION! To sew in a zipper, use a special sewing machine foot.
- We sew the lower inner edge of the waistband by hand to the seam allowance. Let's iron.
- We bend the bottom by 1.5 cm, lay basting ties, bend it another 3 cm, baste, try on. If the length suits you, machine stitch it at a distance of 2 cm from the edge.
The bottom can be processed in other ways:
- Fold the seam allowances inwards and secure with hand held ties.
- Glue the web onto the seam allowances and iron them thoroughly.
We iron the entire product. The culottes are ready.
 0
0