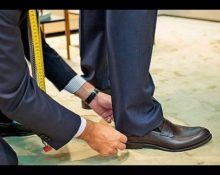
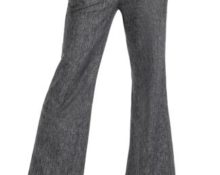
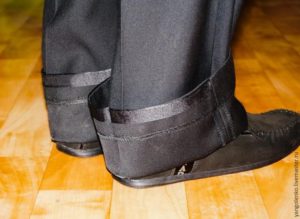
 When buying trousers in a store, very often they turn out to be too big for us. In fact, this problem can easily be solved at home using special adhesive-based tapes or braid. Let's look at how to hem men's (school) or women's trousers with our own hands.
Types of tapes for hemming trousers
There are two types of tapes for processing the bottom of products:
Braid or grosgrain ribbon
Such tapes are especially durable and hold their shape well; they come in different widths and densities. Such trouser, corsage and other ribbons are made from various materials: synthetic and natural.
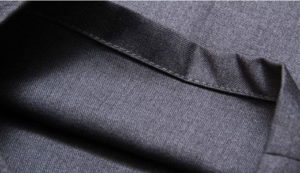 In the old days, trousers were required to be trimmed with braid along the bottom, as it protected the product from wear. Nowadays, you can only find expensive ready-made trousers with padded trouser tape at the bottom. Working with grosgrain ribbon requires the presence of a sewing machine.
Important! Before working with the braid, it must be decated - steamed in a relaxed, free state. This is necessary so that the tape does not shrink after washing.
Spider web tape (with adhesive base)
This tape is a non-woven transparent material and very light. So sticky web tape with a width of 0.5-5 cm can be seen in stores usually in two colors: black and white.
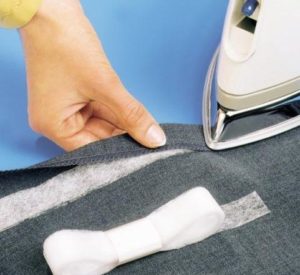
In stores you can find two types of web: regular and paper-based, the second is great for working with knitted fabrics, as it stretches better. To work with hot-melt adhesive tapes, you only need an iron.
Please note that trousers made from expensive fabrics are hemmed only with tape, as adhesive tapes can ruin the material!
Correct fitting of trousers
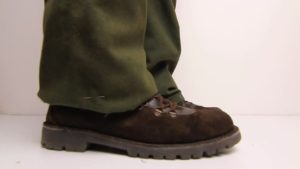 Trying on is a very important operation necessary to eliminate various defects in the fit of the product on the figure. Before trying on, it is advisable to carry out a wet-heat treatment, since many types of fabric shrink after the first wash.
- It is customary to try on trousers with shoes, and if their owner wears a belt, then you should not forget about it.
- The optimal length of men's (school) trousers is to the beginning or middle of the heel, so they will not look too short and at the same time will not drag on the ground. Women's trousers should always end in the middle of the heel.
- If fitting is done without shoes, then the back of the trouser leg should reach the floor. Make sure that the back of the trousers does not form folds, although a slight fold is allowed in the front.
- Another option for choosing the length is by model and depending on fashion. If the trousers are tight, for example skinny type, then they should be made a little shorter so that they do not take on a wrinkled appearance.
- During fitting, the bottom of the trouser leg must be turned outward and the front and back sides should be pinned.
Important! The front half of the trousers is usually 1-1.5 cm shorter than the back half.
Steps to prepare the bottom of the trousers to sew on the tape
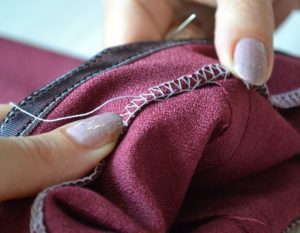 Before you start working on your trousers, they need to be ironed well. Next we perform the following manipulations:
- Turn the pants inside out.
- Fold the trousers in half and place them on a flat surface.
- The hemline is not always the same on factory-made trousers, so you can use the waistline as a guide.
- We pin the trouser legs evenly aligned along the side seams.
- Next, take a ruler and use soap or chalk to draw a line from one pin to another. Along this line we place pins through both legs, turn the product over and draw the resulting line.
- We lay lines along the resulting lines with stitches of approximately 0.5-0.7 cm, since chalk or soap may disappear during steaming of the product and during other operations. Along this line we will iron and fold the trouser legs.
- From the resulting line down it is necessary set aside approximately 4 cm in men's trousers and 3 cm in women's trousers (for an adult, for a child you can leave a larger margin) for the hem and also draw lines. You also need to take into account the fact that the size of the allowance according to the standards is dictated by the model of the trousers: for flared ones the allowance is on average 2.5 cm, and for classic straight ones - up to 4 cm.
- Now you can cut off the excess fabric along the bottom mark.
Important! If the trousers are tapered or flared at the bottom, then the hem allowance should be symmetrical to the shape of the trouser leg, otherwise the bottom of the product will be deformed.
Hemming trousers, differences in working with different tapes
Depending on the type of trousers and fabric, we must use various additional materials. Thus, gossamer is not suitable for materials that require frequent washing, for expensive fabrics, too thick or thin materials, for denim.
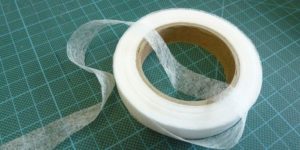
However, if you plan to frequently change the length of the product, then the web will come in handy, since working with it takes little time and is easy to use. Gossamer shows itself well in hemming men's and women's dress trousers, since with this method of shortening the product there is no need to use a manual blind stitch, which is not so easy to handle.
This method will be especially relevant for women who often change the height of their heels and for mothers with small children, because they grow so quickly, and using this method you can easily change the length of your trousers in a matter of minutes!
Advice! This method is perfect for those who do not have an overlocker or sewing machine.
How to shorten trousers using web tape?
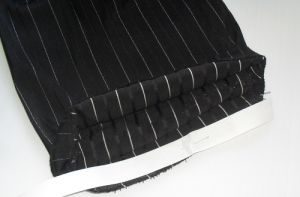 Shorten the bottom line using a web as follows:
- We carry out all preliminary operations.
- We turn the trousers right side out and fold them inward along our previously laid line, pinning the hem with pins.
- Iron the fold of the trousers.
- We take adhesive (sticky) tape twice the length of the trousers from the bottom.
- It is very convenient to work with tape cut into pieces approximately 5 cm in length.
- We place a piece of web inside the fold, the free edge of the fabric must be folded about 0.4 cm inward and pinned with safety pins. Next, iron the resulting hem. This way, the edge of the fabric will not fray or fray, but will look more aesthetically pleasing.
Important! Make sure that the cobwebs do not peek out from the fabric, as when glued it will be difficult to remove.
There is another easy and quick way to shorten pants using paper-based adhesive tape.With this method, the free edge can be overcast by hand, using an overlocker or zigzag, or left unoverlocked:
- We repeat point one of the previous action plan.
- On the wrong side we lay the tape with the adhesive layer down, the width of which should not exceed the width of the hem.
- Iron the tape along the entire length of the trouser leg, let it cool, and then remove the paper.
- Fold and iron on the wrong side.
When using both methods, the front side of the bottom of the trousers will look very nice and neat.
How to hem trousers using braid?
Working with grosgrain ribbon takes longer and is more complex, but during operation this method has proven to be more practical and durable. There are two ways to hem trousers using tape: in a circle or only along the back half of the trouser leg, which is convenient, since trousers wear out mainly only at the back.
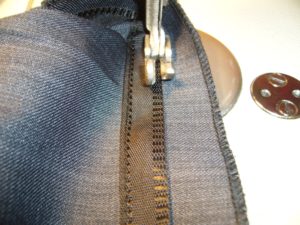
You can find the color of the braid to match your trousers. Black tape in the studio is considered the most universal and is used to hem trousers of different colors, because when everything is done professionally and carefully, it will not be visible.
Let's consider a way how to hem trousers with tape along the back half:
- The preparatory work in this method is the same as in others.
- We widen the side seams in the hem depending on the type of trousers; in straight trousers this value is about 3 mm.
- Decant the tape with steam or soak it in water, the temperature of which should be about 50 degrees, let the water cool, then take out the tape and let it dry. If this is not done, then after the first wash or during wear, the braid may shrink and the trousers at the bottom will have a wavy shape.
- We rip the side seams under the chalk stitch along the width of the tape, this is necessary in order to hide its ends. There is no need to rip the stitching!
- We place the tape with the seal down, hide its edges in the opened seams - side and step, and baste 2 mm above the chalk line. This is necessary so that the trousers last longer and are protected from wear and tear.
- We sew up the step and side seams in the places where they were opened.
- We attach the tape to the edge or 0.1 cm on both sides, not forgetting to put fasteners on each edge.
- Next, we process the bottom edge of the trousers in an accessible way - using an overlocker or manually. Be sure to press the side seams before stitching.
- We pin the hem of the bottom with pins and baste it under the stitching. We check from the front side to see if the fabric is tightened by the stitching.
- We stitch the bottom of the product with a hidden stitch, making sure that the fabric threads do not stretch out from the front side and that no stitches are visible.
- Iron the trousers from the face - everything is ready!
Attention! When performing a blind stitch, it is necessary to capture only 2-3 threads of the main trouser fabric, when the folded part can be sewn through, while the stitches should give a little slack, but not be too loose, otherwise they will be noticeable from the front side.
Hemming men's trousers with grosgrain ribbon
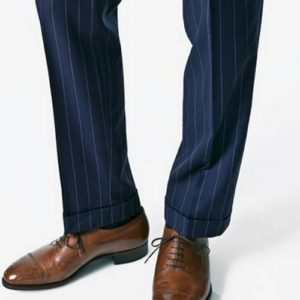
An example of ideal men's trousers
Stages of work:
- We are preparing for hemming.
- We lay the tape to the crotch seam along the front side of the trousers, placing it on the previously laid lines and closing them by 2 mm. We pin it in a circle and start stitching. We sew the braid, as in the previous method, on both sides.
- We sew the free edge.
- We turn the hem inward so that literally 1-2 millimeters of braid peeks out from under the edge of the trousers. This is necessary in order to increase the service life of the product.
- Iron the folded edge. The most convenient way to do this is on an ironing block designed for ironing sleeves.
- We hem the bottom of the product with a hidden stitch and iron it from the face.
Advice! There is also a combined method, for those cases when you don’t have time and simply don’t know how to lay blind stitches evenly. Everything is simple here - take it and glue the hem with hot-melt tape. But such a hem will only last a few washes and will have to be redone.
How to shorten jeans using duct tape
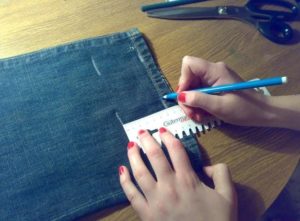 This method can be used to restore frayed bottoms of jeans that otherwise have not lost their appearance. But this method is also good for shortening newly purchased jeans:
- We rip out the old hem and iron it.
- We cut everything exactly along the wear line and mark 5-7 mm upward from this line, draw a straight line with chalk or soap.
- Now you need to bend the jeans along the marked line, pin them with pins and try them on. Jeans usually wear out in this area due to being too long, so everything needs to be on time.
- We choose a durable tape, as well as threads; in stores you can find special ones for working with denim fabrics.
- We sew the tape along the marked line, at the end we bend its edge inward and stitch it - this way the tape will look more aesthetically pleasing and will not irritate the skin.
- Next, we bend the edge of the jeans so that the tape sticks out a little on the outside, literally 1-2 mm, forming a piping, and carry out a wet-heat treatment.
- We lay one more line - a finishing line along the second edge of the tape; first you need to decide on its color.Then we sew 0.1 from the edge of the tape along the wrong side of the leg.
- We do the final ironing and that’s it!
Professional advice from specialists will help you adjust any items according to your height.


 0
0
