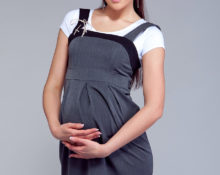
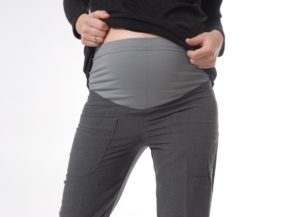
 Are you pregnant and are soon expecting pleasant changes in your life and an addition to your family? Congratulations. What could be more beautiful than this wonderful moment. Many scientists, philosophers and artists say that the most beautiful girl is a pregnant one. Yes, nature works wonders. You, too, can make a miracle for yourself with your own hands. The clothes you wore before no longer fit; they cause discomfort and inconvenience even in the early stages. Therefore, put aside your usual things and change your wardrobe for the next 9 months. In this article we will teach you how to make trousers correctly.
How to sew maternity pants with your own hands
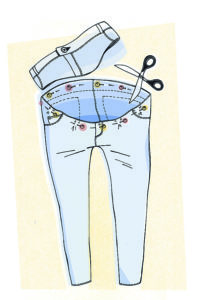 In order to sew these pants you do not need any special skills or knowledge. All you need to do is just follow the instructions and perform all the steps step by step. In general, there are practically no differences from the regular model, the main part will remain unchanged, you will only need to add a special belt for your round tummy.For convenience, you can even take a ready-made pattern, but more on this secret later. To make it you will need:
- fabric for future pants and for a belt;
- needles and threads;
- scissors;
- stationery knife;
- buttons if necessary (usually the belt is made one-piece without fasteners, since they can put pressure on the stomach).
Find out the dimensions, create a pattern for the future product, cut the fabric and sew trousers from the parts. Step-by-step instructions below.
How to correctly take measurements from pregnant women for sewing trousers
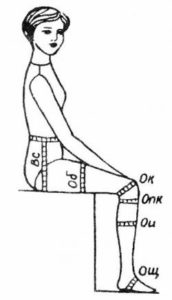 The basic parameters for measurements do not change. The width of the step and the height of the trouser leg remain the same. But the circumference of the waist and hips changes. For correct taking of measurements and further construction of the pattern The following dimensions should be recorded:
- Hip circumference at the level of the lower abdomen in the front, the protruding points of the pelvic bones at the side and at the protruding point of the buttocks at the back.
- It is correct to measure the waist circumference at the most protruding point of the abdomen in front and draw a line back parallel to the ground.
These two main parameters will serve to create a trouser pattern.
Features of maternity trouser patterns
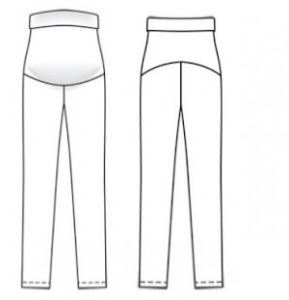 Perhaps the most obvious and main distinguishing feature will be the increase in the size of the abdomen and, accordingly, the additional construction of parts for sewing belt elements. This will be the main element that deserves special attention. Thanks to the modified upper section of the pants, they will fit perfectly at your waist and will not restrict movement.
ATTENTION! The upper part should somehow fit your body, but in no case should it be held there with force, and excessive weakening is unacceptable.
How to draw a maternity trousers pattern correctly: a step-by-step guide
There is nothing complicated in constructing a drawing; you just need to take into account the new features of your figure and strictly follow the resulting dimensions. The main difference in the new pattern from the classic base is the increased waist level. If previously your trousers sat at the level of your protruding pelvic bones, now the height will rise to approximately the lower ribs. It is recommended to use graph paper and a medium-soft pencil to create a pattern.
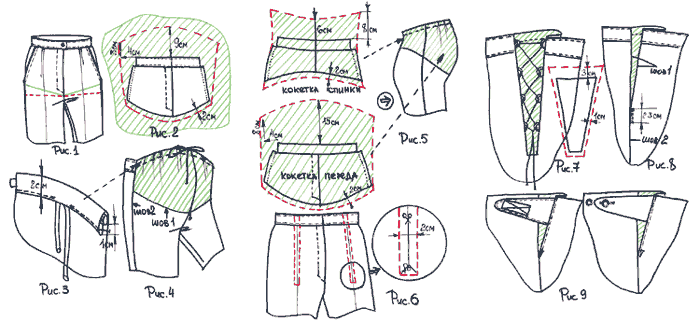
Making a pattern for the front side of maternity trousers
Take the base of your dress pants and do the following:
- Place 4 and 16 cm up and down the sides of the waistline, respectively. The top line can be shifted slightly to the left (1 cm is enough).
- In the middle of the front line, lower yourself 22 cm.
- Extend the waist line by 5 cm.
- From the right corner, set aside 6–9 cm upward (3 cm will be used to tuck the belt).
- Connect the resulting marks with lines.
The front part is ready, now let's move on to the back.
Making a pattern for the back side of maternity trousers
With the rear part everything is much simpler. For this, take a regular pants pattern and extend the back waistline to meet the line of your new belt. The pattern is completely ready. All that remains is to transfer the drawing onto the fabric, cut it, and then sew it into beautiful trousers.
Life hack: how to easily make a pattern for maternity trousers
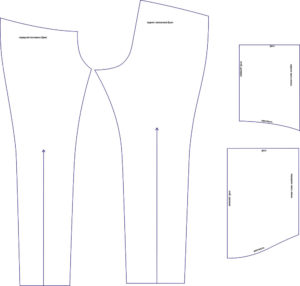 If you don’t have much time and materials to make new trousers, then we offer a more simplified option. To do this, you will need an ordinary classic pattern - the basis of old women's trousers. You will only need to change the waist measurements to fit your tummy perfectly. Step-by-step instructions on how to repurpose old pants:
- Put your pants on, but don't button them up! Simply place the fabric around your entire waist.
- Outline with a pencil the lines of the tummy projected onto the fabric.
- Carefully cut along the marked lines.
- Now make a belt out of body-friendly fabric for your tummy. Sew it to the base of the trousers.
Remodeling in this way will not require much time and material and will save your budget.
IMPORTANT! The fabric of the belt and the pants themselves should not be compressed; this has an adverse effect on the child and mother. Therefore, you should not insert elastic bands into your belt and make them tight.


 0
0


