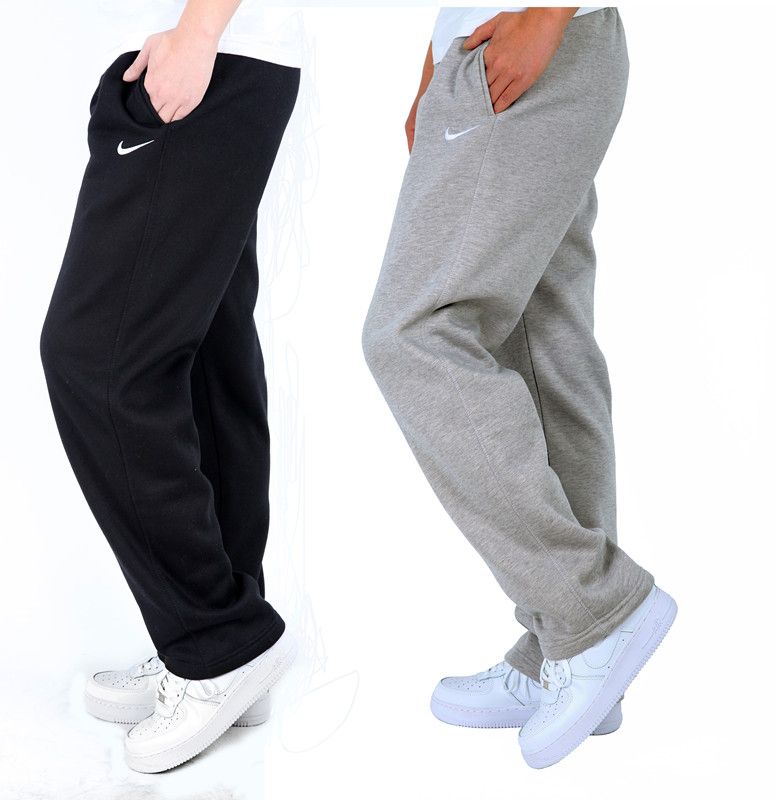
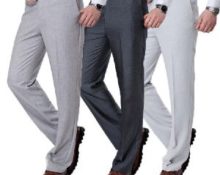
 Sweatpants will always find their place in a man's wardrobe, even if he is far from sports. These pants are used as home wear or for going out into the countryside. Depending on their purpose, trousers are made from different materials. For example, thin knitted ones are suitable for home, fleece-lined ones for jogging in the cold season, and raincoat fabric or other water-repellent material for outdoor activities.
Cutting and sewing men's sports trousers with your own hands step by step
There are many options for these trousers. You can find pants with stripes, with internal or patch pockets, with a zipper or elastic. There are single-layer products or with lining.
Model selection
Let's focus on the simplest option and sew sweatpants with elastic without pockets.
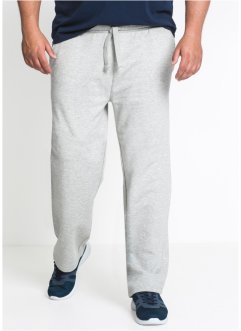 Sewing sweatpants with elastic is very simple. Even a novice seamstress can complete this task.
Materials and tools
We use thick knitted fabric as the main material. You will also need a belt cord and a thin elastic band.
Required tools:
- sewing machine with zigzag or overlock stitch;
- needles for knitted seams;
- pins;
- ruler;
- graph paper;
- tracing paper;
- tape measure;
- pencil;
- chalk.
Step-by-step construction of a pattern
We take several measurements of the figure:
- semi-circumference of the hips;
- length of the trouser leg from waist to floor;
- knee height (from waist to knee level);
- length of the leg along the inner surface;
- width of the bottom of the trouser leg.
We build a pattern for the front part:
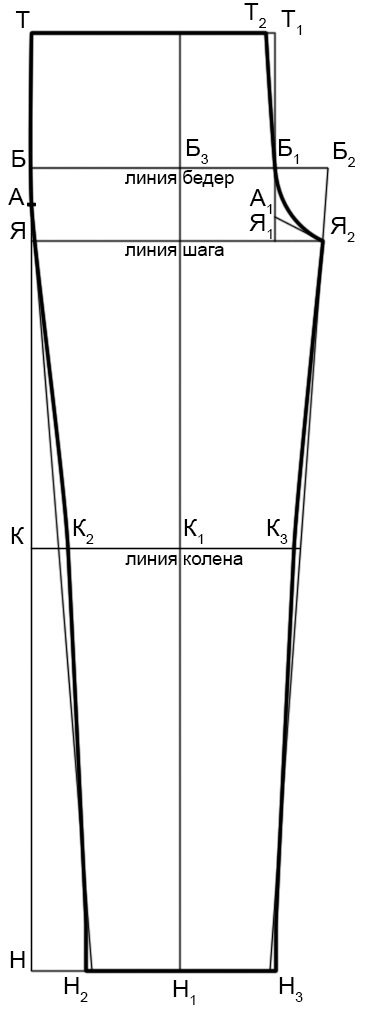
- From the upper left corner we build a vertical line TN. On it, from the waist down, we set aside the height of the knee, put it so. from bottom to top - the length of the trouser leg along the inner surface (I).
- From t. I set aside the line of the hips, put point B. We calculate the distance YB as follows: divide the measure of the half-circumference of the hips by 10 and add 3 cm. We draw horizontal lines through all new points.
- From B we set aside the width of the front of the trousers and set point B1. It is equal to half the hip circumference plus 1.5 cm. Through B1 wire a vertical line up and down, forming a T1 and I1.
- Calculate step width B1B2: divide the half-circumference of the hips by 10 plus 1 cm. Draw the central vertical through B3. B3 = BB2/2. We mark K on it1 and N1.
- From N1 set aside N2 and N3 at the same distance, which is equal to half the width of the lower part of the trouser leg minus half a centimeter.
- From N2 and N3 we put 0.5 cm to the center and from these points upward we draw inclined lines to points A and B2 respectively.
- From the point of intersection of the inclined line with the knee line to the center we set aside 1 cm (K2). From K1 to the right we construct a segment equal to K1TO2, set K3.
- We build the middle line. From T1 set aside 1 cm to the left (T2). From I1 – up half the length of I1I2 (A1). Point A1 connect with I2.
- Connecting T, T2, B1, I2, N3, N2, TO2, I. We draw up the middle line using a pattern.
We build a pattern for the back part:
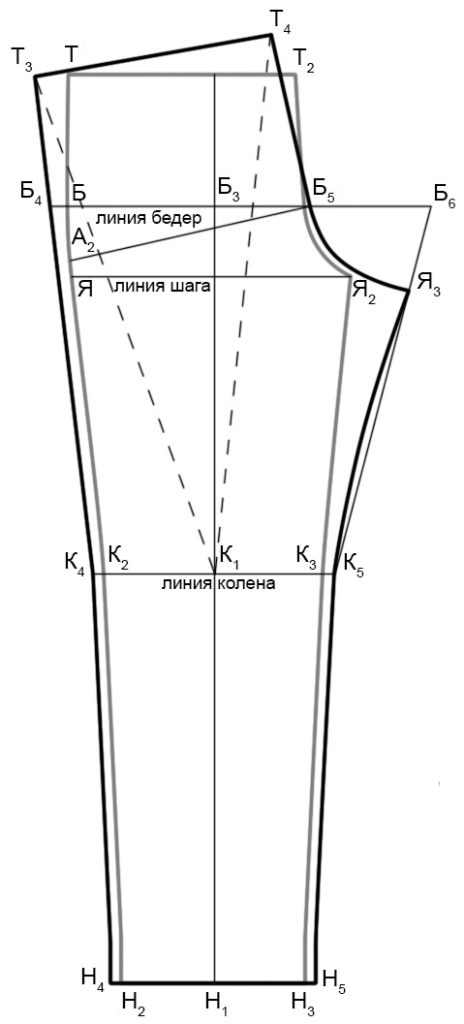
- We construct it based on the front pattern.
- We expand the bottom line by 1 cm on each side. We do the same with the knee line. Putting points K4, TO5, N4, N5.
- Put B4, for this we set aside 2 cm from B.
- We set aside the width of the rear part from B4, put B5. Straight length B4B5 is half the hip circumference plus 4 cm.
- Determine the step width B5B6, it is equal to the measurement of the half-circumference of the hips divided by 5 plus 3 cm. From I upward we put 2 cm (A2). Let's connect segment A2B5 and build from B5 perpendicular to it.
- Draw an auxiliary line K5B6. Putting aside I3, so that K3I2 = K5I3 – 0.5 cm.
- Draw a segment K4B4 and extend it upward. We put point T on it3, so that the distance K2T equaled K4T3.
- Constructing an auxiliary straight line K1T4, so that its length is equal to K1T3 + 1.5 cm, with K1T4 should pass through the middle of segment B3B5. We draw the middle line with a smooth curve.
- Connecting the dots T4, T3, B4, TO4, N4, N5, I5.
We transfer the details of the front and rear parts onto tracing paper. Cut it out.
Cutting the material
ADVICE! To avoid shrinkage of the finished product, it is recommended that before you start cutting the material, you first wash and iron the fabric from the wrong side.
Fold the material right sides inward. We pin the pattern from tracing paper with safety pins, outline it with chalk, add 1.5 cm to the seam allowances on each side and 4 cm to the bottom seam allowances. We cut out the parts taking into account the allowances.
We cut out a belt with a length equal to the waist circumference according to the patterns, 10 cm wide, taking into account allowances.
ATTENTION! When determining the waist circumference using patterns, do not forget to multiply the value for each part by 2.
Sewing steps
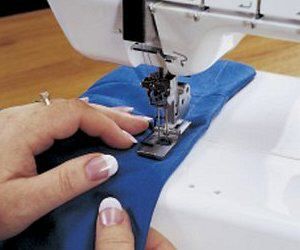
- We process the cuts with an overlock or zigzag stitch.
- We sew up the step, side and middle seams. After this, it is better to try on the product. If the pants fit well and do not pull anywhere, you can sew these seams on a sewing machine using a zigzag stitch with a fine screed width. The middle seam is made by inserting the right pant leg into the left one, face to face. Press the crotch and side seams, press the middle seam until it is rounded.
ATTENTION! When sewing knitted fabrics on a sewing machine, you should use a special needle for knitwear. It has a rounded tip, with which it does not pierce the material, but gently pushes the loops apart, preventing the appearance of hooks and arrows when wearing the product.
- We sew down the belt detail along the short side. Then, fold lengthwise with the wrong sides inward. At a distance of 1.5 cm from the fold, we lay a straight machine stitch along the front side. We make another similar line parallel to the first one at a distance of 1.5 cm from it in the direction of the cut.
REFERENCE! To get perfectly straight stitches, it is better to use a special sewing machine foot with a ruler.
- We connect the belt with the product, applying it to the front side of the trousers with the cut side up. We pin, aligning the back middle seam with the waist seam. We make a basting and sew a zigzag seam with a fine screed width. Iron the seam down.
- On the front of the belt, at an equal distance from the middle seam, we make two identical holes for the lace and elastic. We sew them by hand.Using a regular pin, insert the elastic into the belt, tie it and hide the edges of the elastic in the belt. We thread the decorative cord in the same way, bringing its ends out.
- We try on the pants and determine the hem line. Fold the bottom edge, make a basting line, fold it a second time, make a basting line again. Let's iron. We make a straight machine seam at a distance of approximately 1.5 cm from the edge.
As an additional element, you can make a back patch pocket:
- To do this, we cut out a pocket detail, maybe even from a contrasting fabric.
- We bend all the edges inward. Iron them thoroughly. We stitch the top edge using a machine.
- Pin the pocket to the back of the trousers. Let's baste. We attach on three sides at a distance of 1–2 mm from the edge.
Men's sports trousers are ready.
 0
0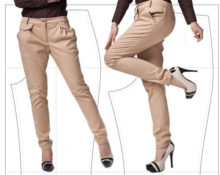


Where did point A come from? We didn’t remove a single centimeter along the front of the leg, so why add to the back? Then there will be a discrepancy in measurements and the pant leg will be wider. Is that so?
Very wide pants(((removed 1 cm in the front and added 2 cm in the back from the bottom.
Where did point A on the front pattern come from? Line K3-T4nu does not pass through the middle of line B3-B5
The pattern doesn't match when constructed, but that's not the worst thing. The main thing is that the shorts obtained from this pattern are large, but at the same time uncomfortable. You can’t step wide and you can’t spread your legs. Apparently this is an ancient concept of building not for an active life. In modern pants, if you simply lay them flat, the legs are spread much wider due to the addition of fabric in the central area. I'll be looking for a pattern like this. It's a shame I wasted good fabric.