For a woman, the ability to knit becomes a very useful life skill. For example, if nowhere in stores is there a sweater, skirt or even coat that fits the size or design, you can always make them yourself using knitting needles and yarn from wool, acrylic or other material.
Recent fashion trends have brought tights with fancy patterns and stockings back to their former popularity. The onset of winter cold is not a reason to give up wearing fashionable things, because thin nylon stockings can be easily replaced with beautiful and at the same time very warm knitted knee socks or stockings.
How to knit stockings: features
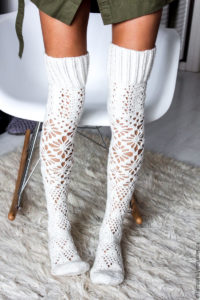
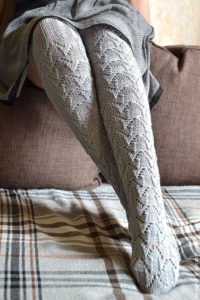
There is a huge variety of golfs and stockings, which allows girls to choose an option that suits a certain style of clothing. Colored or plain, smooth or openwork, tonic or knitted from thick wool, knitted stockings can complement and decorate any look.
Important! Stockings and leggings should not be confused with each other. The second option does not have a lower part, which allows you to wear them over shoes.
Before you start knitting stockings, you need to decide on the size. To do this, find out the diameter of the foot at its widest point (near the toes on the “bones”). The resulting figure is multiplied by the horizontal knitting density (number of loops per 1 cm of finished fabric). Typically the horizontal density is 1.7-1.5. The resulting number (40) will be equal to the number of loops that need to be knitted in the cast-on row.
Often, needlewomen in the process of knitting are faced with problems and questions that baffle them. The most common are:
- Dropped hinges. A hook of the same diameter as the knitting needles inserted into the loop will help prevent undesirable developments. Using a hook, the dropped loop is raised as high as possible in order to knit it out of the broach like an ordinary air loop.
- Uneven rows of stockinette stitch. You can make the front rows straighter by knitting them with a knitting needle that is half the number smaller than the main ones.
- Choosing the wrong tools. The correct size of knitting needles is responsible for the fact that the finished item will be beautiful and wearable. Those who tighten the loops too much during the process need to choose thinner tools, those who are too loose - on the contrary, thick ones.
- The need to introduce a new thread. It is better to do this at the end of the row using a hook.
- Knitting an ornament. If an ornament is to be knitted on a stocking, and it just doesn’t come out, it can be embroidered on a finished product.
Patterns and descriptions of knitting stockings for beginners
Beginners in knitting need to understand that before starting the process, the work needs to be divided into several parts. Based on the image of the finished stocking, its component elements are designated by letters:
- A - called a side, knitted with an elastic band and is the part responsible for ensuring that the stocking does not crawl down the leg. Knitted at least 5cm long.
- B – wide part without reduction, due to which height is created. The size depends on the width of the stocking, which must be multiplied by two.
- B is the part of the length that fits the product to the leg; the number of loops varies from row to row. Everyone loses two loops.
- G – denoted by “neck”, a segment without decrease. Equal to one fourth of "B".
- D – heel. Its size must strictly correspond to the parameters of the leg.
- E – wedge-shaped part;
- F – foot;
- Z – toe.
Parts E, F, Z are knitted according to the size of the foot.
For the first time, you can knit a very ordinary stocking, without patterns or openwork. You need to start working from the top, using 4 knitting needles. The required number of loops is cast on one, which is then evenly distributed among the others.
Section “B” is knitted with knit stitches with a track located at the back.
Part “B” gradually decreases, so two loops of the same row located around the track are knitted together.
Section “G” is knitted with knit stitches, without shortening the rows.
Heel “D” is knitted on two needles, using only half of the total quantity.
Then knit part “E” - the wedge. Loops are picked up on the knitting needles from the edges of the heel and knitted in a circle in two rows. The links are then reduced to make the foot.
The foot is knitted to the length of the leg, maintaining the number of loops.
The toe should taper, which is why one link is removed from each knitting needle.
How to knit stockings: step-by-step instructions
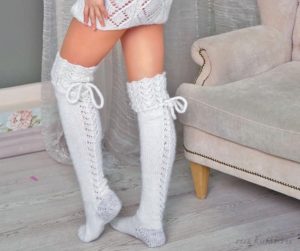
More experienced needlewomen who have mastered the technique of knitting simple smooth patterns should try their hand at making fishnet stockings.Beautiful, decorated with an intricate pattern, they will perfectly complement a romantic image and dilute the hooligan “casual” style.
To work you will need:
- yarn (acrylic, cotton) – 100g;
- knitting needles (No3) – 1 pair;
- stocking needles (No2) – 2 pairs.
Attention! The model is designed for women with foot size 38.
The step-by-step process looks like this:
- Work begins on tools No.3. 64 loops are cast on them and approximately 30 cm of fabric are knitted in a circle with a two-by-two elastic band using any of the openwork patterns you like.
- Knitting is transferred to needles No. 2 and 16 loops are spread on each of them. Thus, the stocking will narrow at the ankle by half. Knit 14 rows in satin stitch.
- Leaving half the loops, continue to knit the front stitch with the first and fourth knitting needles (20 rows).
- In the new row, all loops are divided into three rows: 11, 10 and 11. Center loops are created by slowly decreasing the side loops.
- The rows are completed by knitting the final central stitches together.
- When 10 loops remain on the knitting needle, the heel is finished. The same number of edge loops are cast on it.
- Knitting continues with an openwork pattern on 2 and 3 knitting needles.
- The edge loops are transferred to the knitting needle along the second edge of the heel and the loops are again divided between the four knitting needles.
- On the little finger, the loops are decreased in every second row.
- After 5 decrease stitches remain on the knitting needles, make each row. After several rows, the fabric is closed and the last loops are sewn together with a needle.
When deciding on the color of future knitted stockings, you should take into account that too bright shades can visually shorten your legs. For everyday wear, it is advisable to use more conservative black, burgundy or beige colors.
 0
0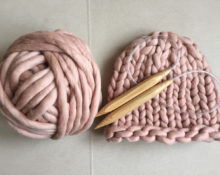

It is knitted very beautifully, but the thing is completely useless.