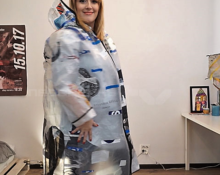
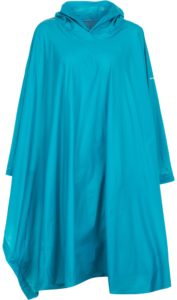
 A raincoat is a convenient and practical item that protects from bad weather. Put in your purse in advance, it will save you from both a small rain and a big downpour. There is no doubt about the demand for this type of clothing, because... it is much more convenient than an umbrella.
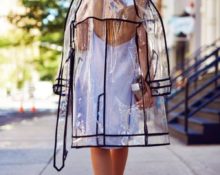
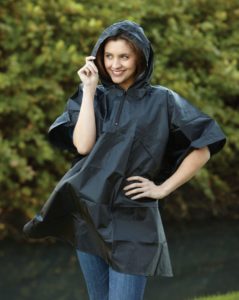
Differences between a raincoat
Unlike other types of clothing, you can sew such an irreplaceable item in five minutes using scrap materials with your own hands. No special patterns are required for this.. Particular attention should be paid to the choice of fabric, as it must be waterproof. In addition, compared to other raincoats, the raincoat is very compact and does not take up much space.
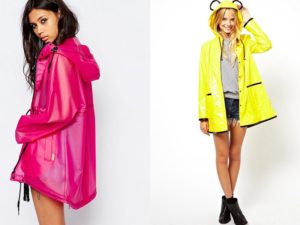
Choice of style and fabric
 To sew a raincoat for a woman, waterproof and water-repellent fabric is used. It can be bought both in specialized construction departments and in sewing stores. It is necessary to check with the seller the level of moisture protection and breathability of the fabric.
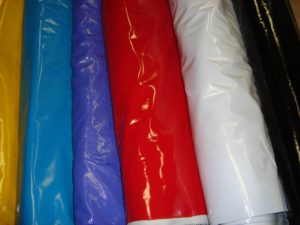
Such fabrics are used to make sportswear or travel accessories such as tents, awnings or special suits. Since this wardrobe item is not designed for constant wear, it is better to resort to cheaper materials, such as lavsan or ordinary polyethylene fabric.
A raincoat of average size requires about 2 meters of material.
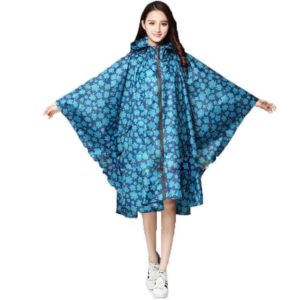
Important! There are two styles of raincoats. This is a raincoat made from two squares or a semicircular raincoat. Raincoats can be different in length and width. It all depends on personal preference.
 Wide raincoats are convenient, under which you can hide a bag or backpack. For sewing, you may need a zipper and other accessories. Many craftsmen have learned to sew raincoats from thick, comfortable bags from IKEA.
Taking measurements
You can sew a waterproof raincoat yourself, following the tips and recommendations of experienced craftsmen. An important measure is the length of the product, which is chosen depending on height and personal preferences. You can take a measuring tape and use it to measure the length of other types of outerwear and choose the best one. Usually they prefer to make long raincoats in order to protect the body as much as possible from moisture.
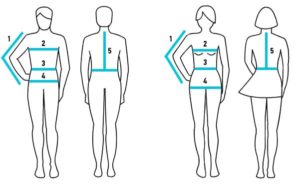 For example, a semicircular raincoat will require 2 lengths. You need to add about 20 cm to the recess for the neck and processing the bottom of the product. Also, if necessary, you need measure arm length and neck circumference. In more complex models, hip and chest girth may also be required. Here we look at the simplest, quick options. Loose raincoats without patterns can be sewn for the whole family.
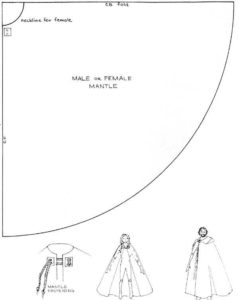
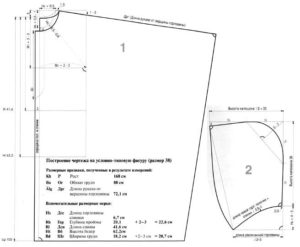
Raincoat pattern
In order to get started, you need to prepare the necessary materials: a piece of special fabric, chalk or soap, a measuring tape, a large ruler, scissors, a needle and thread and other accessories. First you need to draw a pattern. Even a person who is far from design can draw it.

Raincoat without pattern
A rectangle 180 cm long and 150 cm wide can be drawn directly on the fabric. It needs to be cut out, folded in four layers and the required shape drawn by eye. Then, connecting two points along a rounded line, cut out a hole for the neck and sleeve. The shelf is cut in half.
Raincoat pattern 2
Attention! To create a hood pattern, cut out two squares with sides of 40 centimeters each. You can carry out constructions on paper or oilcloth. You can even connect the pattern with tape and try it on. If you don’t like something during the fitting process, it is better to make changes immediately before sewing the main parts.
Raincoat pattern 3
You can make a raincoat like a cape. The fabric is folded diagonally and a semicircle is built on it. Its radius should be equal to the length of the arm. Then the neckline is cut out and a cut is made in the front.
Raincoat pattern 4
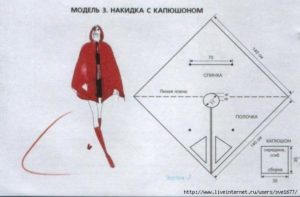
Raincoat pattern 4
Hood pattern
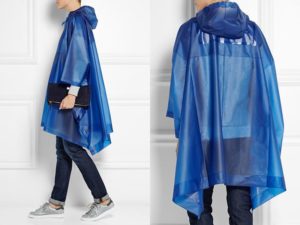
The hood is cut out on a separate piece from the remaining material. The advantage of a raincoat in the form of a stole is obvious. This option is suitable for those who do not have a sewing machine. This product is made without seams, and the craftsman does not have to worry about connecting them.
If you want to create something unusual or designer, then it is always better to use ready-made patterns. It's also quite easy to trace around an existing rain cover and make a new one the same.
 There is a way to do raincoat strictly tailored to your figure. To do this, take your favorite long-sleeved sweater. Next, place it on a sheet of paper folded in half and outline the edges in the shape of a semicircle with a margin. From the resulting edge to the end of the sleeve there should be approximately 10 cm on each side. From the bottom of the sweater to the edge of the paper, the required margin should be at least 20 cm, depending on the desired length of the product.
 In the part where there was a neckline on the blouse, we draw a notch for the neck. We measure the recesses for the arms strictly along the sleeve. We place it on the edge of the paper and, at the location of the shoulder, begin to cut off a round hole slightly larger than the neck. Then we cut the paper from the neck to the base on one side only. Cut out one sleeve from the rectangle. The hood can also be outlined according to an existing item.
Stages of work
 The sewing process proceeds in the following sequence:
- Connecting the side seams of the resulting parts using a sewing machine or by hand. Before stitching, the parts can be pinned together. For greater strength, they are reinforced with bias tape.
- Sewing on the hood. To do this, you need to attach it to the neck. The length of the neckline should match the length of the bottom edge of the hood. It is recommended to immediately hem the front edge of the hood by folding the fabric inside out twice.
- Processing with bias tape on sleeves, hem, edges and hood. This is done both for beauty and to give strength to the product. You can simply fold the edge and sew it on a machine. In quick-fix products, processing may not be carried out at all.
- Selection of material and manufacturing technology for fasteners, if they are. These can be ties, buttons, Velcro or snaps. It all depends on the personal preferences of the master.To ensure that the fastener stays on the polyethylene, it is recommended to place a transparent button under it.
- Decoration of the product. The raincoat can be decorated with rhinestones, appliqué, or interesting designs can be painted with indelible paint.
Reference! There are a large number of hood styles. For example, it can be on a stand or removable. Buttons, zippers or Velcro are used as fasteners. The upper cut is decorated with a drawstring or decorative elements.
You can sew a raincoat yourself very quickly. The main thing is to choose a good waterproof fabric and choose the right length of the product. With a little imagination, a raincoat can become not only useful, but also an elegant wardrobe item.
 0
0