Every woman wants to have beautiful and original things in her wardrobe. The modern textile industry often offers us time-tested but standard clothing options. In order not to get lost among others, fashionistas resort to searching for truly non-standard solutions in clothing.
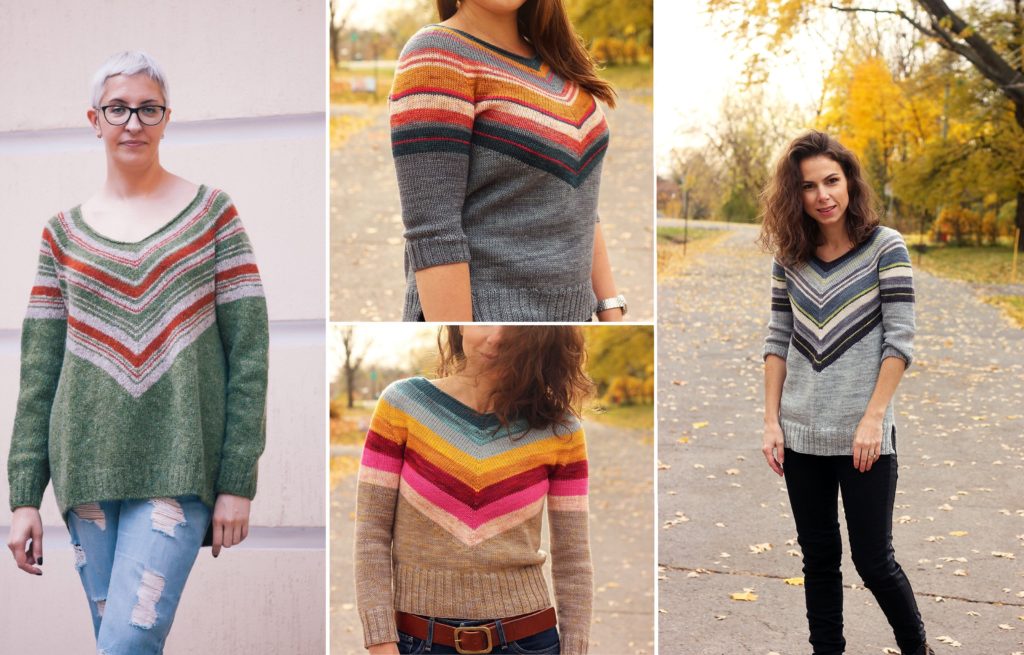
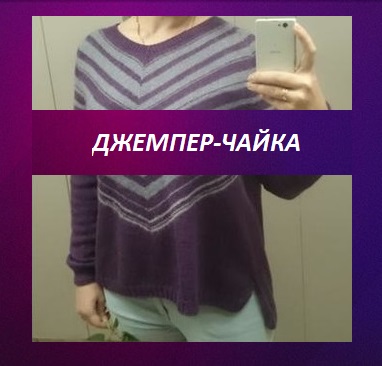
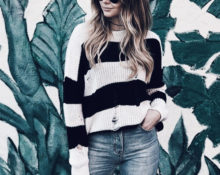
One of these options can easily include a sweater with a round “seagull” yoke. This version of the jumper is also called “Camaro”. The yoke in such a sweater can be knitted either with bright contrasting threads or with calmer combinations of yarn. The sleeve of the jumper can also be of absolutely any length.
We knit a seagull jumper with knitting needles ourselves
Agree that such a model simply attracts the eye and makes its owner stand out in grayish autumn everyday life. This sweater is often knitted from wool blend or wool yarn., but you can use any options you like. What’s especially nice about this model is the ability to use leftover yarn for contrasting v-shaped lines.
Attention! For contrasting color lines in such models, it is better to choose the same type of yarn. If you prefer a monochrome design for a jumper, it is better to use soft and fluffy yarn for the main part, while for the second color you can choose silk or cotton with the addition of lurex or sequins.
Model selection
Let's look at knitting this jumper using the example of a fairly simple option with a combination of only two colors.
What is interesting about this model is the alternation of contrasting stripes of different thicknesses.
Advice! Effective alternation of stripes can be achieved using calculations in a special program - a stripe generator, which can be found on the Internet or among smartphone applications.
The product is knitted from top to bottom in the round, it is seamless and very impressive.
Materials and tools
For knitting we will need:
- Woolen or wool blend yarn with a skein weight of 50g and a length of 250 m.
- Circular knitting needles No. 2.75.
- Markers.
- 2 additional knitting needles for sleeves.
Knitting density 8 cm*8 cm = 22p.*28r.
Patterns used: stockinette stitch and elastic in 1*1 format.
Knitting process (patterns and description)
- On circular knitting needles we cast on the first row of loops with a length of 66 cm (180 sts + 1 st according to calculations using the knitted pattern, rounding the calculation result to a multiple of ten). This amount may vary depending on your preferences, ranging from the length of your head circumference.
- We knit one front row and mark with markers the loops around which the loops will be added (see diagram 1).
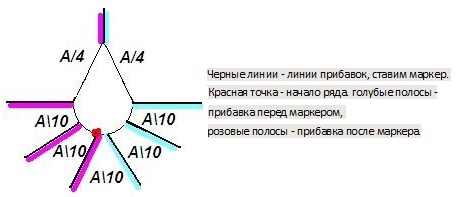
Scheme 1 – Installation of markers on the neck of the product
When determining the length of the yoke for a classic fit, we suggest you use the table:
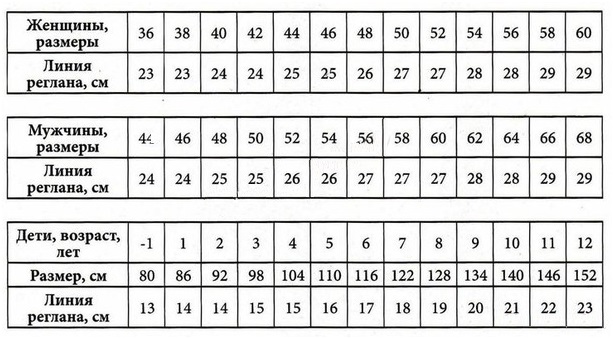
Table with raglan line lengths
If you want to knit a jumper with a low armhole line, the length of the raglan lines in such a product will be longer.
Let's take as an example 32 cm (112 rubles), after knitting which, on the knitting needles The total number of loops should be as follows:
(chest girth (OG) + loose-fitting loops (LO) + 2*(biceps girth + loops on LO) – 4* (raglan undercut loops).
For this example, consider the following values:
- OG – 105 cm.
- SB along the body – 20 cm.
- FR of sleeve – 5 cm.
- Undercuts – 10p.
Having carried out the necessary calculations, we get 496p.
According to scheme 1, 8 stitches will be added in each row. To calculate the number of rows with increases, subtract the initially cast on stitches (180 stitches) from the last number of stitches on the knitting needles (496 stitches) and divide the result by the number of increases in the row (8). We will receive 40 rubles, which we will evenly distribute along the length of the raglan (112 rubles): 10*8p. in each 2r. and then 30*8p. in each 3r.
Rows of contrasting colors in this raglan pattern with a round yoke are knitted according to pattern 2.
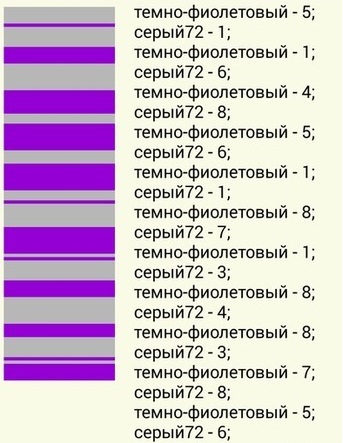
Scheme 2 – distribution of multi-colored rows
Advice! To make it easier to count knitted rows, you can use special applications for your smartphone or PC. In such programs you can also download descriptions and diagrams necessary for work, which is a good help in the knitting process.
- So, we knit 112r, making the required number of increases and changing threads to knit strips of different colors. Then the loops for the sleeves are cast, the armhole is added and the body is closed. Next, the fabric is knitted in the main color.
- On the knitting needles at this point 40*8p.+180p. = 500p. Of these, 164p. – on the back and front, 96 stitches each (10 stitches undercut + 86 stitches on the body) – on the sleeves. We knit from the back to the first green marker 100p.(we remove the marker), knit 34p. 86p. for the sleeve we remove it for extra. knitting needle + cast on 10 sts. for cutting. Then knit 164p. front (we leave the marker here), transfer the loops for the second sleeve to additional. knitting needle + undercut, knit 34 sts. backrests
- We knit 7 rows of stockinette stitch. We use the “boomerang” method to knit shortened rows when aligning the product front and back, since the neckline of the sweater is v-shaped, and the front will be longer than the back. First we knit the back, after that - loops above the undercuts + 3p. We turn the product to the wrong side: the first stitch is “boomerang”, then we knit from the wrong side to the opposite undercut line + 3 stitches. Then the procedure is repeated from the front side, now a row is knitted up to the first “boomerang”, which is knitted behind two walls. Another 3 stitches are knitted. Next, the procedure is repeated until all the loops are picked up.
- After this alignment, we knit the required length of the product. We also knit sleeves of the required length, making even decreases in the sleeves according to the calculations (96 stitches - loops around the circumference of the wrist).
- The bottom of the product and sleeves can be knitted with an elastic band. You can also process the neck using this method.
Thus, with a little patience and perseverance, you can add an extraordinary and spectacular item to your wardrobe.
 6
6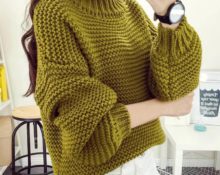


Thank you, I found this description from you, oddly enough ☺
Can you add extras if you make a false fastener in the center of the front?