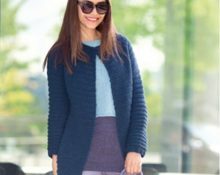
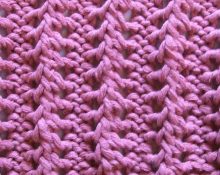
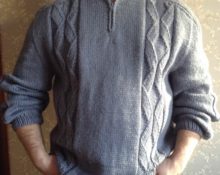
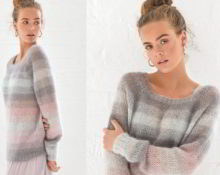
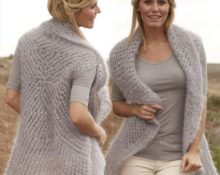
A jumper is a knitted sweater that does not have a collar. This is such a convenient and familiar thing that it’s even difficult to imagine a woman’s wardrobe without it. They come in a variety of styles and knitting methods. The jumper can be easily knitted either with knitting needles or using a crochet hook.

We knit a jumper with our own hands
Today we have unlimited access to knitting patterns with a detailed description of the entire process. Moreover, an experienced craftswoman will determine by eye how to knit this or that item.
Almost any model can be repeated with your own hands; Even a very thin thread has its own knitting needles or hook. There are also special knitting machines for creating knitted items at home. The only obstacle to creating the perfect sweater can be a lack of experience, but this circumstance is temporary and fixable.
Model selection
If you do not yet have sufficient skills to knit complex patterns and styles, ohmake your choice on models with one decorative element (rapport) or without it at all. Please note that braids and other patterns look more advantageous with plain yarn.
You can add some flair to a simple product by using several threads of different colors to create stripes or a pattern. For the most inexperienced craftswomen, we can recommend using melange threads. Stripes with them will turn out by themselves, because different colors alternate in the skein with a certain interval.
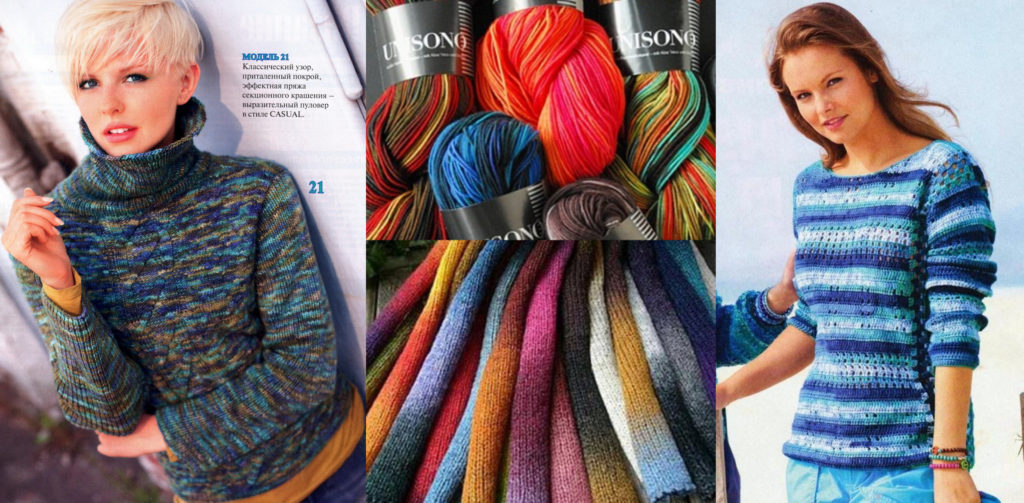
As for the cut of the product itself, one thing can be said: the simpler the better.. For those who are taking their first steps in knitting, it is better to give preference to jumpers with set-in sleeves, like on a regular T-shirt or shirt. Slightly more experienced knitters can master the raglan pattern.
Selection of material and tools
Choose threads and tools depending on the jumper model you are interested in. Usually, the description of the item gives recommendations on using yarn, knitting needles or a crochet hook to achieve the effect that you see in the photo next to the knitting pattern. For beginners, it is best to follow these guidelines. Later, you yourself will understand how to get a tighter or looser knitting, how fabric made from wool or cotton thread will lie, and much more.
The product can be knitted from yarn:
- cotton (100% and with the addition of artificial material);
- woolen;
- half-wool;
- synthetic (acrylic).
There is even yarn made from reclaimed cotton, which will be of great interest to sustainability advocates.
Some elements can be obtained using both knitting needles and crochet. For example, with any tool you can get a stockinette stitch or some airy motifs.But often only knitting needles or only a crochet hook are used to make certain patterns.
The following types of knitting needles are used:
- straight;
- circular;
- stockings
The main fabric is knitted on straight or circular knitting needles; the choice here depends on the convenience for each needlewoman. Stocking knitting needles are used for circular knitting of individual elements of small diameter; for other work on areas closed in a circle, circular knitting needles are used.
Knitting a women's jumper from mohair
Mohair is a thin, warm yarn made from the fluff of Angora goats. Products made from such threads are light and very soft, and the special structure of the thread allows you to wear mohair products both in winter and in warmer seasons, since mohair wicks excess moisture away from the body well.
Reference! Such incredibly soft and fluffy wool appeared in Turkey, namely in its Angora province. In this regard, mohair (yarn made from the fluff of Angora goats) is often called angora. This material is elastic, durable, fire-resistant, and also does not wrinkle. For this reason, angora is rightfully considered a high quality fiber. Due to the structure of goat wool, you will not find 100% mohair on store shelves. Sheep wool fibers or synthetic fibers are always added to yarn.
Especially for beginner needlewomen, we have chosen a very simple model of a mohair jumper with a set-in sleeve.
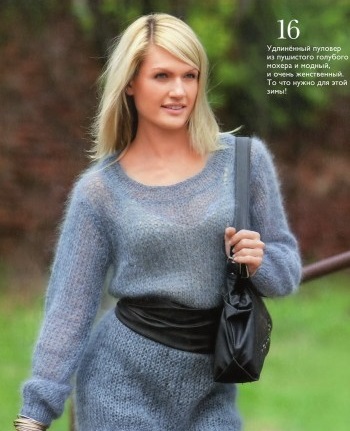
The main fabric is knitted in it with thick needles No. 9, so even such an expensive yarn will need a little - 150 g for size 38/40. For this model, it is recommended to take threads containing 80% mohair and 20% polyamide. One such skein weighs 25 g, and the length of the thread is 245 m.
For work we will need straight knitting needles of the following sizes:
- number 6;
- number 9.
Knitting stages
First of all, let's calculate the loops for knitting a jumper. To do this we knit:
Rubber: one front loop (LR), then one purl loop (IP). Repeat until the end of the row in this order. This is a 1*1 scheme, you should not choose the English one.
Facial surface, as usual, in the front rows (P) the LP is knitted, in the purl rows - the IP.
On knitting needles No. 9, a fragment of fabric measuring 10 cm * 10 cm should be obtained from 9 loops and 12 rows. Take measurements of your volumes and calculate the number of loops you need to cast on the first row. It is more important not to make a mistake with the set of first loops, since the “height” of the product can be adjusted much easier.
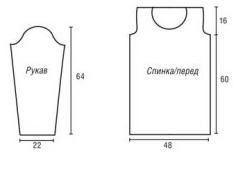
Mohair jumper pattern
Advice! When calculating the loops that will be needed to knit a sweater of your size, experienced knitters advise knitting a larger fragment than is accepted according to the standard (for example, 15 cm * 15 cm). Then the error when counting loops and rows will be smaller.
Back
We knit an elastic band 6 cm long, casting on 60 stitches. knitting needles No. 6. Then, switching to needles No. 9, we knit in stockinette stitch. In the first row of stockinette stitch you need to evenly decrease 12 stitches. across the entire width of the product. Having knitted 60 cm from the beginning of the product, we close the armhole on both sides with 2 stitches. Then, in every second row, decrease 2 loops on both sides of the back (from the right edge of the knitting - after knitting the first two loops, from the left edge - before the last two loops). We close the remaining loops after 76 cm from the start of work.
Before
It is knitted in the same way as the back, only after 64 cm from the start of knitting the middle 16 stitches are closed. for a neckline. We will finish the two resulting parts separately.To do this, it is very convenient to use a special knitting pin, on which loops that are unnecessary in the work are removed.
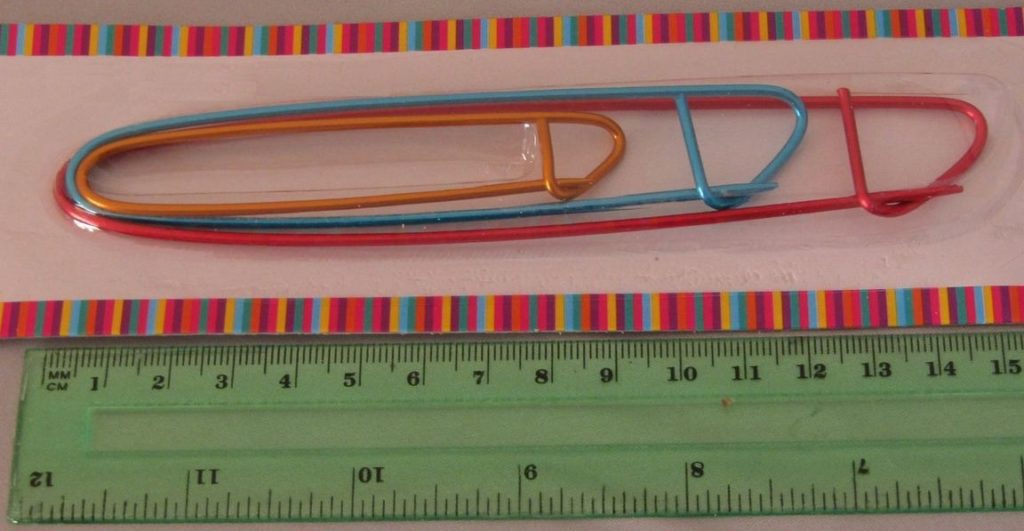
Knitting pins
On each resulting side from the center, in every second row we decrease first 2p., then 2*1p. After knitting 76 cm from the beginning of knitting, we close off the shoulder loops that remain after decreasing.
Sleeves
We knit 6 cm of elastic with knitting needles number 6, casting on 31 stitches. Using size 9 needles in stockinette stitch we will knit the rest of the sleeve. After 16 cm from the cast-on edge in 2 stitches. add 4*1p to the edge on each side. in every 12th row. To roll back the sleeves, knitting 54 cm from the beginning of knitting, close 2 loops on both sides. Then in every second row we decrease 3 times by 1 stitch. in the same way as they did it before: retreating 2 loops from each edge of the product. Having knitted 64 cm of sleeve length, we complete the part by closing all the loops.
Product assembly
We make one of the shoulder seams, then on knitting needles number 9 we cast on 65 stitches along the neckline and knit 4 stitches. LP. We close the loops, sew the second shoulder seam, the seam of the neck strap, as well as the side seams and sleeve seams, and sew in the sleeve.
The mohair product is ready!
We knit a jumper with a youthful “braid” design
There is very an attractive knitting element called “braids”. This pattern is quite voluminous; it is knitted with knit stitches by transferring a certain number of them during work or before work onto an additional knitting needle, followed by knitting the postponed loops. Braids are quite popular and are used in various elements of knitted clothing.
Advice! An additional knitting needle can be replaced by many available tools. For example, you can use an ordinary hairpin for this purpose.
For our article we chose a jumper with cables and Celtic decorative patterns. Also in this model, beginning needlewomen can master the pearl pattern.
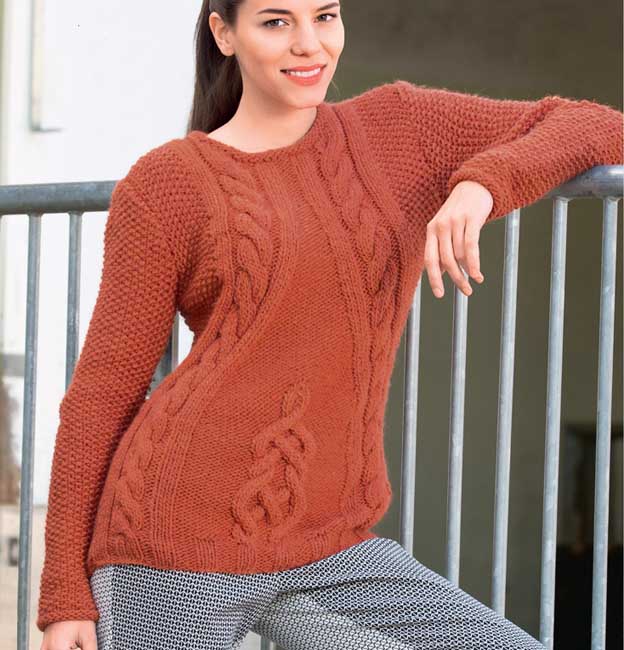
For size 38/40 you must have:
- straight knitting needles Nos. 6 and 7;
- circular knitting needles No. 6;
- half-woolen yarn (75% wool and 25% acrylic), skein weight 50g per 85m, we need 500g of yarn, i.e. 10 skeins.
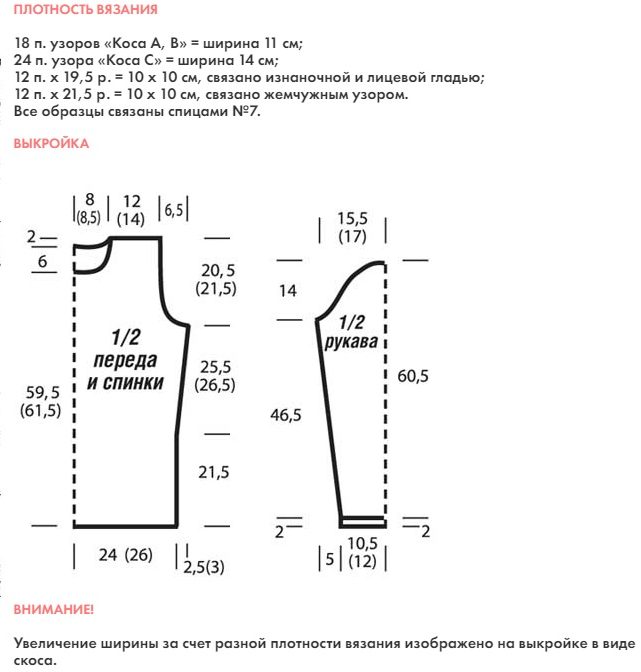
Knitting density and jumper pattern
Knitting stages
Front and back stitch knitted, as usual, according to the pattern.
Pearl pattern. Alternate 1 LP and 1IP, shifting the loops by one in each front row. Thus, the IP will be above the LP and vice versa.
Plank contains 5 rows: 3 rows connected by IP and 2 rows by LP.
Patterns
Braid 1.
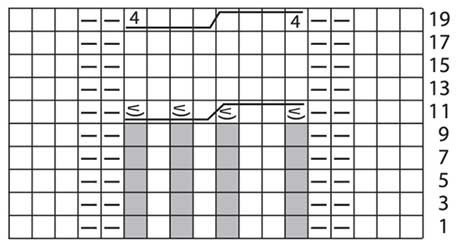
Scheme 1
The braid is knitted according to pattern 1, and the number of loops in the pattern at the base will be less (14 stitches) than it will be after the 11th row (18 stitches). According to tradition, the diagrams show the front rows; the pattern should be repeated on the reverse side of the knitting. In Braid 1, the range of rows 1–20 is knitted once, then the pattern is repeated from 13 to 20 for the entire length of the product.
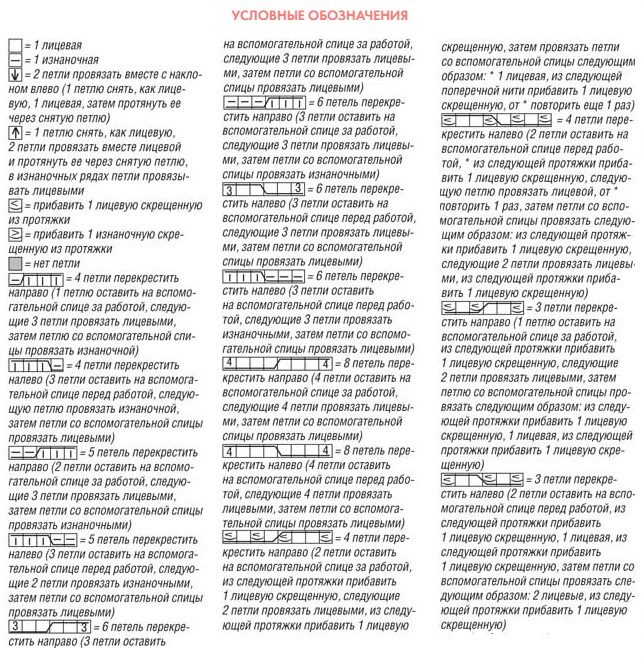 Symbols for diagrams
Scythe 2.
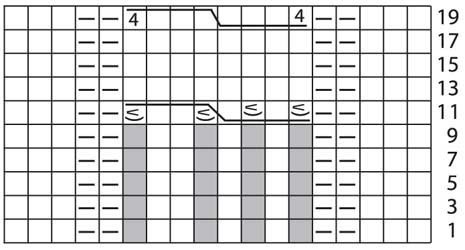
Scheme 2
The technique for making this pattern is similar to that described above, but taking into account the differences in pattern 2.
Spit 3 (located in the center of the front of the product).
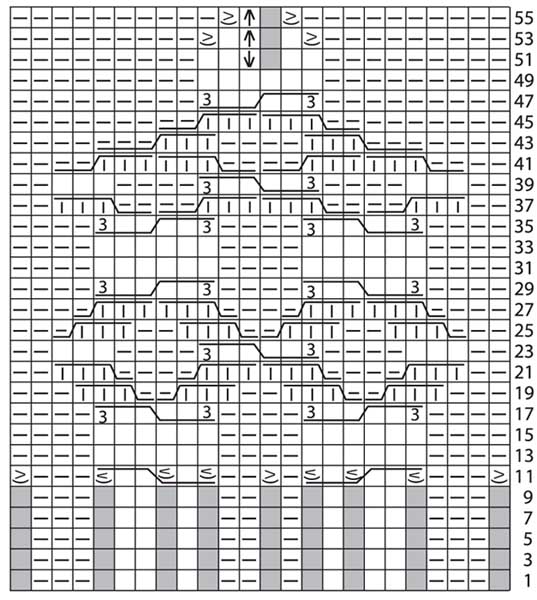
Scheme 3
We knit a braid according to pattern 3, from the 11th row the number of loops increases from 15 to 24, and from the 51st row it decreases to 23.
The pattern is performed 1 time, ending with stitch stitch from IP.
Back
On knitting needles number 6 we cast on 57 sts. We knit according to the pattern: 1 edge loop (KP) + 14p. “Scythe 1” + 3 IP + 3 LP + 15p. “Scythe 3” + 3 LP + 3 IP + 14p. “Scythe 2” + 1 CP. For large jumper sizes, PIs are added after and before the CP.
After 5 cm (10 rubles) from the start of knitting, we change the knitting needles to thicker ones (No. 7). Between the patterns we knit IP. For a larger jumper, a pearl pattern is knitted after the edge stitches. After 11 p.m. on the needles there will be 74 stitches.
On the 43rd row (21.5 cm from the beginning of knitting), the shifting of the “Braid 1” and “Braid 2” patterns towards the center begins. We achieve this by adding and subtracting loops before and before the braids. Namely:
– before “Scythe 1” add 1 LP;
– after “Braid 2” we add 1 crossed IP.
Next the pearl pattern is knitted.
In the same row, after “Braid 1” and before “Braid 2”, we combine 2 stitches, knitting them IP. Please note that the total number of loops does not change!
The operations described above are repeated in order:
- in every fourth row (3 times);
- every second (4 times);
- 1 time in the next fourth row;
- 1 time in the next second;
- in every fourth row (3 times);
- in every sixth (2 times);
- once in the next eighth row.
Taking into account the decreases in the Braid 3 pattern described above, 73 stitches will remain on the knitting needles.
On the 92nd row (47 cm) from the beginning we close symmetrically in 3 stitches. for armholes, after, in every second row and once 2p. and 1p. Then 2 times 1 p. in every fourth row. As a result, 57p should remain.
We close 19p. in the middle of knitting at a height of 65.5 cm (128 rubles) from the beginning of knitting, we finish both sides separately from each other.
In the next second row we close 3p. to round the edge inside the neck. Repeat for the other side.
After 132 rows (67.5 cm) from the beginning of knitting, we close off the 16 stitches that remained on the knitting needles.
Before
Knitted similarly to the part described above. The only difference is a deeper neck, which is achieved by closing the middle 9p. at a height of 59.5 cm (116 rubles), and then through the front row 1*3p., 1*2p., 3*1p.
Advice! If you want to speed up knitting this pattern, you can knit the back with a pearl pattern, and the front, as given above in the description.
Sleeves
The main fabric of the sleeve is knitted on needles No. 7 using a pearl pattern.But before that, we cast on 25 stitches on thinner needles of size 6. and knit 5p. (2 cm) with the “Plank” pattern. We start with a number of individual entrepreneurs.
From the bar in every 14th row we add 6*1p. up to a total of 37p.
After knitting 100r. (46.5 cm) from the bar we close symmetrically 1 p., then in every second row 3 * 1 p., in every fourth 3 * 1 p., in every second - 3 * 1 p. and 2*2p.
After 130 rub. (60.5 cm) from the bar we complete the knitting, closing the last 9 stitches.
Product assembly
Sew the back and front along the shoulders.
On circular knitting needles to complete the plank, we cast on 55 stitches from the resulting neckline and knit 3 stitches. IP in a circle. Close with knit stitches.
Sew in the sleeves and complete the remaining seams.
A spectacular and warm jumper is ready! Wear it for your health!


 0
0