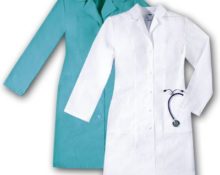
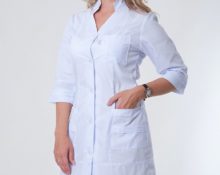
 A white medical coat is clothing that will not hurt in every home.
First of all, doctors need it. They even have to have several of these items in their wardrobe. After all, a neat appearance is an indispensable condition for a professional image.
People who are not involved in medical practice will also find this product useful. When visiting sick relatives or caring for them in a medical institution, you cannot do without such clothing.
Nowadays, finding a white robe on sale is not a problem. But choosing clothes that exactly fit your figure, providing comfort and convenience, is more difficult.
However, purchasing is not the only way to purchase a medical gown. You can sew it yourself.
We'll tell you how to make such clothes with your own hands.
What you need for work
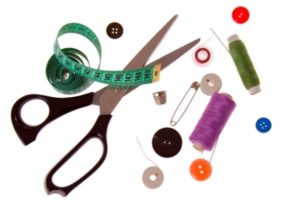
Before you start work, you need to prepare everything you need.
Materials and tools
For sewing you will need to prepare the following.
- Pattern paper.
- Stationery: pencil, ruler, triangle, eraser.
- Sewing supplies: thread, needles, pins, centimeter.
- Sewing machine.
- Fabric: natural materials (linen, calico) or mixed fabrics on a natural basis..
What measurements are needed
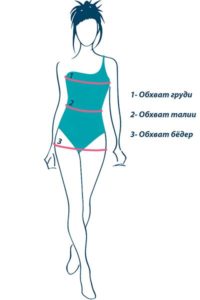
An important point in the preparatory stage is taking measurements. After all, the result of all the work will depend on them.
To sew a medical gown, you will need the following data.
- Circumferences: neck, chest, waist, hips, arms.
- Length: arms (with a bend at the elbow), as well as the entire product (along the back and side).
Constructing a pattern
The next step is to build a drawing.
How to make a medical gown pattern
Let's look in detail at how to make a pattern for women's and men's medical gowns.
We suggest doing the work based on the basic pattern of medical gowns. This model has a straight, loose fit. It is suitable for sewing products for both men and women.
Advice: Men's and women's versions differ in the clasp. For men, the loops are located on the left shelf, for women - on the right.
The pattern consists of the following parts, which are presented in one picture.
Back and shelves
The back is the left side in the drawing, which is shown in the photo. You will need 1 piece, which is cut out on the fabric with a fold so as not to make an additional connecting seam.
The shelf is the right side of the drawing. You need 1 paper blank, according to which the right and left parts of the front are cut out.
We offer drawing of a product whose length is 120 cm along the back.
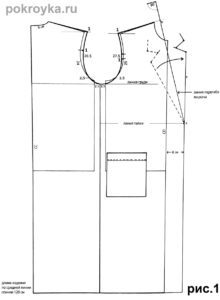
To model to your own size, you must first transfer a life-size drawing onto paper. After this, check the pattern for compliance with your measurements (half girths) in length, as well as the chest, hips and waist lines. Make appropriate changes if necessary.
Sleeve
In addition to the shelves and back, a sleeve pattern is required. We We offer a pattern with a small rim height.
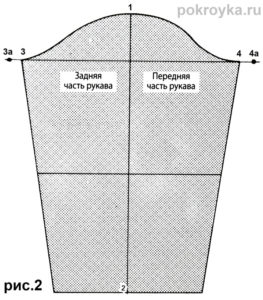
If desired, the sleeve can be made looser.
Collar
The final element of the pattern is the collar. The main part of it is cut out according to this drawing.
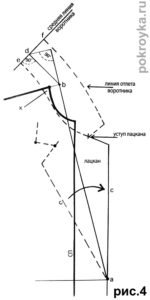
For the middle part you will need one more piece.
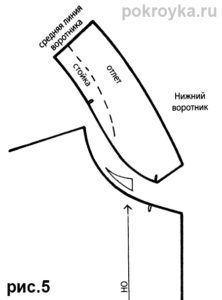
Now the pattern is ready. It can be supplemented with another element - a patch pocket.
How to make a pattern for a medical gown for a child

Not only adults may need a medical gown. Often you have to look for a children's option that is necessary for kindergarten, for the child to perform at a holiday or matinee. A white children's robe is also easier to sew yourself.
We offer a pattern with which you can sew a good Doctor Aibolit costume for your child.
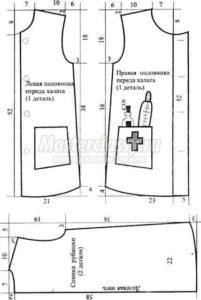
To complete the look, the baby will need a medical cap (cap). Her pattern is presented here.
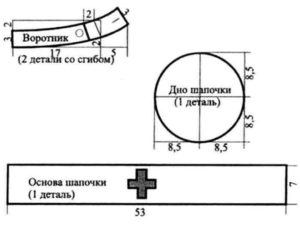
Advice: You can use a white shirt as a blank for a baby robe. If you cut out pieces of clothing from it, the shelves will already have ready-made strips with loops and buttons.
Sewing a medical gown

After drawing up the pattern, you can begin making the robe.
Regardless of whether you sew an adult or a children's model, the work is performed in a certain order.
Step-by-step instruction
- Transfer pattern details to fabric.
Important! Do not forget to add 1.5-2 cm to the paper base on each side for seam allowances.
- Cut all elements of the robe.
- Start assembling the product by connecting the shelves to the back: side and then shoulder seam.First, hand basting is done, then machine stitching. Each seam is processed and ironed.
- Sew up the sleeves.
- Sew them into the armhole.
- Add a middle section to the collar lapels.
- Fold the collar in half and attach it to the front and backe.
- Depending on who the robe is being sewn for, make loops on the right or left shelf.
- Along the bottom cut perform hem.
- If desired, add a pocket to the robe.
Your medical gown is ready.


 0
0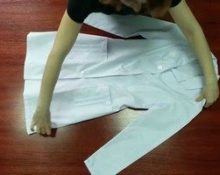



Hello, I need a medical gown, 44-46,48-50,52-54