 After general cleaning, there are a lot of things left that fall into the “I won’t wear it, but it’s a pity to throw it away” category.
Don't rush to get rid of these, because they can be given a second chance. After all, they can become material for various useful things.
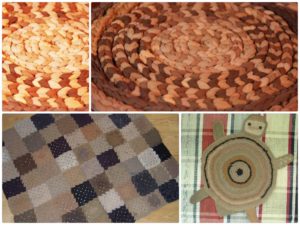
For example, nylon tights are perfect for a handmade rug, which is easy to wash and dry quickly.
It will fit perfectly into country style, so it will serve faithfully in the bathroom or on the country veranda. You can also use it as a doormat.
You've probably come across photos or videos of such practical things on the Internet. We will tell you how to make a rug from old things with your own hands.
Well, shall we try?
How to make a rug from tights
To make a nice thing from old nylon tights, you need not only to pay attention to the material, the technique of doing the work is also important.
The rug can be:
- to tie;
- sew;
- weave
Important!
Before you start work, be sure to wash your clothes. It will be more pleasant to work with clean tights, and the finished rug will look aesthetically pleasing.
Let's look at the instructions step by step. Our tips and tricks will help you choose your technique and create your masterpiece.
How to crochet a rug
One knitted rug requires about 10 pieces of tights.
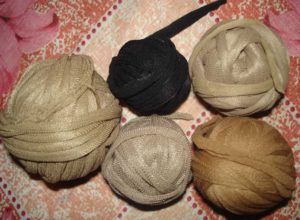
Before you start needlework, you need to make threads from nylon scrap.
You will need
- Sharp scissors to cut the edge beautifully and neatly.
- Thread and needle to sew the cut strips into long threads.
- Crochet hook (choose thickness depending on the thread for knitting).
Preparing for work
- Cut off the gusset, elastic and heel and toe part.
- From the remaining fabric (trouser leg) we begin to cut a strip in a spiral.
- The thickness of the thread will depend on the width of the strip.
- Take the finished spirals with both hands and pull the sides. With this effect, the strip will curl into a tube. The cut edges will end up on the inside, so they will be masked.
- Sew the resulting twisted tubes into a single thread, and then wind them into a ball for convenience.
Let's start knitting
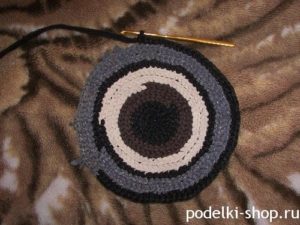
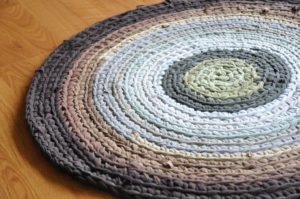
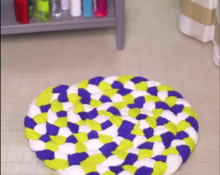
Round rug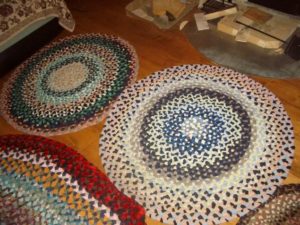
- Using a hook, knit a chain of five air loops.
- We connect the chain into a circle.
- Crochet double crochets in the round.
- As you knit, add 1-2 loops.
- You can alternate the threads by color, so you get a colored pattern.
- At the end of the work, hide the working end of the thread and secure it with thread from the inside out.
This way you will get a neat round rug.
Oval rug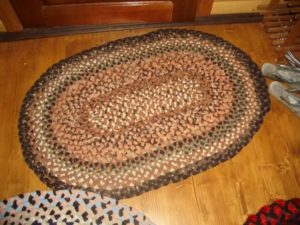
- Cast on more than five stitches and then make a chain.
- Add loops not only as you knit, but also at the edges of the first row.
- For convenience, use markers or knitting pins, they will help you not get confused in increasing the number of loops.
- Cut the thread and then fasten it to the wrong side.
Important! When working, do not overtighten the threads, otherwise the rugs will be too dense and hard.
Be sure to increase the loops, because without them, instead of a round flat shape, you will get a basket.
You can also shape the rug into a square, rectangular or polygonal shape. Don't be afraid to fantasize!
Advice! If you knit rugs according to patterns for openwork napkins, you will get not only a practical, but also an original thing. Just keep in mind that a thick thread will not create a pattern.
How to weave a rug on your fingers
You can make a rug even if you don't know how to knit! This can be done without a hook. In this case, your fingers will act as working tools.
Weaving from rings
You will need:
- Well sharpened scissors.
- Threads, needle.
Completing of the work
- We cut clean, washed tights into rings.
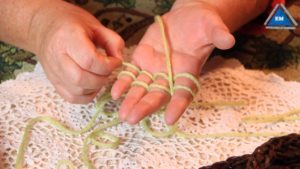
- If you wove rubber bands as a child, then this weaving method is the same. Take the ring and fold it twice.
- Twist it into a figure eight and place it on the thumb and index finger of the right hand.
- Then we make another loop in the same way.
- We remove the first loop from the thumb, then transfer it to the top loop.
- In the same way, we transfer the lower loop from the index finger to the upper one. The result is a neat braided chain.
- Continue braiding on your fingers, making the braid to the required length.
- We lay out the required shape of the rug from the braided braid. Using thread and needle we sew the parts together.
This weaving is very fast, performed automatically and does not require close attention. Therefore, handicrafts can be combined with watching TV shows.
With this weaving method, the rug has a light and fluffy shape.
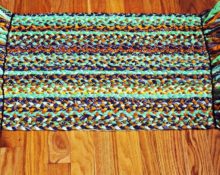
From braids
Prepare good scissors, thread and a sewing needle for the job.
Cut the tights into long strips, you can also use a spiral (as we described above, for crocheting).
Execution technique
- Using both hands, we stretch the ribbons so that they stretch out and curl into a tube.
- We take three parts and weave them into a braid (you can alternate colors and change the texture of the fabric).
- We secure the end of the weave with a thread and a needle.
- We braid another braid of three threads, and also secure the tip so that the shape does not unravel.
- We sew the braids together.
- We make a pigtail again and sew it to the other two.
- We repeat the steps until we run out of stockings from tights.
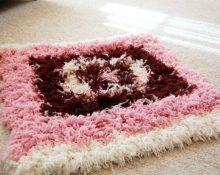
- From a long braid we lay out the desired shape in an oval, circle, square (we lay out the braid in a zigzag) and sew it by hand.
For strength and density of the product, it can be sewn onto a fabric base.
Algorithm of actions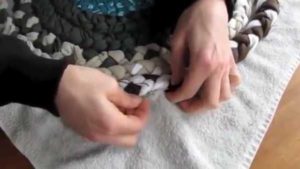
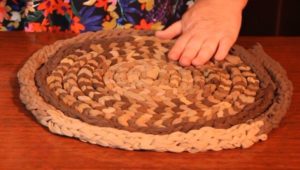
- We start laying out the round shape from the middle.
- After laying out the center, sew it to the base.
- Gradually increase the radius, while not forgetting to sew the pigtail onto the fabric.
- At the end of the braiding, we cut the braid, fasten it and hide it on the wrong side.
- We cut off the remains of the base, and sew fabric trim along the edge.
How to make a mat on a hoop
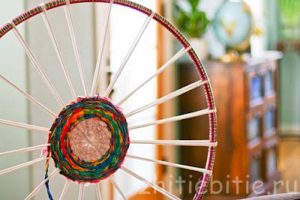
It’s easy to master another way of weaving - on a hoop.
Advice! Using this method, you can weave a rug not only on a hoop, but also on a square or rectangular shape, for example, a picture frame.
Operating procedure
- We take the prepared threads from the tights. We fix it on the base.
- First we fill it with vertical lines, then horizontal ones, intertwining them in a checkerboard pattern.
- Be sure to alternate colors so that the work acquires depth.
Making a “web”
You can intertwine the threads like a spider web.
- We fasten the threads on the hoop from edge to edge, through the center.
- We begin to weave the threads from the center. To do this, we fasten the working thread and push it up and then down in a checkerboard pattern.
- Once you have reached the hoop, secure the weave by sewing it by hand.
- Remove the product from the base.
Useful tips
- Start collecting tights early.
- If you have some free time, immediately make threads and wind them into balls. This way you will have enough material to work with. There will also be an opportunity for color experiments.
- You can diversify the color scheme if you first dye your nude tights with fabric dyes.
- Try not to tighten the fabric, this way you will maintain the lightness and airiness of the nylon in the product.
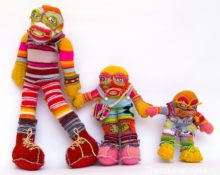
All of the above methods are perfect for fabric ribbons made from old socks, knitted T-shirts or T-shirts.
And if you alternate not only colors, but also different textures of ribbons prepared in advance, your rug can become a work of art in the hand-made style.
 0
0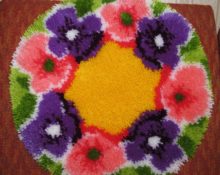
how to secure the last binding of a circular mat on a hoop