How to sew a Pinocchio costume with your own hands? It would seem, why sew yourself when there is such a variety of choices on the market these days? But handicrafts have many positive aspects. This is the ability to choose fabric, individual size. It is not always possible to find suits of good quality and suitable size in the store. Original solutions will allow your child to stand out from all the kids at the celebration. It should be noted that doing something with your own hands is useful and important. Any mother wants to make her child happy on one of his favorite holidays. Undoubtedly, such a gift will be given by her with love, and little “Pinocchio” will accept it with joy. And you don’t have to be a skilled needlewoman. No need to worry. As practice shows, creating such a masterpiece is not difficult. Everyone has a creative side. Therefore, create boldly!
Process description
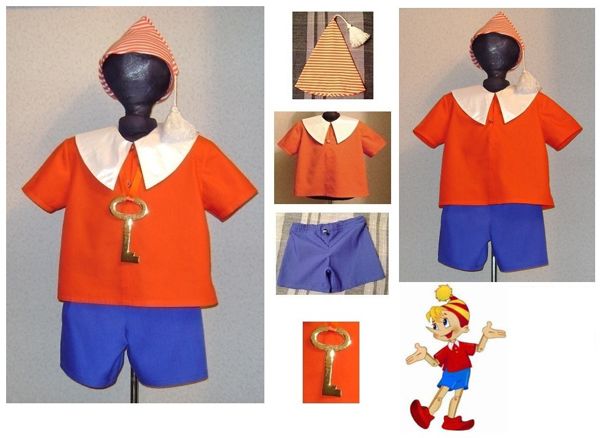
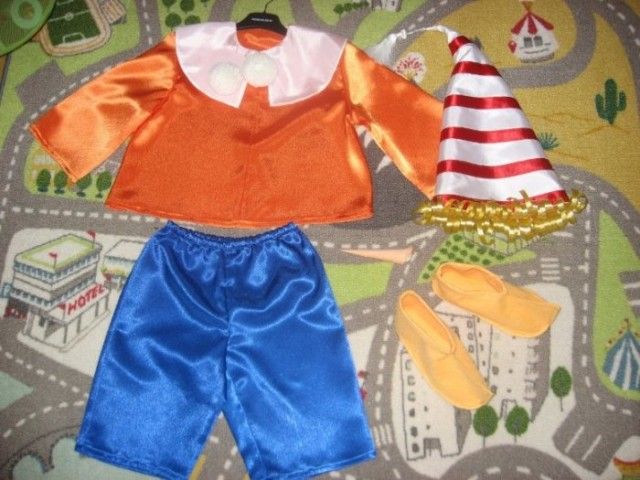
Let's take a step-by-step look at the work ahead. First you need to decide on the choice of material and highlight the main details of the costume.Satin fabric looks very beautiful. But then you will need to put in a little more effort. If you are not very comfortable with sewing, then to make the work easier, choose a simpler material. For example, cotton or fleece. This is something that does not crumble and can be easily dealt with. The costume of our fairy-tale hero consists of a vest, shorts, and a cap. And, of course, a golden key as an additional accessory and an important element of the image.
Cap
Let's start preparing for the holiday by making a cap. It should be striped and with a tassel. You can simplify and use a plain fabric, for example, red.
We will need cardboard, fabric, scissors and bright yarn.
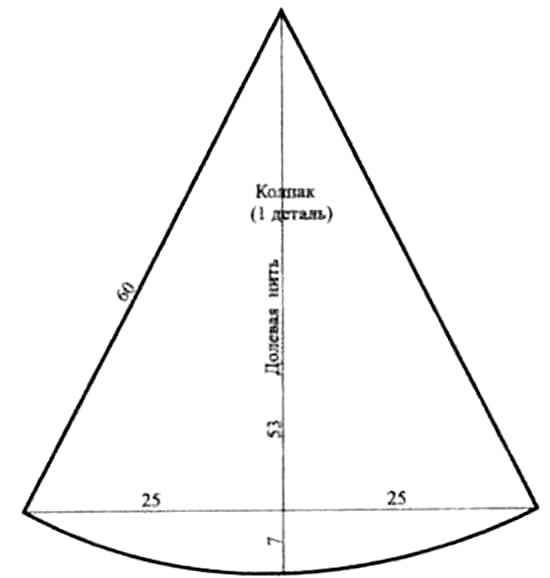
Let's make a pattern. First measure the circumference of your child's head. Draw a cone on cardboard, taking into account all dimensions. It turns out to be a triangle. Let's cut it out.
We apply the pattern to the fabric, trace it with chalk or a dry piece of soap, and cut it out with seam allowances. We connect the edges of the resulting triangle and sew it together.
The base can be folded up, leaving a little space for inserting an elastic band. This will allow the hat to fit tightly on your head. We will make a tassel from the yarn. We will wind a thread on any small object (the more there is, the larger and more magnificent the tassel will be). On the one hand, we tie the resulting bundle, and on the other, we need to cut it with scissors. And then we’ll sew it to the top of the cap.
Making vests and shorts
Let's start making the vest and shorts. Let's take cardboard, fabric, scissors, and an elastic band for the belt. The same material can be used for both the vest and shorts. Of course, it is best to try to find fabric in two contrasting colors. For example, the vest will be brown or red, the shorts will be green or blue.
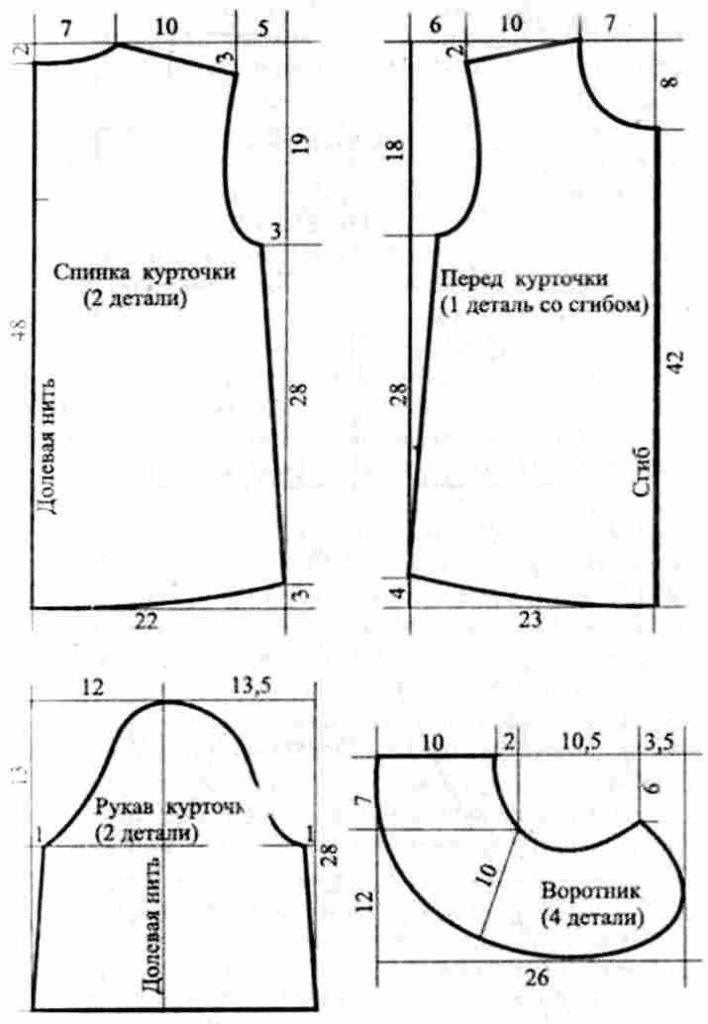
We draw details on cardboard according to the samples proposed below.The sizes can be increased or decreased if necessary. We cut out the patterns.
The fairy-tale hero's vest is complemented by a white collar with ties. Measure your child's neck. Draw a circle on the cardboard, then inside it is a smaller circle, equal to the circumference of the child’s neck. We cut the circles along the radius to the center.
We place all the blanks on the fabric, outline them taking into account the allowance and cut them out. Then we connect the back and front, sew the shoulder and side lines. We process the sections of the collar and sew braid for ties to the edges of its smaller part. The vest is ready.
We sew the shorts along all side seams. We turn the edges at the top by 2-2.5 cm. Sew, leaving a small hole. Measure the circumference of the baby's abdomen. We thread an elastic band of the appropriate length into the hole. You can use a cord instead. The bottom edges of the shorts need to be folded 2 cm and stitched.
Golden Key
Our holiday kit is ready. It remains to make the main attribute. Of course it's a golden key. To do this, we will take cardboard, glue, gold foil or gold paint with a brush, and tape.

Draw the template below on paper and cut it out. You need to make 3-4 such elements. Then we glue them together. We do this to make the craft more rigid. Let's wait until the glue dries. Only after this can the key be wrapped in foil, securing the edges with tape, or painted with gold paint.
Tips for making a costume to simplify the process
If there is very little time left before the celebration, we can make our work easier. For the pattern, trace the child’s T-shirt and shorts and cut out the details based on them. This is how you will get more accurate clothing measurements.
After measuring your baby, add 3-4 cm to the resulting numbers.This is necessary to ensure that the outfit fits comfortably and does not hinder movement.
You can also make a headdress from cardboard and paint it with stripes with white and red paint. And instead of a tassel, glue tinsel.
Use your imagination, use any available materials. Don't be afraid to experiment! Let your child be bright and happy on the holiday!
 0
0