 Very soon the most favorite holiday for children and adults – New Year – will be knocking on our doors. And with it, it’s time for matinees in kindergartens and at all kinds of New Year’s trees. It's time to think about creating an original and fun costume for your beloved children, grandchildren, nephews and godchildren.
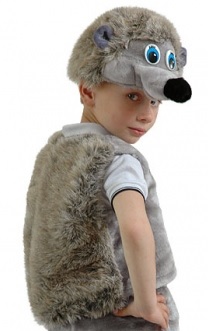
One of these options could be the image of everyone’s favorite hedgehog (photo), especially since you can recreate its characteristic features in a huge number of ways. And it is not at all necessary to resort to the services of sellers of ready-made suits. Creating a holiday outfit will not take much time, a variety of materials can be used, and the result will definitely bring joy and childlike gratitude, which no amount of money can buy.
How to make a hedgehog costume with your own hands from scrap materials
Depending on what you have to create a New Year's costume, you can make different versions of this outfit. Three variations are commonly used:
- Vest and hat.
- Vest with hood.
- Cape with a hood and mask (or without a hood and with a cap).
There are quite a lot of materials from which the above options can be made:
- Knitted fabric (when the parts of the product can be knitted using knitting needles or a hook). Usually for such costumes a yarn called "grass" is used in combination with a plain regular thread.
- Artificial wool in combination with velor or fleece.
- Any fabric with “needles” sewn onto it (which can also be made from all kinds of materials).
And really handy tools include “rain” garlands, clothespins, old sweaters, and you can even just focus on a child’s hairstyle. All decor is sewn onto a ready-made children's item, or the item of clothing is made independently using knitting or sewing.
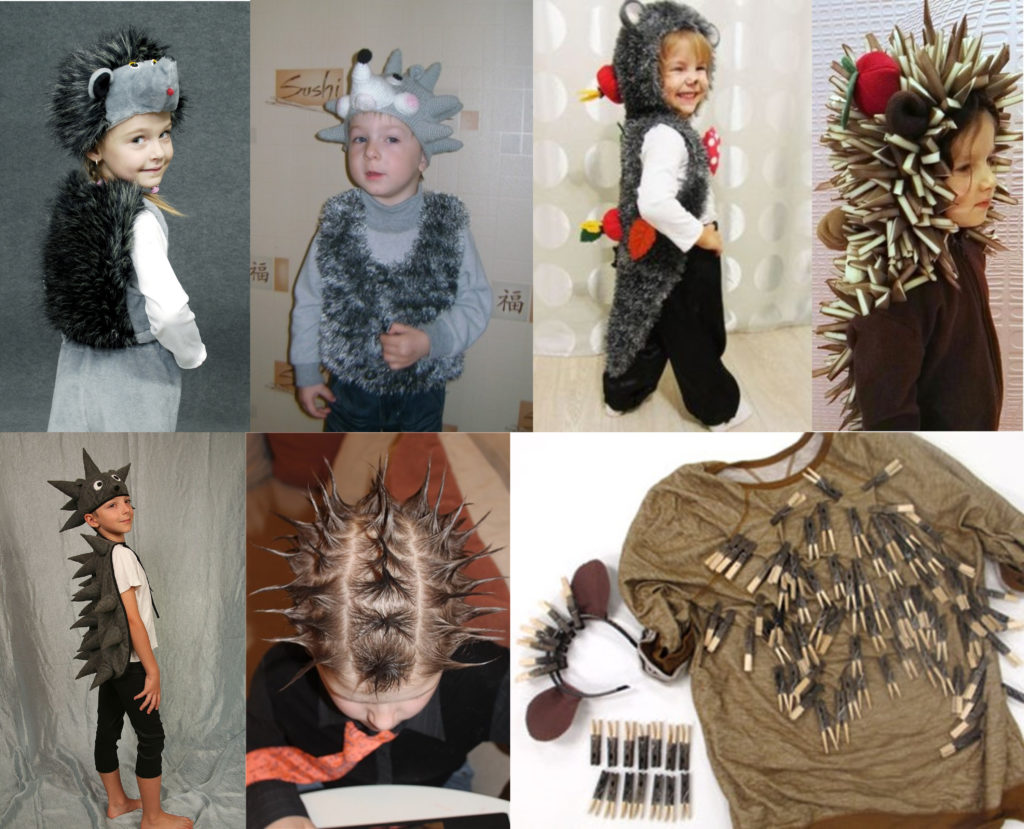
Examples of DIY children's hedgehog costumes
How to sew a hedgehog costume for a boy
We offer you one of the simplest options for a hedgehog costume for boys, the creation process of which involves sewing together parts from different materials.
One of the features of making any clothes for children is that you won’t spend a lot of effort on cutting and sewing, even if you don’t have a sewing machine at home. Therefore, such a costume can be easily made even in one evening. Such a kit will look like this:
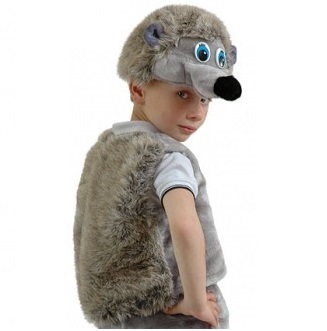
It consists of two parts: a vest made of velor and faux fur with long pile and a hat.
The longer the pile, the easier it will be to form it into needles.Also, to decorate the hat you will need a piece of black fabric (for the nose) and eyes from a soft toy or multi-colored felt for making them yourself. Large round buttons are also suitable for this detail. In general, use for creativity those materials that you have on hand or that are not difficult to buy.
To decorate the back, it would be very nice to use felt decorations depicting the standard “prey” of a hedgehog: apples, mushrooms, autumn leaves. You can also use real leaves for decoration, attached to the vest using hot glue. Another option is to cut out all the above-described elements from colored paper.

Examples of vest decor for a hedgehog costume
Hat with “needles”
The hat is also made of artificial wool and velor (which, by the way, can be replaced with fleece). For this we need:
- Printout of Scheme 1.
- Faux fur and velor fabrics.
- Some black fabric for the nose.
- Sewing elastic band.
- Sintepon or cotton wool.
- Thread and needle or, if possible, a sewing machine (having one will greatly speed up the process of creating a hat).
- “Eyes” for the hedgehog’s face.
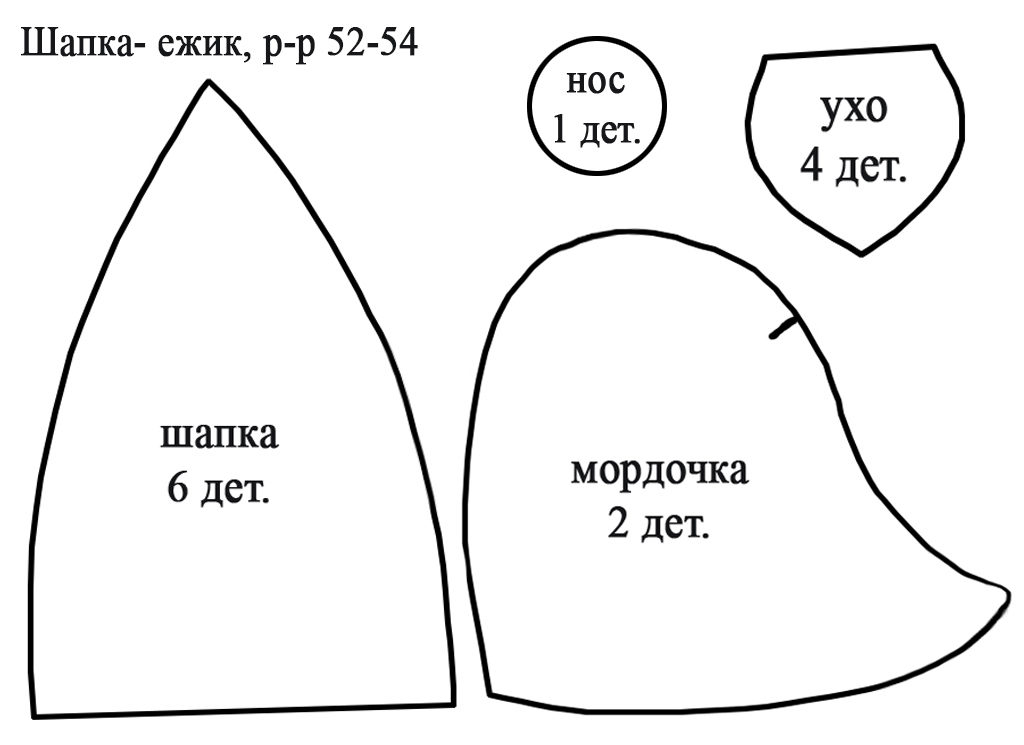
Scheme 1 – Pattern of a hat from a hedgehog costume for a boy
The above Diagram 1 should be printed on an A4 sheet, placing the drawing on the entire sheet (this function is in the menu for printing files on your computer).
Important! Please note that the details are given without additional distance for allowances, so add 1 cm in the area of the side seams, and for the elastic around the circumference of the head - 3 cm at the bottom.
Then you need to cut out 6 parts for the hat itself (faux fur), 2 parts for the muzzle (velor), 4 ears (velor) and 1 for the nose.
After this, we will assemble the hat by sewing six wedges on the sides of the parts, bend the bottom 3 cm for an elastic band (the length of which corresponds to the circumference of the child’s head), insert it and stitch it.
Then we sew the details of the muzzle to the mark on the pattern, fill it with padding polyester or cotton wool and sew it to the main hat. After this, we sew 2 parts together and sew the ears to the “muzzle”. We fill the nose with soft material and sew it to the front of the hat. We sew on the eyes last.
Advice! If buying faux fur is not an option, replace it with an old sweater in a matching color. In this case, you will need to process the edges of parts made from it.
It would also be useful to decorate such a hat with the decor that we wrote about above. This technique can also be applied to a vest, the manufacturing process of which will be described below.
Vest
Whatever materials you choose, the vest can be sewn using a standard pattern, such as the one shown in Diagram 2. Here are options for three vest sizes. They should be suitable for most children, for whom such a costume would be appropriate based on age.
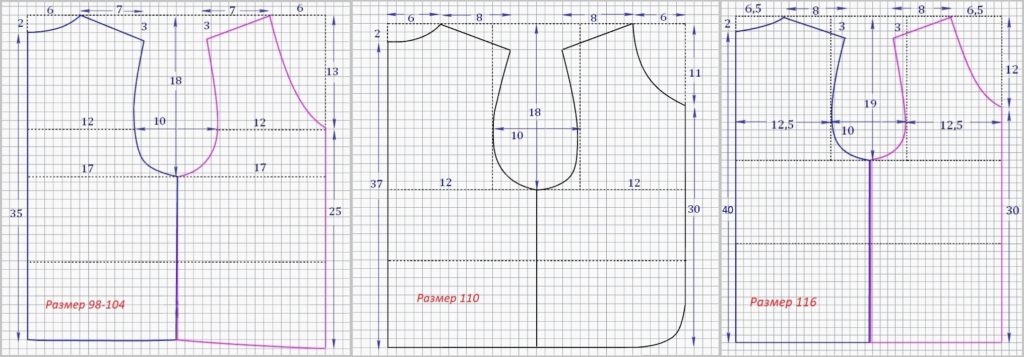
Scheme 2 – Patterns for vests of different sizes
The child for whom the costume is being sewn needs to measure the chest circumference and, based on this, choose one of the pattern options suggested in the diagram. If necessary, add or subtract 1-2 cm from the width of the parts.
The material consumption will be the desired length of the product and another 5 cm. These models do not have a fastener. If you want to add buttons or a zipper, add another 1.5 cm on the front side of the zipper.
To cut out the parts, you need to add 1.2 cm to the seams in those places where the back and shelves will be sewn together.Let us remind you that the back is a part with a fold made of faux fur, the shelves are 2 parts without folds made of velor or other velvety material.
Reference! A part with a fold is an element of a product in which the pattern involves placing fabric on the fold in such a way as to create a part of symmetrical parts.
For example, the back pattern is applied with the straight side to the fold of the fabric and secured to it with eyelet pins. The contours of the back are transferred to the fabric using chalk or a piece of soap. The pattern is then removed and the piece is cut out and unrolled. A part without bending involves all the same operations, only without bending the fabric. That is, the shelf pattern is transferred to the fabric twice without folding.
Hedgehog costume for girls: quick and easy
It is quite easy to repeat the idea of a cape costume, which, of course, can be used for boys and girls with equal success. But still, a costume in the form of a cape will be more interesting for little princesses in the sense that such a thing can easily be worn on any beautiful dress.
By following the instructions for making a cape, you can get the following result, changing the materials to your taste and their availability in the house.
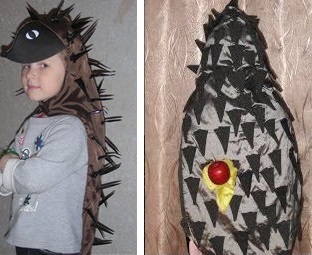
Examples of ready-made capes for a hedgehog costume
Cape with “needles”
As they say, everything new is well forgotten old. Here we will offer a design option for a children's carnival costume, which was taken from a book of the late twentieth century. This product is quite easy to reproduce. To sew a cape you will need:
- Any fabric of a suitable color (fleece, velor, fleece, cloth).
- Material for needles. The authors suggest that craftswomen use plastic bags, but you can also use just fabric that has a different texture from the main fabric.These needles can also be stuffed with filler, then they will stick out and further enhance the resemblance to hedgehog spines.
- Cardboard and elastic band for a mask.
- Glue, thread and scissors.
The hooded cape can be fastened with buttons or strings, and the nose can be made of foam rubber, a large round button, or similar materials.
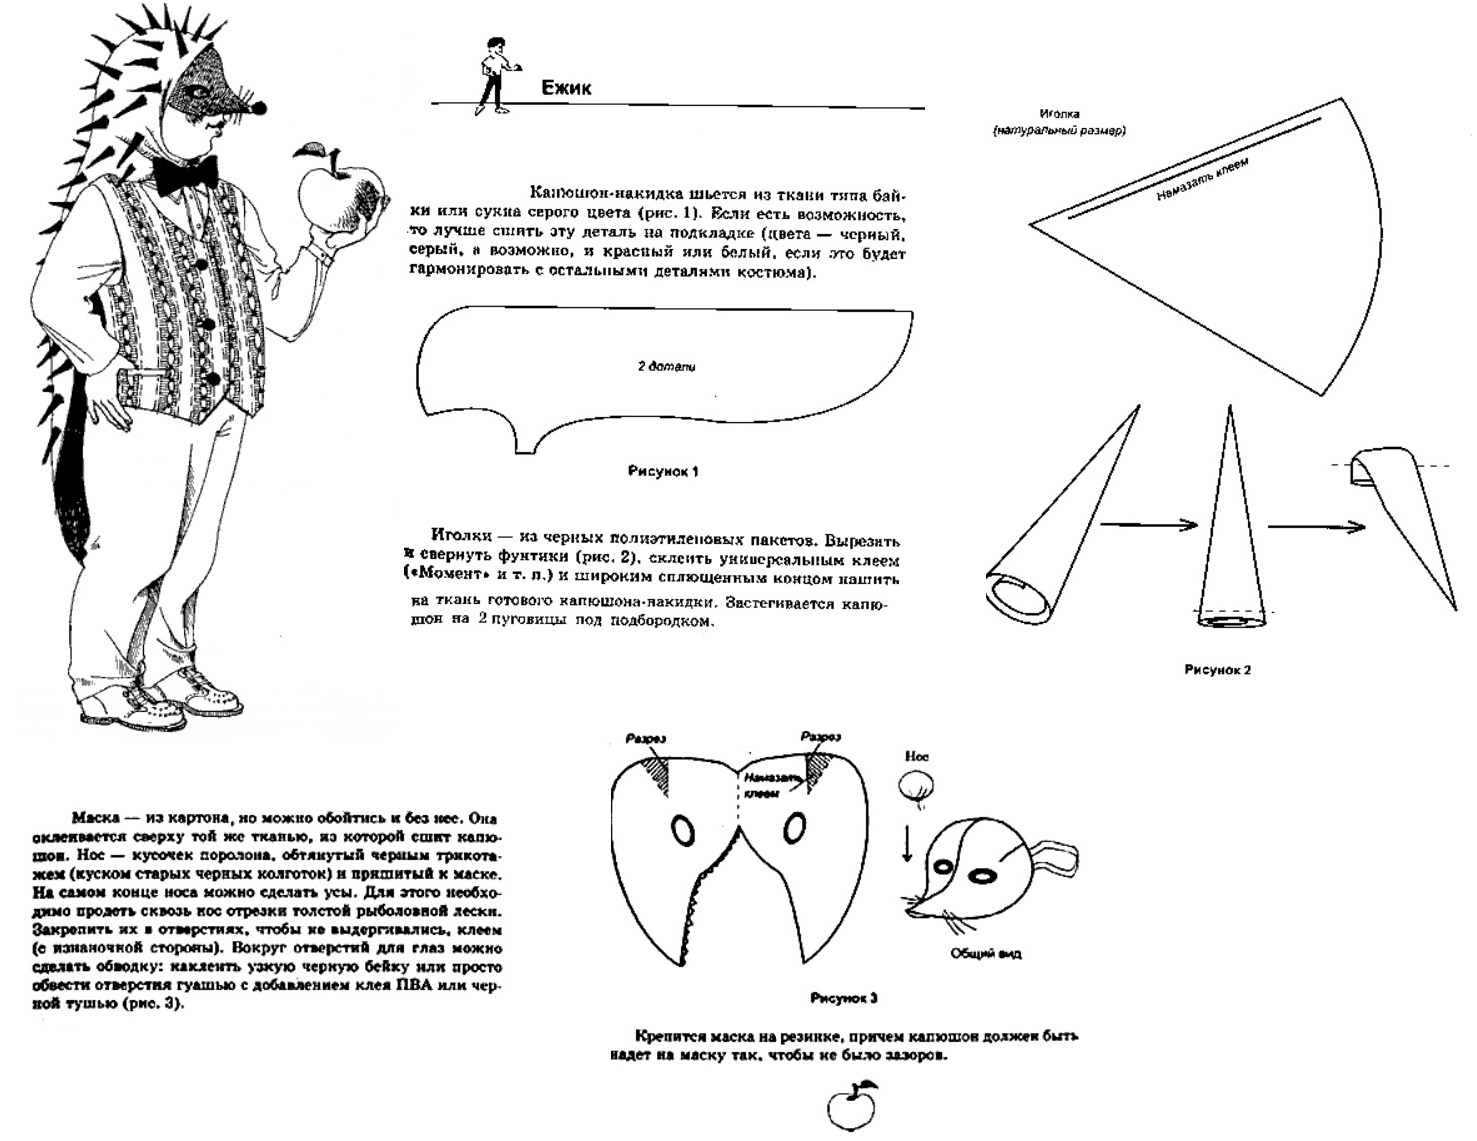
Pattern and description for a hedgehog costume in the form of a cape with a mask


 0
0