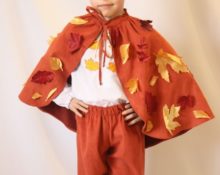
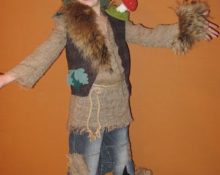
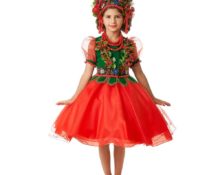
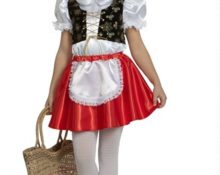
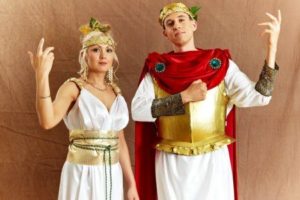
 The New Year holidays are approaching, which means it’s time for matinees and parties around the Christmas tree. A bunny costume is suitable for a baby, but if the child is already grown up, then you need to look for another solution. Turning to ancient Greek mythology would be quite an interesting option.
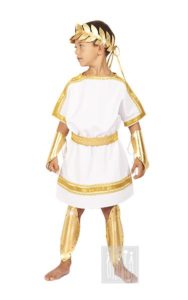
Gods and goddesses lived on the Greek Mount Olympus, their king was Zeus. The weather depended on him, he sent the elements, dominated the destinies of people, and ruled the inhabitants of heaven. Outwardly, he was a fit man with a long beard. His outfit consisted of a white toga and a colored chiton with gold trim.. But the main distinguishing feature from other gods is the golden crown of ivy leaves around the head.
What will you need to create a costume?
The task of making a costume with your own hands can be solved in two ways: chiton + toga or tunic + toga. For both we will need the following:
 white sheet;
- 2 brooches or 2 chain clasps;
- bright fabric (1.5 - 2 m);
- narrow golden ribbon from 2 m;
- wide golden ribbon 60–80 cm;
- a piece of Velcro (Velcro fastener);
- thick paper for the crown;
- glue;
- needle, thread;
- scissors;
- gold spray paint.
It is possible that even a centimeter may not be needed, since all calculations are quite approximate. But if you have it at hand, be sure to use it for the second version of the costume.
Step-by-step instruction
The basic item of the ancient Greek men's wardrobe was the chiton. It was worn on a naked body, pinned at the shoulders and draped, picked up by a belt. Noble citizens wore a toga over the chiton, which was also draped, but either on the shoulder or under the belt along with the chiton.
Costume base
First, let's make the basic costume item:
 Take a white sheet and fold it in half so that the fold is on the left. This is a side connection of the chiton, the second side either remains with free ends or is slightly picked up with threads from the inside;
- so, a sheet folded in half is our tunic. There is a top and a bottom of the product, one fixed side and two free ends for the right side. Now our task is to try on the length of the product directly on the child. The width of the sheet is the desired value;
- if the length is too big, then bend the top edge outward to the required width;
- the top of the tunic is decorated in several ways: you can connect the two free ends of the sheet together, releasing the ends so that the left side of the product rises to the armpit and fasten it together.
- the second option is to connect the top of the chiton at two points, evenly spaced along the edges from the neck. To do this you will need two brooches;
- We will decorate the bottom of the tunic with decorative braid with golden ornaments: we will glue or sew it along the very bottom.
The basic part of the costume is ready. The next stage is the construction of a toga from bright colored fabric.
Toga
Important! In Ancient Hellas, purple was considered the most luxurious color after white. Rich citizens decorated their clothes with different shades of it. But for a carnival costume it is not necessary to choose this particular color. Blue, light blue, red, beige, cherry, and gold are also suitable.
Let's take care of that:
- we bend the fabric in the same way as we worked with a sheet;
- we obtain a product blank whose length and free ends can be trimmed with gold braid. The suit will look great;
- the free ends should be secured on the left side, just like the chiton on the right;
- if there are two fasteners on the left side, then remove the lower one and pin off the ends of the chiton and toga together on the shoulder.
The toga is ready, you should take care of a very important accessory - the belt. Let's make it from a wide golden ribbon, bending the edges inward and sewing pieces of Velcro on top of them.
Crown
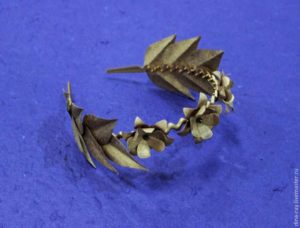 The crown is made of thick paper. Ivy leaves are cut out of it, glued together at the ends, and then covered with gold paint. If you have golden paper, you can stick it on thick paper, then cut out and glue the leaves together.
Shoes
One of the key points of the outfit is shoes. The ancient Greeks wore sandals consisting of numerous straps that reached to the knee. All this was attached to a flat leather sole. It is problematic to make such shoes with your own hands, and therefore it is worth borrowing something similar to sandals from your summer wardrobe.
Important! If you have no options, take regular flip-flops, wrap the rubber parts with a gold ribbon and lace your legs with it from the ankle to the knee, tie it at the top.
That's it, the Zeus costume is ready. Let's assemble it for fitting: first the boy must put on a chiton, then a toga. All fasteners and connections must be in place and folds straightened out. After this, a belt is put on, under which all the folds of the drapery are straightened and beautifully laid out.
Tunic
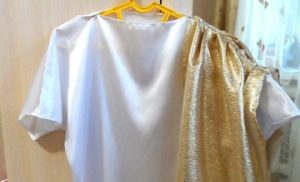 But there is another option, in which the base is not a chiton, but a tunic. It will need to be sewn, and if you have a sewing machine, then things will go faster. If it’s not there, it’s also not a problem, the seams in the tunic are quite primitive, straight, and the braid can be glued on.
Sew a tunic:
- fold the fabric (sheet) in half. The top fold will be the shoulder part. Then again in half, shoulder to shoulder;
- From the resulting rectangle we cut out a tunic: at the top we have a ready-made solid shoulder, at the other end there is the bottom of the product, which should not be reduced in width. We retreat from the top 20–30 centimeters from the top and the same amount from the edge;
- from this point we draw a smooth line connecting the sleeve with the side part, draw it to the very bottom, expanding to the sides;
- draw a neck of the required width;
- We chop off the parts with pins along the intended contour;
- cut it out, then remove the pins;
- sew down the side seams;
- we process the neck;
- bend the bottom;
- sew a golden ribbon onto the neckline, the ends of the sleeves, and the bottom of the tunic;
- The product is ready, all that remains is to iron the suit.
Little things you shouldn't forget
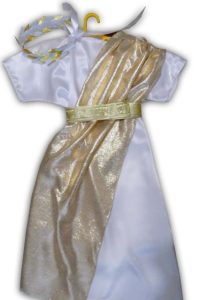 The costume will look great if you have a wig and a false beard in your arsenal.. The ends of the chiton are fastened with a brooch, or a clasp with two clothespins on a chain, or a crab hair clip, and if nothing is at hand, they are simply sewn together or tied in a knot.
If the chiton will have fasteners on both shoulders, you can mark the connection points a little closer to the neck. In this case, the neckline will be a “boat” and, slightly stretched, will not form folds.And if you want a light drapery of the neckline, then connect the top at points further away from the neck.
If the belt tape is not dense and rigid enough, you can hem another layer of any fabric underneath or simply starch it.
The toga can be replaced with a wide draped piece sewn directly to the left shoulder of the tunic. To do this, fold the bright fabric in the middle so that this part is equal to or less than the length of the shoulder (measure from the neck to the end of the sleeve). Attach the draped fabric to the tunic along the shoulder contour. It's enough. Under the belt, straighten the fabric beautifully from the left edge to the right. You can even sew the piece at the bottom right with both ends (front and back) together.


 white sheet;
 Take a white sheet and fold it in half so that the fold is on the left. This is a side connection of the chiton, the second side either remains with free ends or is slightly picked up with threads from the inside;
 0
0