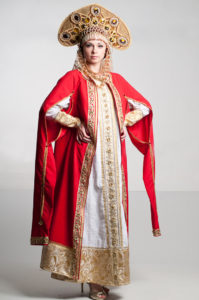
 Fashion trends are cyclical, and more and more often the design of modern clothing echoes historical and national costumes. It doesn’t matter what the occasion will be for making a national costume: a themed party, a children’s matinee or a stylized photo shoot, or maybe even creating an everyday original dress, these recommendations will help you master this task, even if before that you only sewed an apron during “labor” lessons at school!
What is Russian folk costume made of?
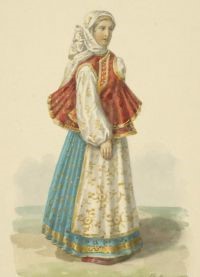 Russian folk costume had maximum functionality for people's lives in harsh climatic conditions, and was decorated based on religious rituals. Shirts, sundresses, ports, and blouses did not hinder movement and were secured with the help of ribbons and sashes. It combines types of creativity in which Russian craftswomen are very strong:
- sewing;
- knitting;
- embroidery.
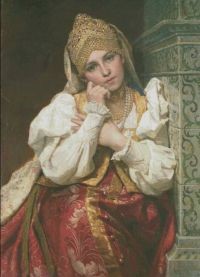 The national costume not only reflected the occupation of its owner, but also the place of residence and origin. The most affordable and natural materials were used - linen, wool. The women's costume is especially detailed and beautiful, because it contains the sacred meaning of existence, connection with clan, and the values of femininity and family. The components of the national costume developed around the 12th century:
- The basis is a straight-cut shirt (waist) with gathered sleeves. There could be several such shirts, because one of them served as underwear. Embroidery was done along the cuffs, shoulders and hem with colored, gold threads or pearls.
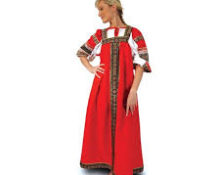
- A plain sundress, mostly red, was worn over it. A sundress is a fabric fabric with ruching, a small corset in the chest and two straps.
- The head was decorated with a richly embroidered kokoshnik.
- Ribbons, lace inserts, and appliqués were used to decorate the shirt and sundress. The pattern on the suit served as a talisman against evil forces.
Often, Russian folk costume allowed a combination of fabrics of the same composition, but distinguishable by color.
How to sew a Russian folk costume for a girl with your own hands
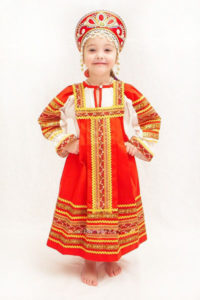 The first is the choice of fabric. For a children's costume, choose bright, rich shades of red, blue, orange or green. In the classic representation of the national costume, the fabric used is plain, but small ornaments are also suitable. It is better to use velvet, satin, satin or wool. The amount of material is calculated based on the girl’s age and height. In addition to fabric, you need:
- Strong threads to match the fabric or contrast.
- Sewing supplies (scissors, pattern paper, measuring tape, chalk, etc.).
- Sewing machine.
- Decorative elements - ribbons, beads, beads, lace, sewing, etc.
Advice! If you are sewing a dress for a child, you should not make it all the way to the floor, the baby will stumble. Let the hem be 2-3 cm shorter; the appearance will not suffer, but the child will be more comfortable.
Pattern of a sundress in folk style for a girl
To create a pattern, you need measurements. The main one is the length of the product, from the armpit to the required length. We also measure the circumference of the chest. We multiply this value by 2 or 2.5 - this will be the width of the sundress skirt. To cut out a flared skirt, you need to sew from 2 to 4 parts, widened at the bottom.
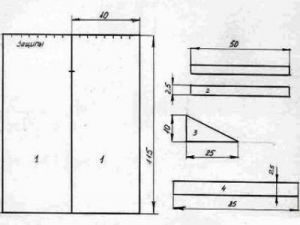
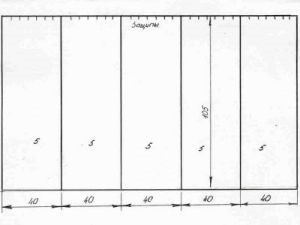
Cutting the yoke is very simple - this is a rectangular strip, equal in length to the circumference of the chest, with an allowance on each side of 5–6 cm. The width is from 10 to 15 cm in finished form, so it is better to cut out two parts, sew them together, right sides inward, and turn them inside out. It is better to sew the straps for a folk costume rather wide, 7–10 cm. The approximate length is 40 cm, but if necessary, adjust it during fitting.
Advice! The edges of all parts should be processed - zigzag seams or other overcast stitch that your machine has. Ideally, you can use an overlocker.
Step-by-step sewing of a sundress
We assemble a sundress from ready-made parts.
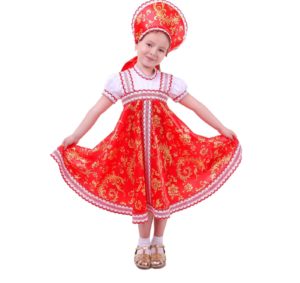
Step 1. First, the hem pieces are sewn together, the yoke is sewn to them, and the straps are attached to it. The back seam connecting the parts of the skirt and sundress is not sewn completely, you need to leave a couple of centimeters for the fastener. Then, the top is stitched with the largest possible straight stitches and pulled together (it is important that the thread can withstand the tension). As a result, the yoke should be 4 cm longer than the circumference of the skirt.
Important! It is better to sew such a seam on a machine so that the stitch sizes are the same.The folds should also be well aligned.
Step 2. Afterwards, it's time to sew the yoke to the skirt. Be sure to line up the centers of the yoke and hem. First, baste the parts together, and then sew them on a machine. For convenience, you can sew a zipper or button on the back.
The straps can be cut out from two parts each, or you can simply cut out a wide rectangle and fold it in half. Turn them inside out after stitching. Sew them to the yoke from the wrong side.
Important! Thanks to the dense fabric, there is no need to wear a petticoat with such a sundress. And there is no need to peck for additional rigidity either.
Step 3. It's time to get creative - decorate! If you like to embroider, you can embroider the hem and ribbons, then such a sundress will really meet all the requirements of the national Russian costume! Show your imagination and use decorative elements - beads, lace, sewing. You can try it on!
Blouse under a sundress
To make the costume as believable as possible, you need a white shirt, which is worn under a sundress. It's quite easy to sew.
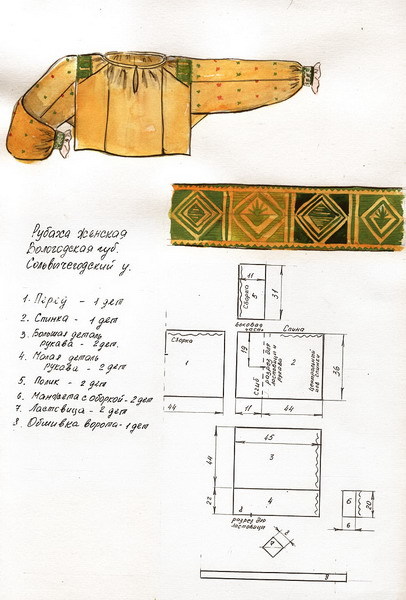
It is enough to cut out 4 rectangles, two of which will be the basis of the shirt - the front and back, and the other two will be folded in half and will serve as sleeves. Such sleeves are sewn at right angles to the main parts. The edge of the collar and cuffs can be folded over and sewn on a machine with a large seam, and then pulled together to create gathers. For fixation, another line is laid, but this time more dense.
If you have sewing experience, you can sew gusset wedges under the sleeves to make this blouse comfortable to wear.
Kokoshnik for girls
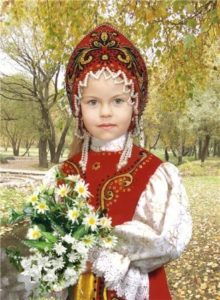 Russian folk costume is always associated with the presence of a high kokoshnik on the head.But it should be remembered that this headdress was worn only by married women. Young ladies decorated their heads with the prototype of a modern bandana - a scarf folded several times, securing it under a braid or loose hair. There were also hoops covered with velvet or satin fabric, embroidered and decorated.
To make a kokoshnik you will need:
- thick paper or cardboard from a box;
- fabric that matches the sundress;
- sewing supplies;
- “moment - crystal” or any other reliable and transparent glue;
- decorative elements.
First, a frame is created from cardboard. The shape can be arbitrary, the main thing is to follow the direction - from one ear to the other, across the forehead. All measurements are taken in the same sequence.
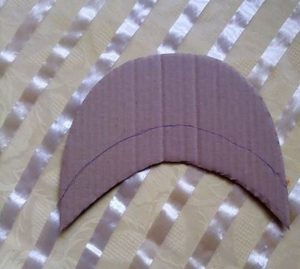
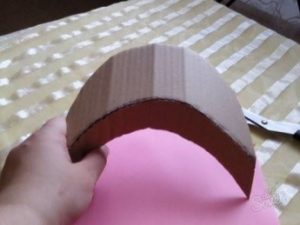
It is easy to determine the size of the fabric for fitting - you need to lay a cardboard blank and trace it, leaving a couple of centimeters for the hem. Once cut, you can fix the fabric with glue. At the same moment we attach the tape that will hold the headdress.
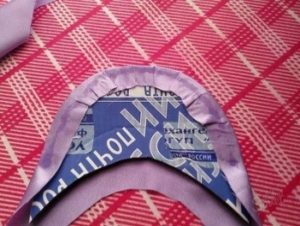
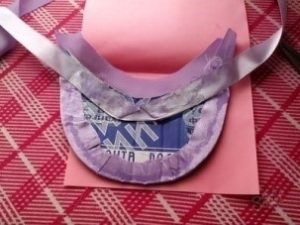
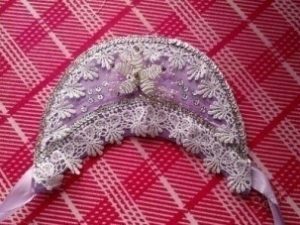
We decorate and decorate the “facade” of the kokoshnik. Don't overdo it! The kokoshnik and sundress should be elements of a harmonious costume!
How to decorate a Russian folk costume for a girl
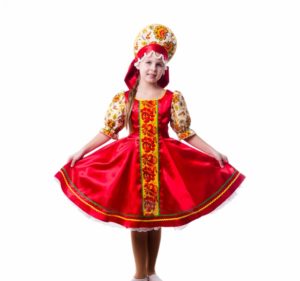 If you want to give your costume a pristine historical meaning, choose classic decoration methods:
- embroidery;
- sewing;
- ribbons and ribbons.
When embroidering patterns, stick to folk motifs - depict animals, plants, flowers, as well as geometric shapes symbolizing natural phenomena.
Artificial and plastic pebbles and glue-based glass are perfect for kokoshnik. They fit easily and securely and look amazing!
How to sew a Russian folk costume for a boy: step-by-step description
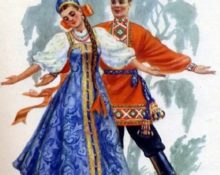
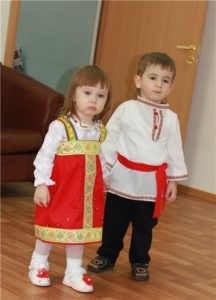 Men's Russian folk costume is more prosaic. The appearance of the kosovorotka did not reveal the affiliation of its owner to any class. Wealth could be determined by the fabric - silk and satin were the prerogative of the rich, rags and canvas were for the poor. Such shirts are worn over trousers, untucked, belted with a silk or woolen belt, with tassels at the ends. A perky detail of the men's national costume was the cap - a headdress made of velvet or cloth with a straight or semicircular visor, covered with leather or fabric. Ports, sewn from cloth or canvas, acted as trousers and were tied at the waist with a gashnik. Could be any color. Traditional shoes are bast shoes.
Shirt for Russian costume
For assembly you need linen or cotton fabric and sewing supplies.
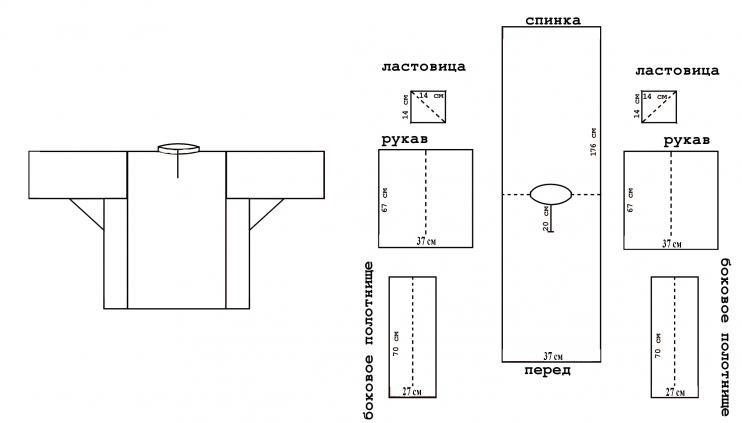
- The presented scheme is one of the simplest to implement. Enlarge to the required size, transfer to fabric and cut with allowances of 1.5-2 cm. You will get 1 base, 2 sleeves. and 2 gussets.
- The gusset is stitched to the base of the sleeves.
- We collect all the details and sew them on.
- We bend the edges of the sleeves and make a stitch. Then we also process the bottom.
- Neck treatment:
- All that remains is to sew on the embroidered ribbon or ribbon!
Shirt belt
A wool braid or the same ribbon with which the collar is decorated can act as a belt for a braided shirt. Or you can sew it to a rectangle of the required length, cut from the main fabric, then turn it inside out and sew it up with a hidden seam.
Pattern and sewing of a cap for a Russian folk costume
The easiest way to make a cap is to cut it out of cardboard, cover it with suiting fabric and sew it.
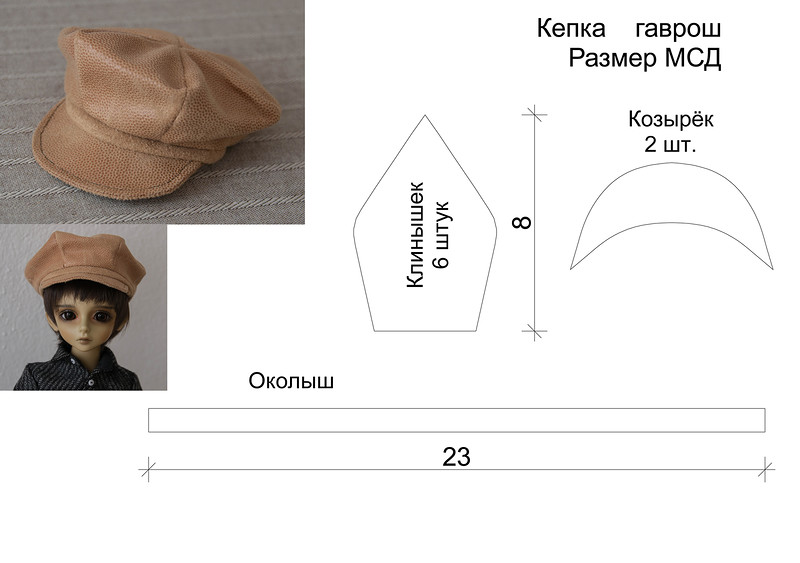
You need to know the circumference of your head, add 1 cm for allowances. This is the main part, we cut it out and cover it with fabric.The next part should be 7–9 cm larger; it is done according to the same principle. Complete with a round piece that fits the size of the middle part. The visor is about a third of the size of the head circumference. It can be covered with shiny fabric, for example, satin. The finished cap can be decorated with a strap and a large flower!
We sew a women's Russian folk costume
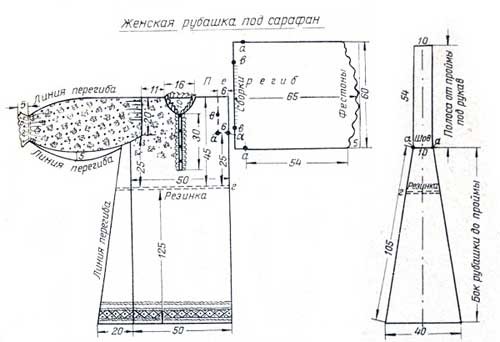
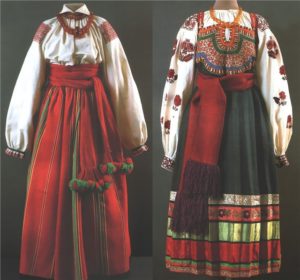 Sewing a folk costume for an adult lady is not much different from the one for children, which was discussed above. It is worth choosing a model that meets your needs and existing sewing experience.
Blouse for a suit
This option is suitable for beginners. The shirt is sewn from the following parts:
- front and back;
- sleeves (wide rectangles, folded in half);
- 2 gussets (sewn into the armpit area).
All that remains is to process the neckline and gather the sleeves.
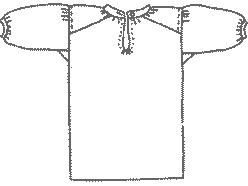
The second, more complex option.
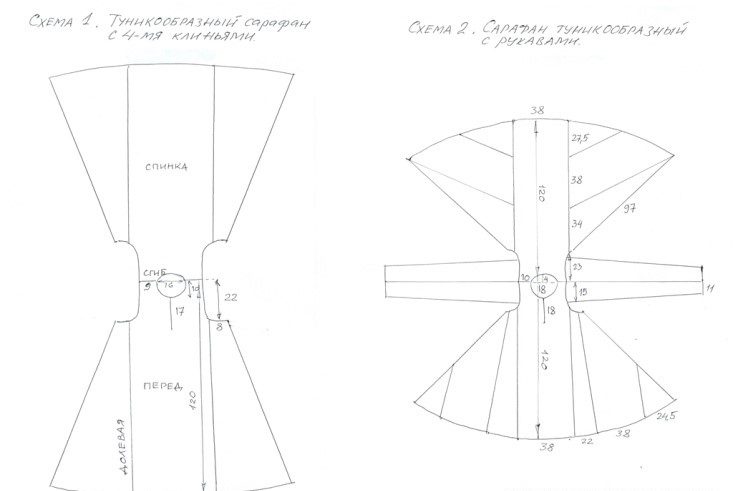
Sundress for women's suit
Try sewing a slanted sundress, similar to a tunic. It is one of the oldest models. This sundress can be either with or without sleeves. Using the presented pattern, it is easy to make.
Kokoshnik in Russian style for women
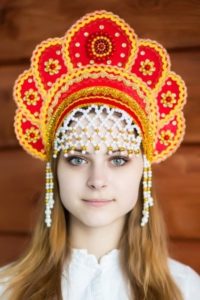 Making a kokoshnik is quite simple:
- For the base, choose the shape you like and cut it out of cardboard.
- Cover with any fabric. The fabric can be glued using a hot gun or machine stitched. At the same stage, a satin ribbon is attached to secure the kokoshnik on the head.
- All that remains is to decorate and embroider the product. Here you can use larger and more expensive stones to emphasize the status of its owner.
Advice! For a more labor-intensive and rich model, you can use component parts.
Features of sewing Russian folk costumes
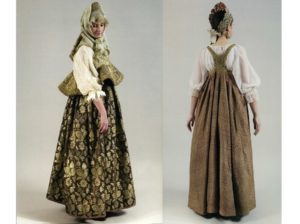 When sewing a national Russian costume, you must follow a number of simple requirements so that your costume corresponds to reality and is believable:
- choose natural fabrics;
- adhere to a certain color scheme (do not be colorful and do not use “acid” colors);
- decorate the costume in accordance with historical reality (simple geometric shapes, floral design, images of animals, etc.).
Now you can create a Russian folk costume for any gender and age. Success in creative work!


 0
0