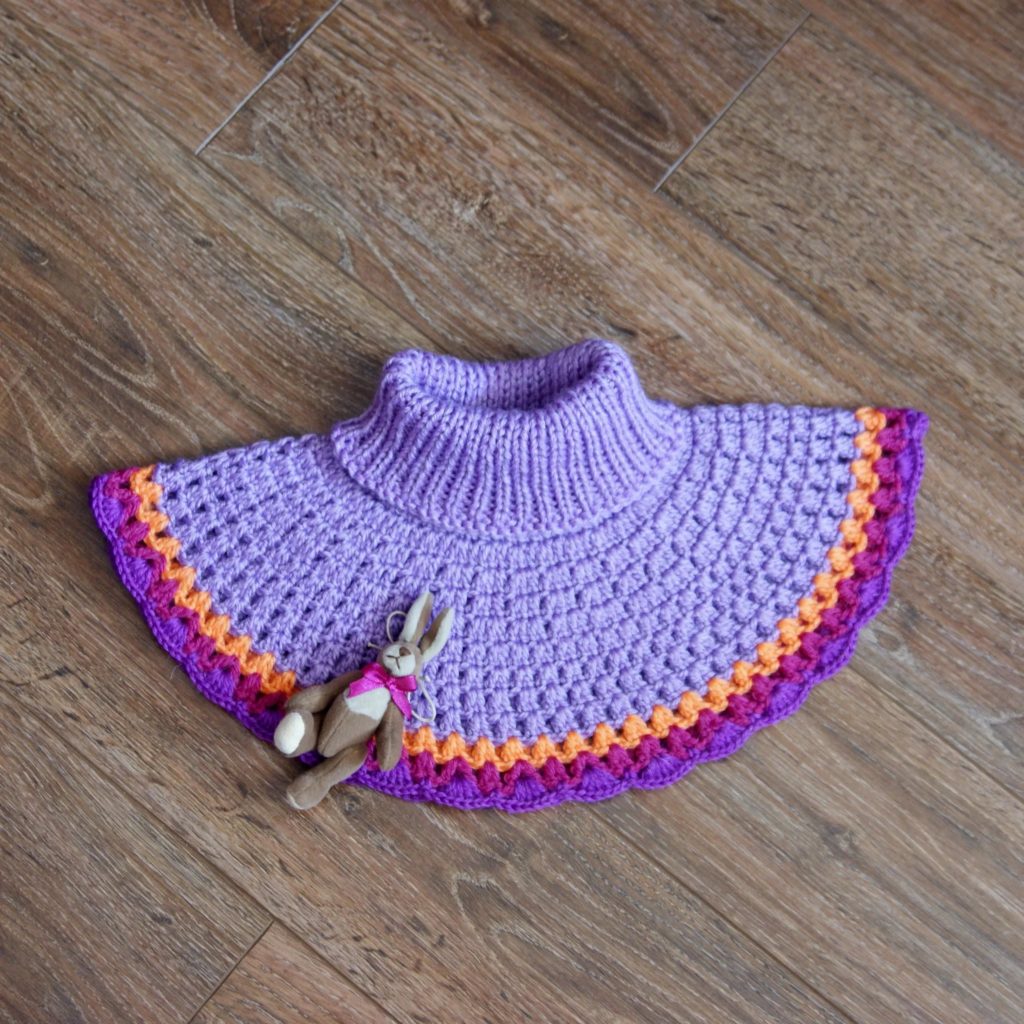
 In the cold season, for any mother, caring for the health of her child comes first. For this purpose, we purchase warm boots and a coat, as well as a hat and scarf. Unfortunately, the last thing is often not very convenient for a little fidget. That's why We recommend replacing the scarf with a shirtfront. This wonderful item does not restrict movement, does not come undone, and perfectly protects the neck from cold wind and snow. A needlewoman with any skill level can knit this item. This will require a little patience and a couple of free evenings.
What you need to knit a shirtfront
In order for the process of creating the right thing to proceed easily and the end result to please you with its beauty and quality, you should be well prepared. For knitting, preparation consists of the following steps.
- Model selection. It depends entirely on the preferences of the future owner and the creative vision of the craftswoman.
- Taking measurements. A children's shirtfront requires the following data: neck circumference, measuring the distance from the base of the neck to the beginning of the shoulder and the length of the product.
- Selection of material and tools. This stage is very significant, so let’s look at it in more detail.
Which yarn to choose for knitting
 This item is intended for the cold season, which means the following requirements are imposed on the material.
- The fiber should protect well from the cold.
- The product should not be too thick, as it is worn under outerwear.
- The yarn should not irritate sensitive baby skin.
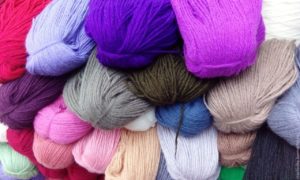
Based on these criteria, the best material would be natural fiber: wool, mohair, alpaca or angora. In this case, the threads should be of medium density, for example, with parameters 350 m/100 g.
Reference! For artificial products, you can use high-quality acrylic. It is quite soft, hypoallergenic and has a wide color palette.
How to choose knitting needles
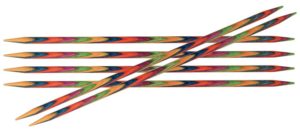 After choosing the yarn, you can select the appropriate tool. This can be done in three ways.
- Fold the thread in half and compare its thickness with the volume of the knitting needle. These parameters must be equivalent.
- Attentively read the information on the label skein. Typically, manufacturers indicate which number is preferable to knit.
- Run multiple samples different numbers and use the tool you like best. This option gives an idea of the appearance of the future product, its density and ductility.
Attention! Before use, wipe the knitting needles with a soft cloth. This action will remove invisible plaque from the surface of the instrument that forms on it over time.
If it is not removed, the canvas may become smeared, this is especially noticeable on white.
Models and patterns
There are many different models of children's bibs. They can be divided into the following categories.
- Circular. It is performed from top to bottom with a gradual expansion of the canvas.
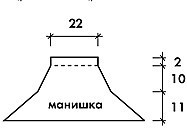
- Trapezoidal also made from top to bottom using the raglan method. In this case, the back may be shorter than the front.

- Square the shape resembles a sweater top. It is also made using the raglan method.

Rubber
All models have one thing in common: First, the neck part is knitted, which is done with an elastic band. It can be its various variations from simple to intricate patterns.
- Simple elastic band

- Complex variation
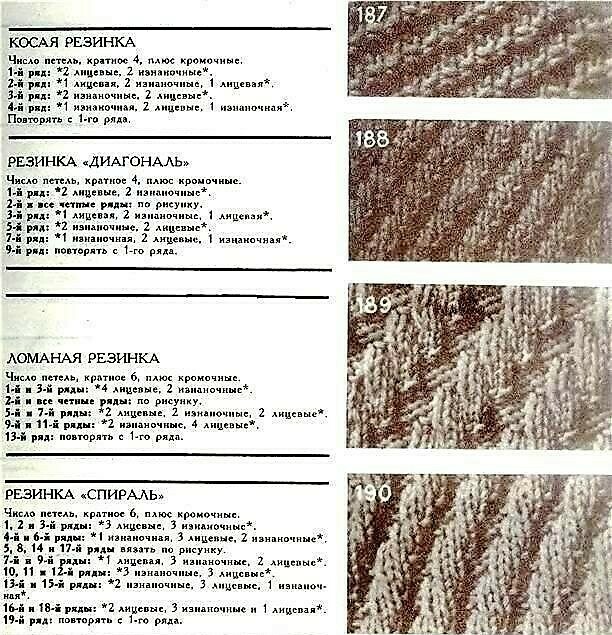
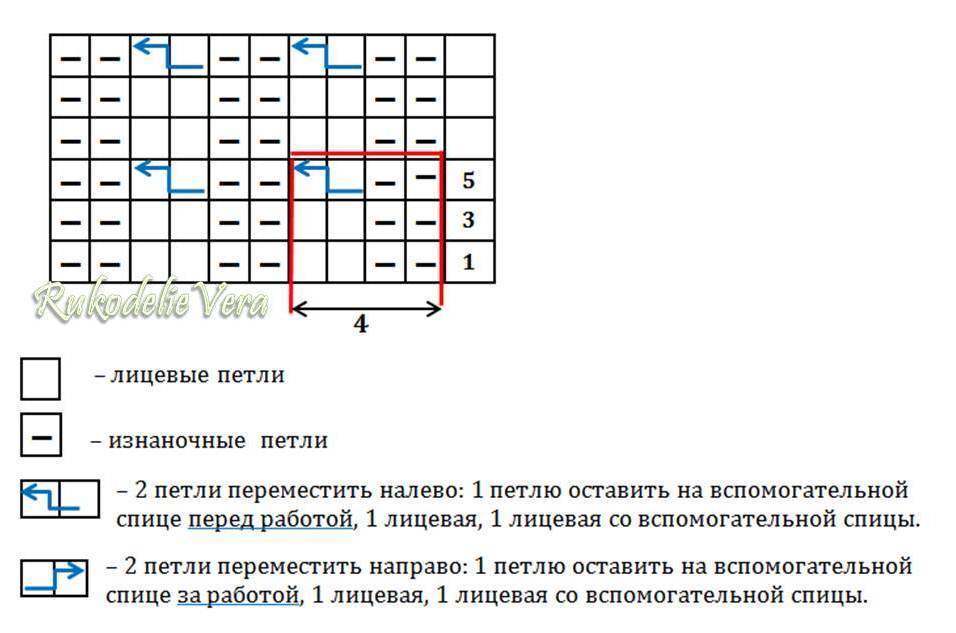
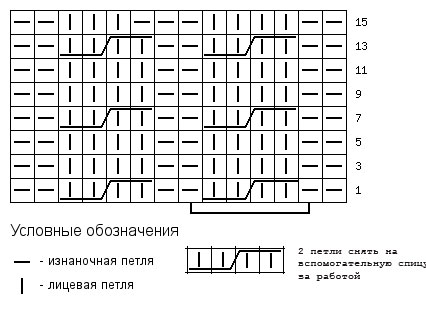
Pattern scheme
Next, various patterns are used for the canvas
- Knit, purl or garter stitch.

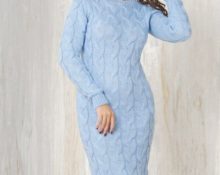
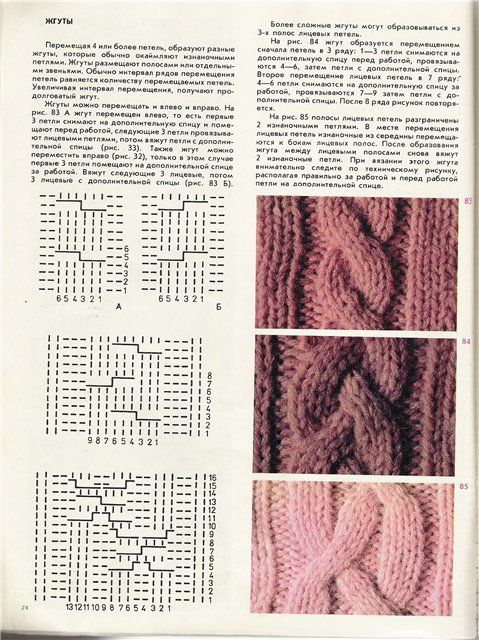
- Various types of weaves: plaits, braids, braids and so on.
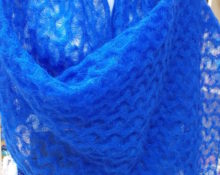
- Airy openwork patterns.

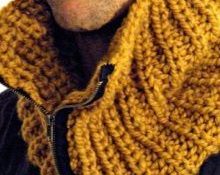
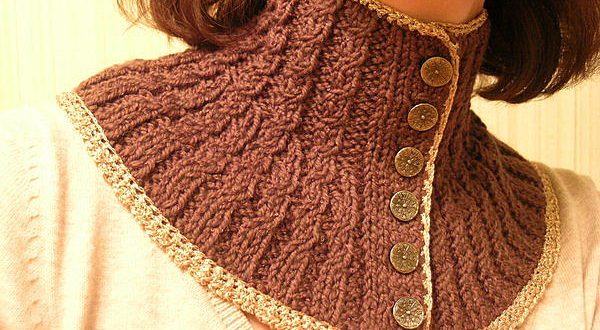
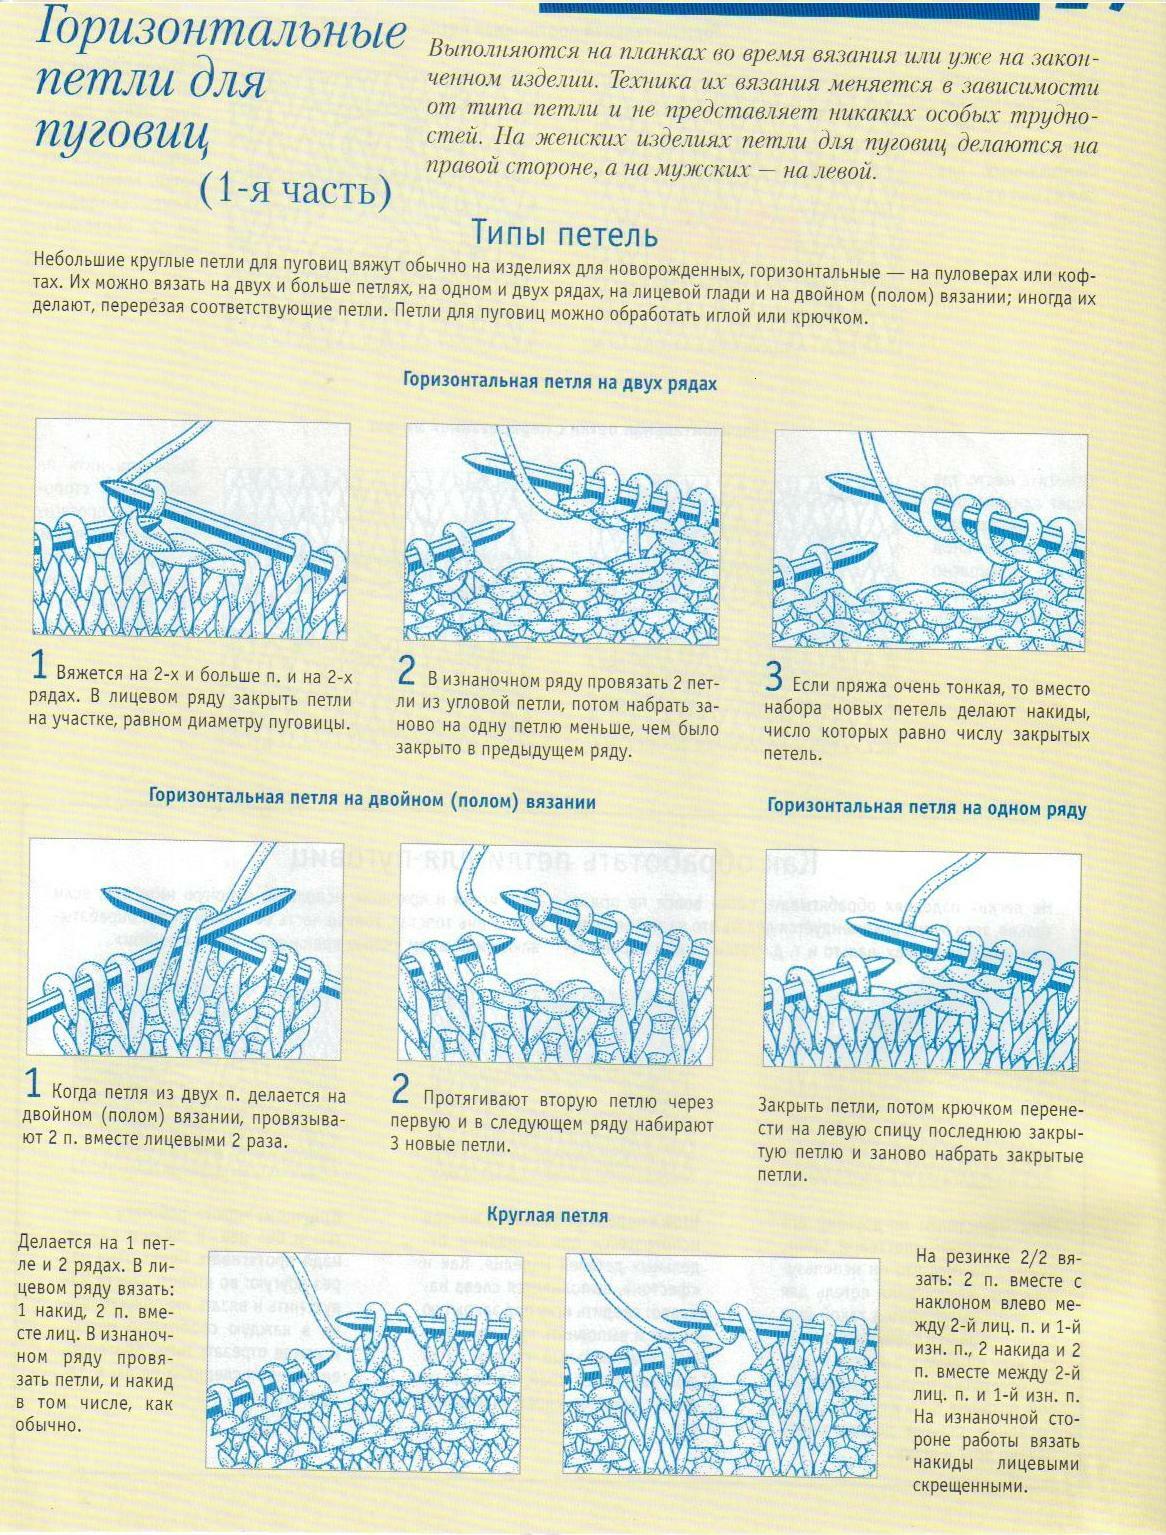
How to knit a shirtfront with buttons
In addition to the shape and pattern used, models of shirtfronts for girls can be divided into solid ones and variations with a clasp. The latter can be a zipper, buttons, Velcro or snaps. But buttons are the most common type.
For this incarnation you You will need a wool/acrylic blend yarn with parameters of 350 m/100 g of the main and contrasting colors and knitting needles No. 3.
Completing of the work
- Take measurements and create a pattern. You can make adjustments to the pattern below.
- Make a sample of patterns and carry out wet-heat treatment.
- Based on the pattern and sample, make the necessary calculations.
- Cast on the estimated number of stitches on the knitting needles and knit as follows: 6 stitches in stockinette stitch, pattern, 6 stitches in stockinette stitch.
Attention! On one edge of the stockinette strip, make holes for buttons.
- Having completed the upper part (neck), add the required number of loops to expand the fabric. In this example, the number of loops of the plait is doubled and the weaving is bifurcated.
- Make a fabric of the required size, and finish it with 6 rows of 2x2 elastic.
- Tie the edge of the item with a thread of a contrasting color using single crochets. At the same time, perform several rows along the bottom edge.
- Sew buttons.
- Carry out wet-heat treatment of the product.
Reference! Large beads can be used as buttons. In this version, the clasp will become a decoration.
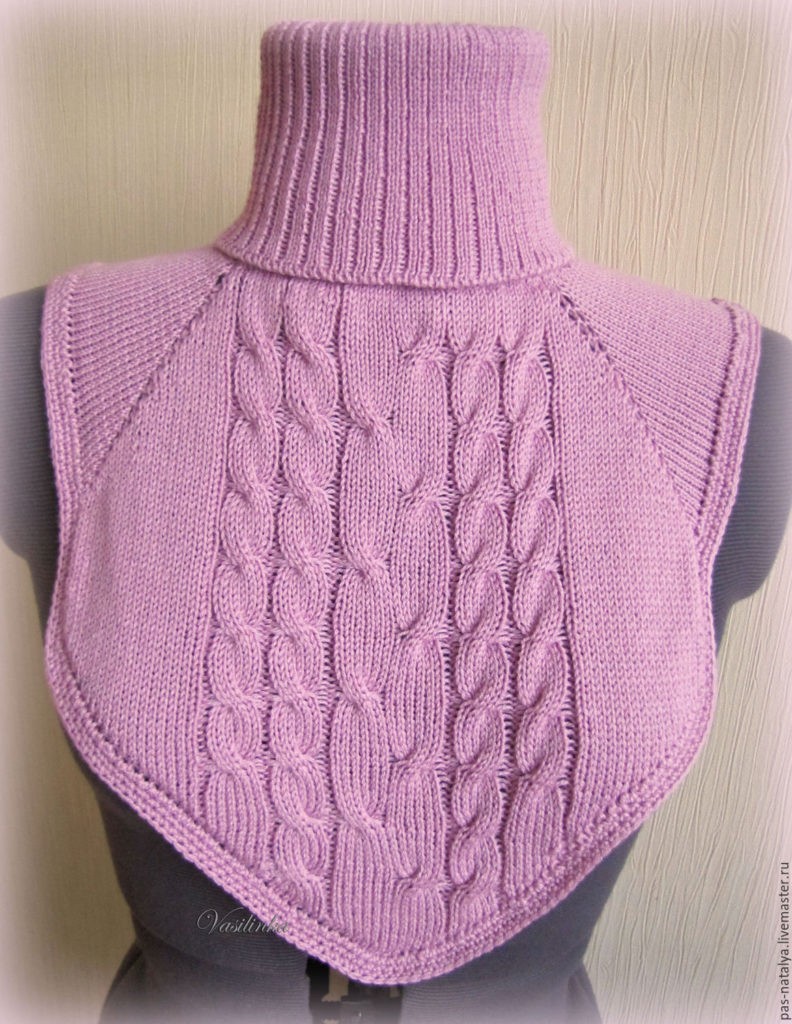
How to knit a shirtfront for children without buttons
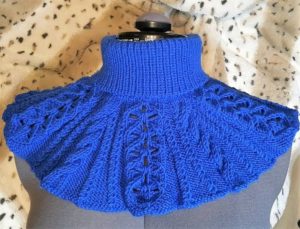
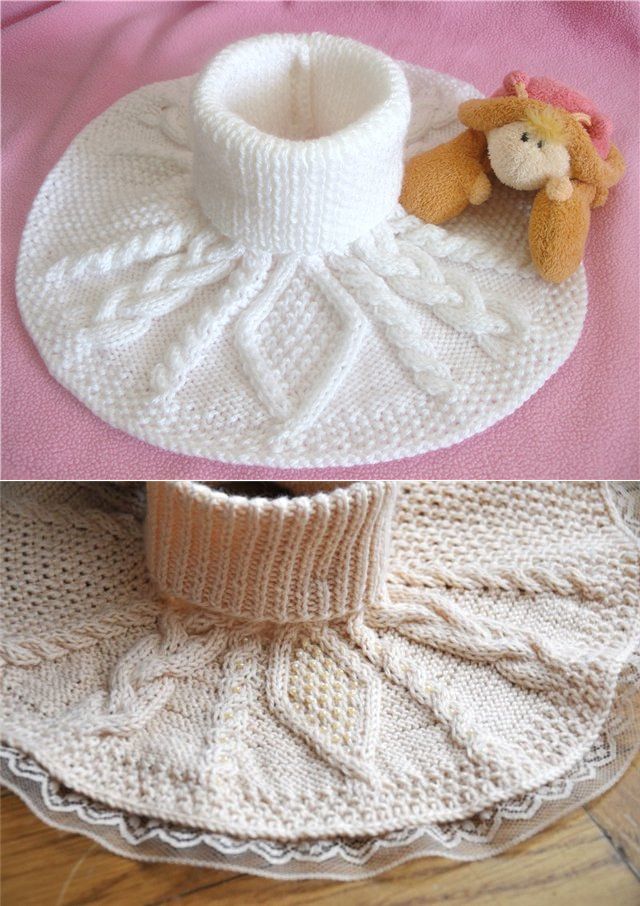
Now let's look at how a one-piece model is made. As an example, let's take a traditional variation with an elastic collar and aran patterns.
To realize you You will need acrylic yarn with parameters 350 m/100 g and circular knitting needles No. 3.5.
This product can be made in a circle (without a seam) or in straight/rotary rows. In the latter option, before the WTO, you will need to sew the fabric along the seam.
Description of work
- Cast on enough loops on the knitting needles and close the knitting into a ring. The head should fit freely through this hole.
- Knit the fabric with a 1x1 elastic band to a sufficient height.
Attention! The height of the upper part should be sufficient to create a beautiful lapel.
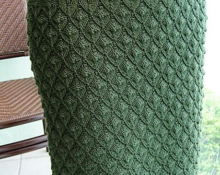
- Next, add loops to expand the fabric and knit alternating “braid”, “braid” and “rhombus” patterns.
Scythe
Tourniquet
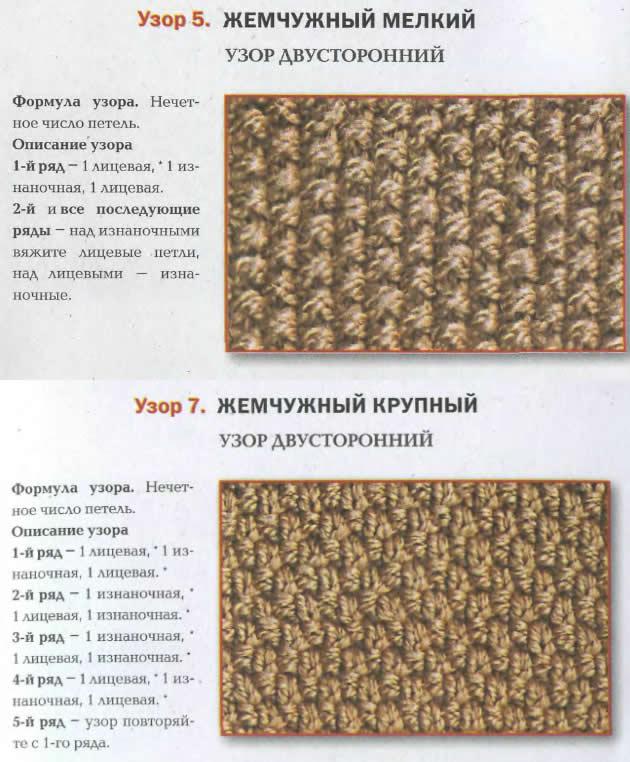
- Finish the product with a border of 6 rows of pearl pattern.
- Hide the ends and carry out wet-heat treatment of the product.
By making beautiful things for your loved ones with your own hands, you not only delight them with wonderful new things, but also show your concern for their comfort and health.
 0
0