 In inclement weather, you want to be sure that your child is dressed warmly. Many jacket models have an open neck. A fleece bib helps to cope with the problem of a bare neck and protects from the wind.. Let's talk in detail about how to cut a shirtfront?
What is a bib?
A shirtfront is an accessory that covers most of the chest and neck.
Women's and children's fashion was introduced from men's fashion and was then called "chemisette", from the French word meaning "shirt".
Can be worn over the head or has a clasp. In this case, it is fastened on the back or chest, rarely on the side.
The back is usually shorter than the front.
Types of bibs
 Models can be classified according to the manufacturing method, material, and location of the fastener.
Fleece bibs - an item of children's wardrobe, as they do not involve complex cutting techniques. Machine embroidery, appliques, chevrons and so on look great.
Types of fleece bibs:
- Models with Velcro fastening on the back.
- Shirts with buttons are often located in the front, being finishing details.
- Dickies with buttons.
Material and measurements for shirtfronts
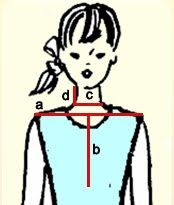 We need simple measurements:
- Neck circumference. – Measured at the base of the neck near the jugular cavity.
- Shoulder width (not for all models). – From the base of the neck to the shoulder line.
- Front length - From the neckline to the expected bottom of the product.
- Back Length – From the base of the neck to the expected bottom of the product.
- The height of the neck is from the base of the neck to the required collar height.
Advice! Some types of fleece do not fray, so there is no need to finish the edges. If your material frays, use an overlocker or a machine with an overlock stitch. You can also process the edge of the product with a narrow zigzag stitch, or with your hands - any seam “over the edge”.
Step-by-step instructions on how to sew a fleece bib
Circular shirtfront with Velcro
 The fastest model to make using the simplest pattern.
Required:
- Fleece – 25-50 cm, depending on the size of the child.
- Threads to match.
- Sewing supplies.
- Sewing machine.
- Velcro tape (Velcro).
Completing of the work:
- We measure the width of the child's shoulder - this is the main size of our pattern.
- We build a square on paper with a side equal to the resulting segment.
- Fold the square in four and round the ends to create a circle.
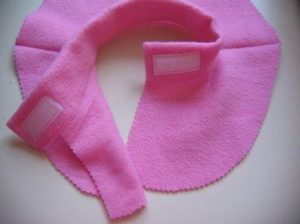
Inside the shirt-front is the circumference of the neck, the width of the product is equal to the width of the shoulder
Advice! At this stage we can change the shape - not a circle, but an oval, a flower, and so on.
- We measure the circumference of the child's neck.
- Cut a hole in the center of the circle equal to the circumference of the neck, plus 1-2 centimeters for a loose fit. We cut our “donut” along the radius - this will be the clasp.
- Making a pattern for a stand-up collar. The length is equal to the circumference of the neck, and the width is equal to twice the height of the collar. Add a couple of centimeters of length to the smell for Velcro.
- We cut it out.Seam allowances are needed to cut the collar pattern. Your collar is a double piece with a fold along the long edge.
- Sew the collar to the main part. We process the cuts as desired.
- Sew the sides of the collar.
- Sew on Velcro tape.
- We straighten the shirtfront.
- We process the sections of the main part.
- If desired, we decorate with embroidery, applique, rhinestones.
- Steam using an iron. You may miss the action if there are no folds.
- Let's try it on.
Triangular shirt-scarf
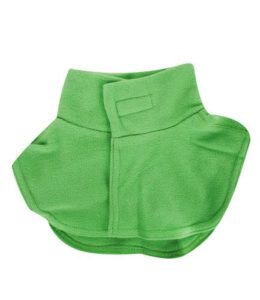
This model is different from a regular scarf distinguished by a thickened front part in the shape of a triangle. This part is made double and sewn to the scarf.
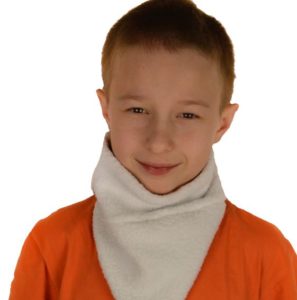 Velcro fastening at the back. You don’t have to make a pattern and just do the work on the fabric right away.
Required:
- Fleece – 25-30 cm, depending on the size of the child.
- Threads to match.
- Sewing supplies.
- Sewing machine.
- Velcro tape (Velcro).
Completing of the work:
- We cut out a scarf. The length of the product is equal to the circumference of the neck, plus 4-6 centimeters for a loose fit, plus a wrap for the fastener, plus seam allowances.
- We determine the width of the scarf, this is the height of the child’s neck.
- Our scarf is double, it’s up to you to decide whether to fold the short side or the long top side.
- We cut out a triangle of the dimensions you need - it is determined individually, we cut out two parts.
- Sew the triangle pieces together. We lay the seam only on the corner sides, leaving the base free.
- Sew the triangular piece into the scarf (in the center).
- Sew the sides of the scarf.
- We get a stitched two-layer scarf, in the center of which a triangular part is sewn.
- Sew on Velcro tape.
- Let's try it on.
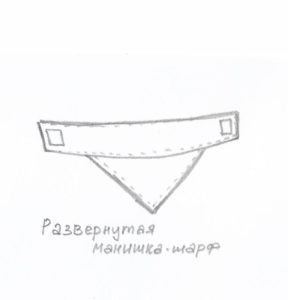
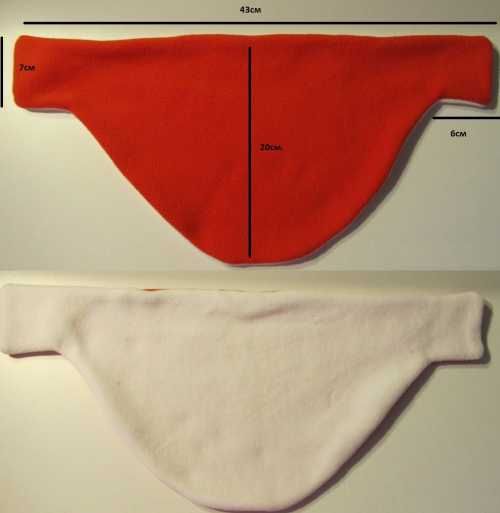
Unfolded shirt-scarf
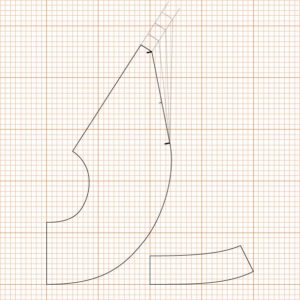
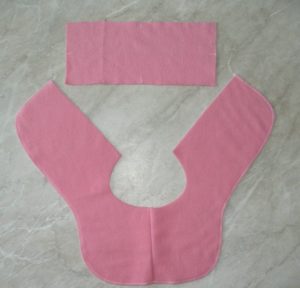
Option for a shirt-scarf pattern
Dickey with zipper in front
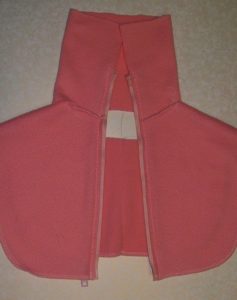 For example, a child’s T-shirt is suitable as a basis for the pattern.
Advice! Choose a zipper that is comfortable for your baby; some people find it difficult to handle a removable zipper.
Required:
- Fleece – 25-30 cm, depending on the size of the child. Scraps of fabric will do.
- Threads to match.
- Sewing supplies.
- Sewing machine.
- Zipper.
Completing of the work:
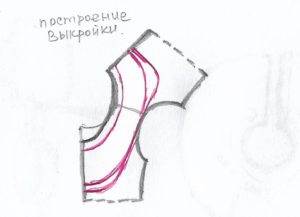
- We outline a comfortable T-shirt. We get patterns for the shelf and back.
- We combine the patterns with shoulder seams - we need a one-piece product.
- We enlarge the neckline and draw a new silhouette of the shirtfront. The length of the front and back can be the same or different.
- We cut out allowances of about 0.5 centimeters.
- We cut out the collar according to the principle of the circular shirt front model.
- We try it on and make adjustments.
- On the collar and main part we mark the middle.
- We do not sew another single collar to the shirtfront completely, but only the areas where there will be a zipper - 3-5 cm.
- The neck sections should be nested between the collar pieces.
- We sew in a zipper.
- Fold the collar in half and sew it on. You can pre-baste or pin it with pins.
- We completely connect the collar with the shirt front.
- We sew the zipper.
- If necessary, we process the edges with an overlock or a narrow zigzag stitch.
Advice! To process the cuts, you can use ready-made bias tape.
Sewing a shirtfront will take you about an hour, and your child will use it all winter. You can make several models for different clothes, then your child will be fashionably and warmly dressed.


 Advice! To process the cuts, you can use ready-made bias tape.
 0
0




good