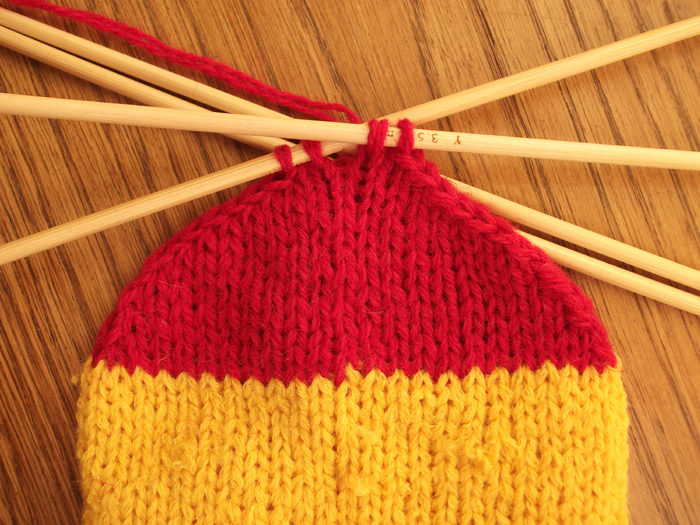
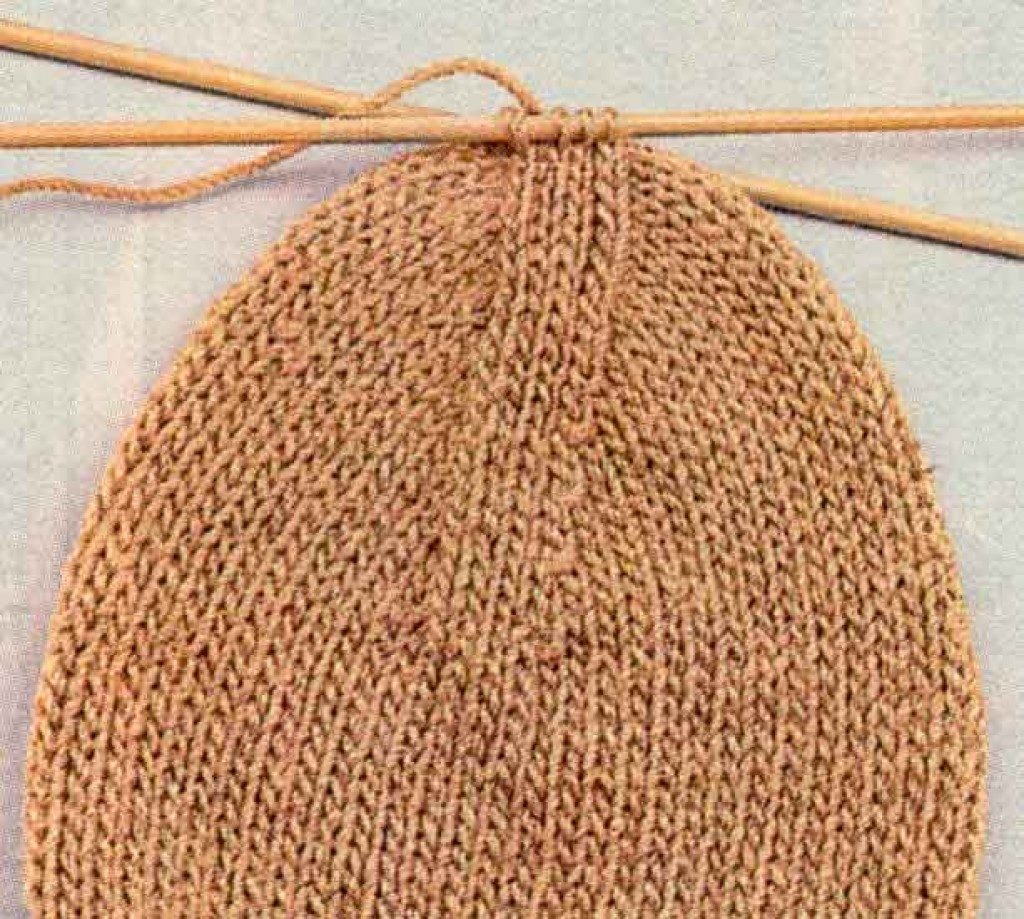
 A knitted sock is a fairly simple thing to make. But beginning needlewomen often have questions about the loop closure area. This part of the sock is called the toe. Knitting the toe will depend on how you do the work. The product can be knitted from the toe, on two knitting needles. Or use the classic method. In this case the work begins from the cuff and is carried out on four knitting needles.
REFERENCE! The common detail for all methods is that stockinette stitch is used for this section.
How to knit the toe of a sock for beginners
For beginner knitters, it is better to use two main methods: the classic and ribbon version.
Classic way
The classic variation consists of evenly decreasing the loops on two opposite sides.
This process looks like this:
- Having knitted the product to the place where the toes begin, we count the loops.
IMPORTANT! The number of stitches on the first and second needles should be the same as on the third and fourth.
- Now in each row you need to perform decreases from each edge. To do this, knit the last stitch of the first needle and the starting stitch of the second needle together. The final stitch on the third and the starting stitch on the fourth needle are also knitted together. If there is a difference, then we equalize it using decreases.
- Decrements should be made until 4 sts remain in the work. They are pulled together using a knitting needle.
- We fasten the tie and pull the thread to the wrong side. Carefully trim off the excess thread.
Often craftswomen secure the thread with a knot.
ADVICE! If you use this method, the knot should be located on the wrong side. Otherwise, try to pull it there using a crochet hook.
Belt method
With the tape method, two stripes are formed from the left and right edges of the product using stockinette stitch. They sewn in the middle with a knitted seam.
Completing of the work
- When knitting this section you need highlight the central four loops at the top and bottom.
Next in each row knit together the outermost central stripes and the loops located next to them. In this case, these extreme ones should be located on top. - Decrements are made until only the center stripes remain on the knitting needles.
- Next, sew the loops with a knitted stitch. To do this, use a needle with a round tip.
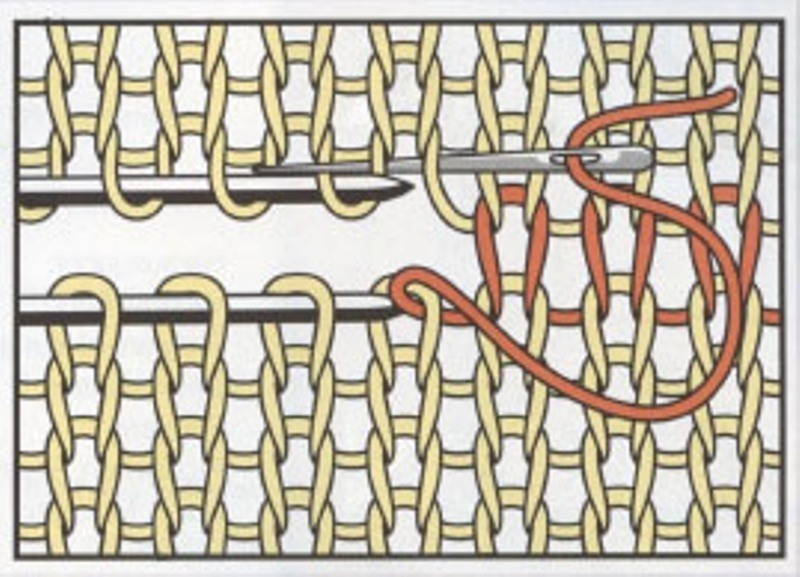
ATTENTION! Before you start decreasing, make sure that the top and bottom parts consist of the same number of loops.
Other ways to knit the toe of a sock
In addition to those listed above, the arsenal of knitting science has several more methods for performing this part:
- "Snail";
- "Propeller";
- "Star".
All these methods give a beautiful appearance and increase the wear resistance of the item.Let's look at each type in detail.
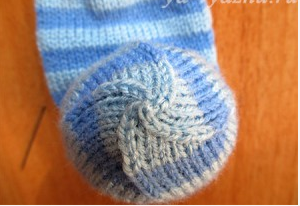
Snail
This method got its name from its appearance. It can also be called spiral closure.

Execution Process
- Having reached the decrease zone, knit every second and third stitch.
- Repeat this action until there are eight loops left in the work.
- Pull the remaining loops together using a needle.
- Turn the product inside out and carefully secure the tip with a knot.
- Trim the excess thread with scissors.
REFERENCE! A sock with this finish is ideal for wearing in shoes.
Propeller
This part creates an attractive pattern reminiscent of propeller blades. This closure is especially suitable for people with elongated toes.
Work process
- This type is used when knitting with four needles. To close, knit the two starting stitches together.
- Next, perform this action through the row. That is in one row we perform a decrease, and we knit the next without it.
- When approximately 1/3 of the total number of loops remains in the work, decrease in each row.
- Cast off the final eight stitches as follows. Thread a double thread into a knitting needle and tighten the loops tightly.
- Secure the tip to the wrong side.
Star
This method is quite interesting. In some ways it is similar to a “propeller”, but there are also serious differences.
How the work is done
- Having reached the desired section, count the loops. There must be an even number of them. If this is not the case, then reduce to even.
- On every spoke decrease two loops at a time. To calculate the place of reduction, divide the number of loops in half. The resulting number will indicate the second decrease loop.
- Knit together the initial two stitches and the second decrease stitch followed by it.
- Repeat this step for each needle.
- Knit as many rows as there are loops between knits without decreasing.
- Reduce in this manner until there are eight stitches left in the work.
- To finish the work, pull off the remaining loops using a double thread.
- Secure the tip to the wrong side.
Every homemaker is obliged to take care of the health of her loved ones and knit them a pair of wonderful warm socks. After all, this is not only a way to usefully while away a long winter evening with an interesting activity. But also the opportunity to please your loved ones with a warm gift made by caring hands. And warm him with a piece of spiritual warmth.
 0
0