 Almost every man has such an element of men's clothing as a jacket in his wardrobe. Some people prefer the classic double-breasted style, others prefer a modern casual style, but the jacket helps both of them look stylish.
Sew a men's jacket with your own hands
Sewing a men's jacket yourself is a very difficult task., especially for a novice dressmaker. Let's try to figure it out together using the example of sewing a single-breasted jacket.
Materials and tools
Basic materialsthat will be required:
- suiting and lining fabrics;
- a small piece of satin or thick cotton for the inside of the pockets;
- thin interlining for chest pad;
- dublerin (duplicating fabric);
- shoulder pads;
- buttons;
- threads in the color of the fabric.
Equipment and tools:
- sewing machine; overlock;
- iron;
- ironing board;
- scissors;
- pins;
- machine and hand needles.
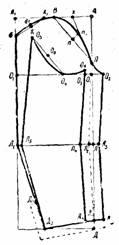
Jacket pattern
To create a jacket pattern, you need the following measurements:
- DI – jacket length.
- TP – waist in front.
- DTS – waist to back.
- DR – sleeve length.
- DP – shoulder length.
- OSH, OG, OT, OB – half-circumferences of the neck, chest, waist and hips.
- ШС – back width.
- GP – armhole depth.
Constructing a pattern
We will construct the pattern on a large sheet of paper.

We build the shelf and back:
- From the upper left point A, set the length of the jacket down (point D).
- Again, from A to the right, set aside the half-chest girth + an increase of 3 cm (point B).
- From B down, also set aside the length of the jacket (point C).
- We form an armhole, for this we set aside the value of OG/3 + 5 cm from A. From this point we draw a line to BC.
- We form the waist line: from A downwards we put aside the DTS measurement, from this point we draw a horizontal line to BC.
- From a point in the armhole to the right we put off the measurement ШС + 1 cm. From this point to the right we put off the measurement PG/4+1 cm.
- We form the neckline: from A to the right we put aside the measurement ОШ/3, from this point we put another 1.5 cm up.
- We form the shoulder line, side and central seam on the back, draw the neckline with a curved line.
Making a sleeve pattern:
- From the top left point we build a rectangle: to the right we put the width of the edge, down – the height of the edge.
- Place the elbow level down.
- Draw the front seam and sleeve hem line.
Sewing steps step by step
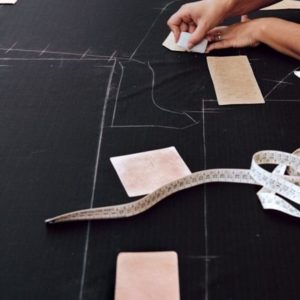
We lay out the pattern pieces on the main and lining fabrics, trace them, and cut them out taking into account the allowances.
Stage 1. Assembling the chest pad:
- To do this, we seal the side with non-woven material.
- We carry out wet-heat treatment of parts.
- We glue the parts with duplicating adhesive fabric (dublerin).
- We make internal pockets and sew down darts.
- We make internal pockets on the lining:
- Making a cardboard template for the pocket.
- We reinforce the pocket leaf with two layers of non-woven fabric.
- We make a flap with a leaf along the intended entrance to the pocket, and put a stitch around the leaf.

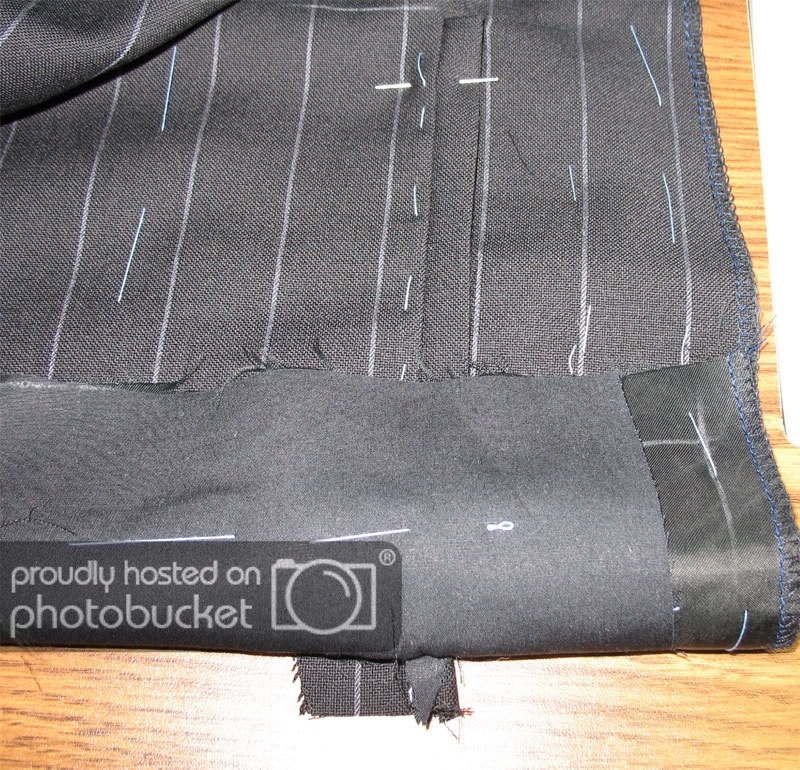
Stage 2. Assembling the lining no sleeves for now, i.e. we sew down all parts of the lining and sleeves, but do not sew the sleeves to the body of the lining. Since the shoulder seams on the lining fabric stretch, they need to be reinforced with bias tape.
Stage 3. Assembling the shelves and back from the main fabric:
- We make side seams and iron them.
- We make a cut for the flaps of the side pockets.
- We strengthen the leaf with non-woven fabric, fold it face to face and stitch along the narrow sides.
- We cut the allowances close to the seam, and trim the excess fabric diagonally at the corners.
- We turn the leaf inside out and iron it so that the seam is not visible on the front side.
- We make a pocket. We fold the pocket burlap face to face with the jacket, the burlap allowance should face down. We baste the leaf and burlap of the pocket horizontally.
- From the inside we sew a stitch from one edge to the other of the leaf, grabbing the pocket burlap.
- Carefully cut the pocket in the middle, not reaching one centimeter to the edges. We tuck the burlap on the wrong side. We turn the leaf up.
- Glue the interlining to the fold of the side of the shelf.
- Sew on the lining and chest pad.
- We sew the shoulder seams of the back and shelves without catching the side padding. Iron the seams.
- We strengthen the collar with non-woven fabric and sew down its side seams; sew in the collar.
- We process the slots.
- We bend the bottom of the product.
Stage 4. We sew in the sleeves and sew in the shoulder pads:
- Sew the lining sleeves to the jacket sleeves in this way. We insert the lining sleeves into the jacket sleeves face to face and sew them along the hem line.
- Turn the lining sleeve inside out and insert it into the sleeves of the jacket. Iron the hem of the one-piece sleeve.
- We baste and sew the sleeves of the lining to the lining of the jacket.
Stage 5. Hem the bottom of the lining fabric, for this:
- We turn one part of the bottom to the wrong side, not reaching the middle by about 10 cm, and sew down the lining and the main fabric.
- We do the same with the second half.
- There remains an unstitched middle, approximately 20 cm. Fix the hem, iron and press the unstitched area, bending it to the desired width.
- We baste the unstitched part, and then sew it on by hand with a seam with the needle inward.
- Iron all seams.
Stage 5. Sew the buttons where they were planned.

Stage 6. Making buttonholes:
- From the side line at a distance of about 2 cm, set aside the width of the loop.
- We make fixing snares along the side and around the loop.
- Carefully make a slit for the loop.
- We process the loop on a sewing machine.
- Similarly, we make the second loop on the front and the loops on the sleeves of the jacket.
With this our jacket is ready! I had to work hard, but the result is worth it!
 0
0


Why is there a photo of the tailoring of the trousers attached to the description of the tailoring of the jacket?
Hello Tatiana! Thanks for the note, it's already been fixed.