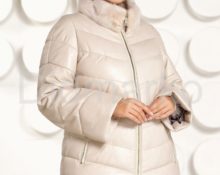
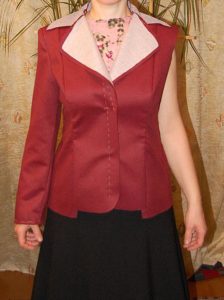
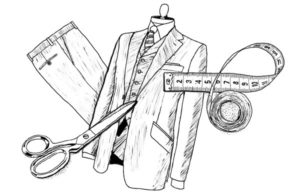
 A jacket is an indispensable item for working in the office, walking or going to the cinema. But there are often cases when a long-awaited purchase turns out to be a size too big or you suddenly lose weight, but you don’t want to part with your favorite jacket. What to do in this case? Leave it collecting dust in the closet? Of course not! First, try sewing a jacket yourself, and our tips will help you with this.
Is it possible to sew a jacket to size?
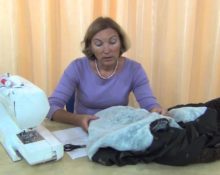
Sewing a jacket is not as difficult as it might seem at first glance. But it is worth remembering that this is a painstaking task, so you need to be careful and careful. The very first and most important thing you have to do is take measurements and correctly count them on the product. But first things first. Here is the algorithm for your actions:
- put on the item and identify the problem area;
- decide whether to shorten the length;
- raise your sleeve;
- narrow the sleeve;
- adjust darts;
- reduce in the area of the side seams.
Surely you once learned to sew at school or under the guidance of your mother, so all these operations are unlikely to cause you any difficulty. If you don’t want to do this yourself or are afraid that your skills are not enough, then don’t despair - you can always turn to professionals for help and take the jacket to a studio, but we’ll talk about this a little later.
How to tailor a jacket to fit your figure
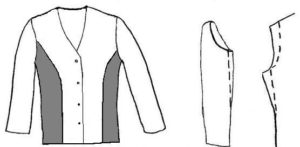
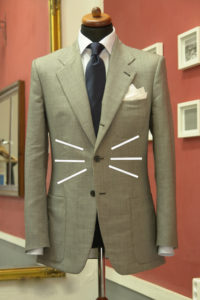
So, you have decided to sew your jacket yourself. Now you need to determine exactly where it needs to be sutured. Usually women lose weight in the chest or waist and this is what we will talk about in our article.
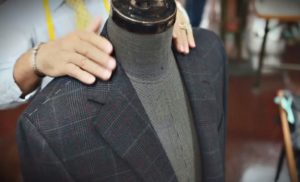
How to sew a jacket at the shoulders
Follow the presented algorithm.
- We take measurements.
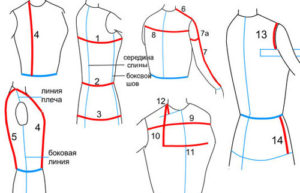
First we deal with chest girth - do not forget that you need to measure at the points of the chest that protrude the most, otherwise the jacket may be so sewn in that it becomes too tight for you, and you will constantly experience discomfort. On the back, the centimeter should be located just above the shoulder blades.
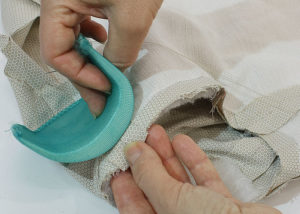
- Now we tear off the shoulder pads.
IMPORTANT!
If there is a lining, be sure to rip it open - the side seam is torn out by 15 cm.
Now we place the shoulder pad so that its dense half is a centimeter from the shoulder. This way you can determine what size the cutout will be. The resulting okata should be raised and attached on one side and the other to the seam on the shoulder. Then make sure it is pinned correctly to the shoulder seam and the resulting sleeve fits exactly how you want it.
- After this we begin marking.
Be careful and attentive - something will go wrong, and you will have to start the work all over again and waste time and effort on something that could have been done once.
Inside the lining, use chalk to mark a new shoulder line.On the fabric you need to mark the places where the sleeves will be sewn. Also determine the locations for new grooves.
- We rip off the sleeve.
After these steps, you can already rip off the sleeve, but before that, do not forget to mark the top and bottom points. There may be excess fabric on the front and back, which will need to be cut off, but you must leave a seam allowance.
Ask an experienced seamstress for help if these tasks seem difficult.
IMPORTANT!
At this stage you can change the sleeve width.
Most likely, you will need to make the sleeve narrower. Pay special attention to this, because by tailoring the jacket but leaving the sleeves too wide, you risk getting an awkward outfit that will look untidy and ugly.
- Sew the sleeve back.
When all the necessary manipulations with the sleeves are completed, you can sew it back. To do this, return the sleeve back to the armhole and make sure that the sleeve is slightly larger in size. Don't forget to put the shoulder pad back in place; its thick part should protrude beyond the sleeve sewing line. Then hand stitch it to the raised part of the sleeve cap seam. Regular stitches will do, so no special knowledge is required from you.
- We sew the darts.
And the final stage of work is to sew the darts along the previously marked lines.
IMPORTANT!
Don't forget to iron fresh seams.
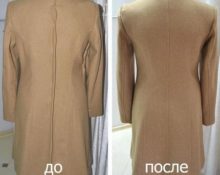
 Now is the most exciting moment - try on the jacket and check if you are happy with the way it fits and if you did everything right! If the result is satisfactory, then you can sew up the ripped seam with a clear conscience. Job finished!
Sewing the jacket at the waist
For this procedure, the algorithm of actions is as follows.
- Taking measurements.
If you need to sew the jacket in at the waist, then the first step is still taking measurements.We have already mentioned the chest circumference and the narrowest part of the waist.
IMPORTANT!
Watch how hard you squeeze the tape when measuring your waist. It shouldn’t dangle, but you shouldn’t tighten it too much either - you’ll end up sewing the jacket in so tightly that you’ll experience discomfort during further use. The best option would be a tight but not tight girth (like a corset).
- Product fit.
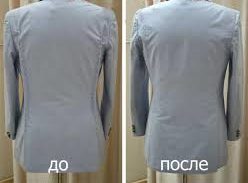
Turn the jacket inside out and mark the new side lines with pins. Be careful when trying it on later so as not to prick yourself. After marking, turn the item back right side out and try it on. If everything fits perfectly, then you can start working. If you are not satisfied with something, repeat the procedure and place the pins a little differently. Surely next time you will do better.
- We sew the jacket on the sides.
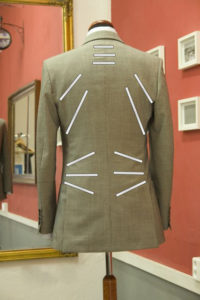 So, you are happy with the way the jacket fits - now you can sew in the sides. You can move away from regular darts by about 1-2 cm and sew them again, but triangle-shaped darts can be transferred: pinch the fabric to the distance from the previous seam that is required and secure. Sew a new dart along the old mark at a distance of about 1 cm.
Sewing a men's jacket
 For men, a jacket is an integral part of their wardrobe. Recently, you can increasingly see men in fitted models, and more and more new fashion trends are appearing. But let's leave that for the designers. What to do if your man bought something a size too big in a store or, after losing a few kilos at the gym, can’t wear a jacket to work because it’s loose? Don't be upset.
A man's jacket differs from a woman's in that it does not have darts. In addition, if you want a classic version, you won’t have to sew it in at the waist.
How to properly sew a men's jacket to size
 You will need to suture the sides and shoulders in the same way as described in the suturing of the female version. Don't forget that there are no darts in a men's jacket. You can make them yourself if you need to sew the item in at the waist. To do this, sew a button at the waist and make the darts yourself in the area from the middle of the jacket to the end of the armhole on the back side. Remove approximately 1cm from the back seam.
IMPORTANT!
Please note that in order to sew a men's jacket to size, that is, to make it smaller, there must be appropriate reserves in the seams. Typically, such stocks on ready-made store items are minimal, so you should be careful when working so as not to spoil the jacket.
Which is better: to have it sutured yourself or in a studio?
 We have already said that it is also possible to take the jacket to the studio. Then you can be sure that the work will be done professionally, and you will be satisfied with the result. Of course, if you choose a proven studio where qualified specialists work. Plus, you won't have to waste your time on what others can do. But then the question of price arises. So how much does it cost to have a jacket sewn in a tailor?
How much does it cost to have a jacket sewn in a tailor shop?
Of course, prices fluctuate depending on the city you live in, as well as the original condition of the item. But here are approximate prices:
- sew up sleeves - from 700 rubles;
- suturing the sides - from 600 rubles;
- changing shoulder seams - from 800 rubles;
- to sew along the middle seam of the back - from 550 rubles.
As you can see, the prices are very affordable, but still, it’s up to you to decide what to do with a large jacket.It is likely that someone will not want to pay money for something that they can do themselves, and at the same time improve their sewing skills, which may be useful in the future.
 0
0