For every parent, the child’s comfort during sleep is important. The slightest discomfort can mean a sleepless night for the whole family. Healthy sleep means vigor and good mood for the whole day. Comfortable pajamas will help your baby get a good night's sleep. But choosing a ready-made item is not always possible. The quality of tailoring, choice of material, and price depend on the manufacturer.
As a rule, sleepwear made from natural fabrics is very expensive. But it will not always satisfy the buyer. The baby may not like the appearance. And he definitely won’t sleep in ugly pajamas. Cheap things are made from synthetic fabrics. You won't be able to sleep in something like this either. It will be hot under the blanket, but cold without it.
The best way out is to sew a new thing with your own hands. To do this you need to choose high-quality material and model. Then you can definitely take into account all the child’s needs. After all, it is important that he is the one who enjoys wearing pajamas. Putting on night clothes means going to bed soon.Many children are capricious before bed. The anticipation of changing into your favorite item will help avoid such situations.
How to sew pajamas for a child with your own hands
Before you start sewing, you should study the types of fabrics and modern models of sleepwear.
Choosing materials for pajamas
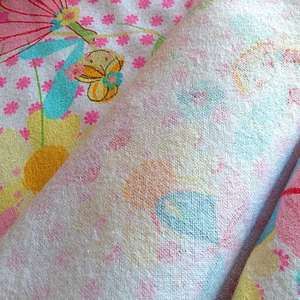
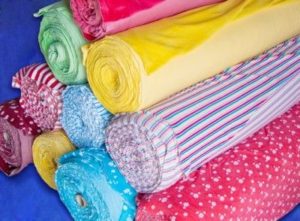
The choice of material determines the durability of the sewn item, comfort during sleep, as well as aesthetic characteristics. Modern production is ready to offer consumers unique colors, varied textures, and different fabric compositions. For pajamas you should choose only natural fibers. Synthetics will be highly electrified, and the temperature of the room will feel uncomfortable.
For the cold season, it is worth paying great attention to the following fabrics:
- flannel;
- thick knitwear;
- terry cloth.
 Flannel features a smooth, even surface. It is made from thick threads by repeated weaving. This type of material can be made from wool or cotton threads.
The fabric is also dyed differently. The pattern can be printed, that is, already applied to the finished woven fabric. Or maybe painted. This type of pattern is made from pre-dyed threads and weaved into a variety of patterns. Flannel has excellent wear-resistant properties. The fabric does not stretch or deform when worn. It is soft to the touch, retains heat well and keeps you warm in cool weather.
IMPORTANT! If your child has allergies, it is better to choose a printed flannel. The dyes are applied on one side, the outer side, while the inner side is not painted. It is completely made of natural fibers.
Thick knitwear has great elasticity. The fabric is breathable and perfectly absorbs moisture.This type of material practically does not wrinkle and is wear-resistant. Thanks to the increased density, such clothes will keep you warm in the cold season. Using a special weave of threads, the fabric does not stretch when worn.
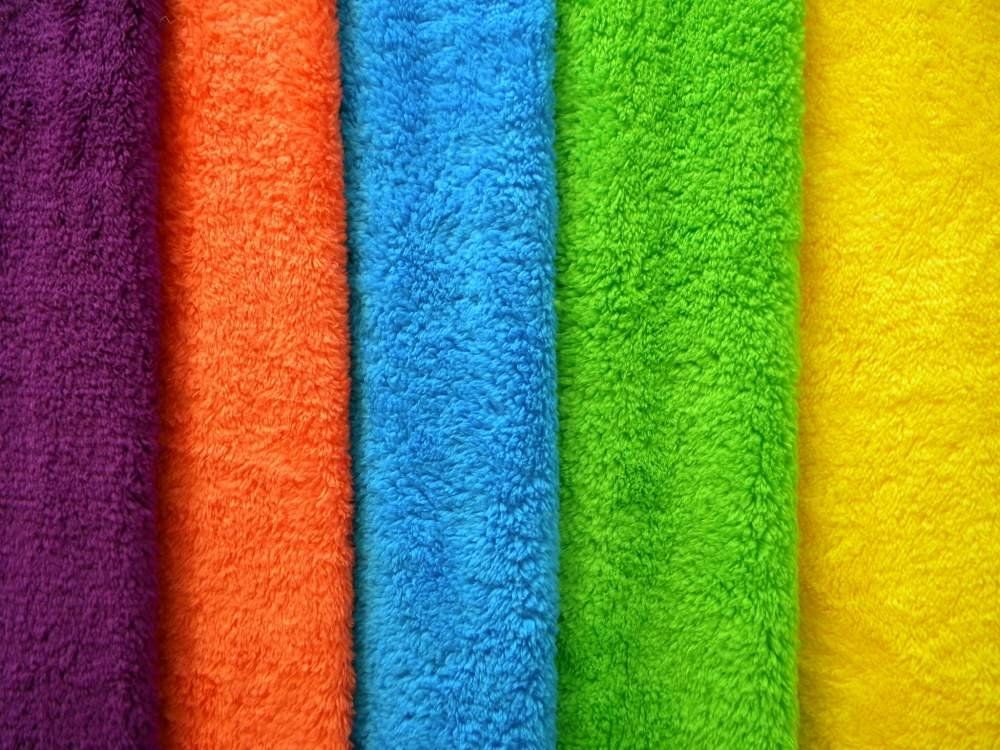 Terry fabric – one of the warmest materials. Its outer surface is covered with small fibers. These are the loops of the main threads. Thanks to these fibers, a layer of air is maintained, which provides warmth and comfort to a person. The fabric is completely hypoallergenic and is made from natural cotton. Densely very soft due to the protruding pile, it absorbs water well. Synthetic fiber admixtures are often added to terry, which imparts wear-resistant and elastic properties to the material.
Natural terry cloth wrinkles easily, but the fibers hide this feature. The fabric ideally provides air exchange and thermoregulation.
For the warm season, or rooms with high room temperatures, you should choose a fabric that does not have a high density:
- chintz;
- thin knitwear;
- silk.
Chintz one of the most inexpensive materials. The fabric is very soft and pliable, easy to handle. This effect is achieved by loose weaving. The color of the fabric is imparted by surface dyeing. Color may change over time. The fabric is highly hygroscopic.
Thin knitwear unlike dense, more elastic. It has a lower thread weave density. Its air permeability is higher, which ensures increased heat transfer. Thick knitwear retains heat from the human body. Due to this, heat is retained.
Silk - one of the most expensive types of material. Due to its smoothness, softness and pleasant shine, it is considered the most preferred material for pajamas.It gives sleepwear a great look. Due to the flat seams used for sewing, it does not chafe the skin. Silk pajamas provide the best air exchange. It is absolutely not hot in it, even at high temperatures. However, this material is practically not used for children. And it’s not a matter of the high cost of the material, because its consumption for a children’s product is very small.
ADVICE! The best material for summer children's pajamas is thin knitwear or chintz. It is better not to choose silk for children, as it is very difficult to remove difficult to wash stains from it.
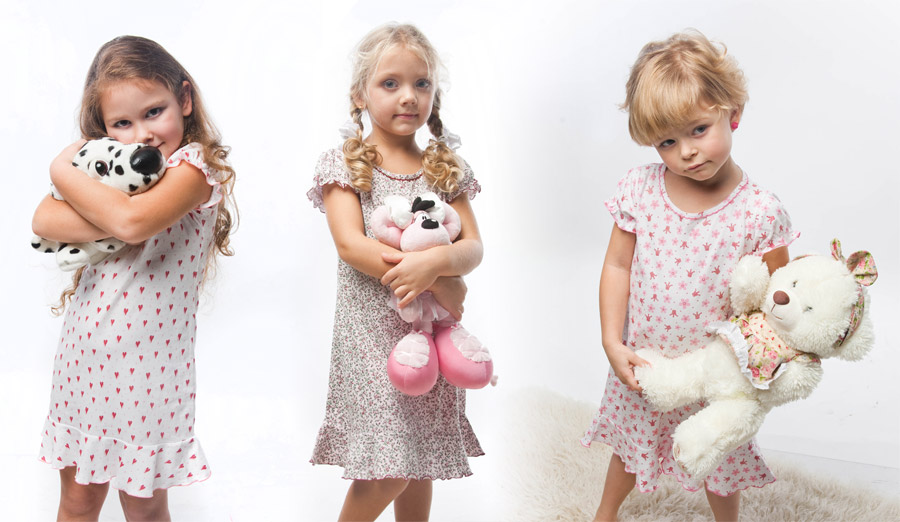
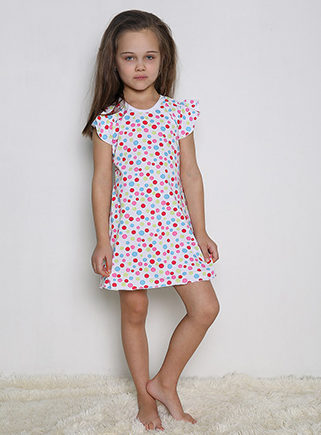
Sewing pajamas for girls 4–6 years old
There are a lot of pajama models for girls. This could be a suit of trousers or breeches, overalls, covers for the little ones. The shirt can be long or short sleeved. Or you can sew shorts and a T-shirt. Which model is the best depends on the temperature of the room in which the child will sleep.
Let's consider the simplest option for girls - thick knit nightgown.
Before you start working, you need to accurately determine the size. For this we will need a measuring tape, paper and a pen.
The most difficult thing in this matter is to get the baby to stand upright. Next, we tie bias tape around the child’s waist, this will make it easier to take measurements.
We take measurements as shown:
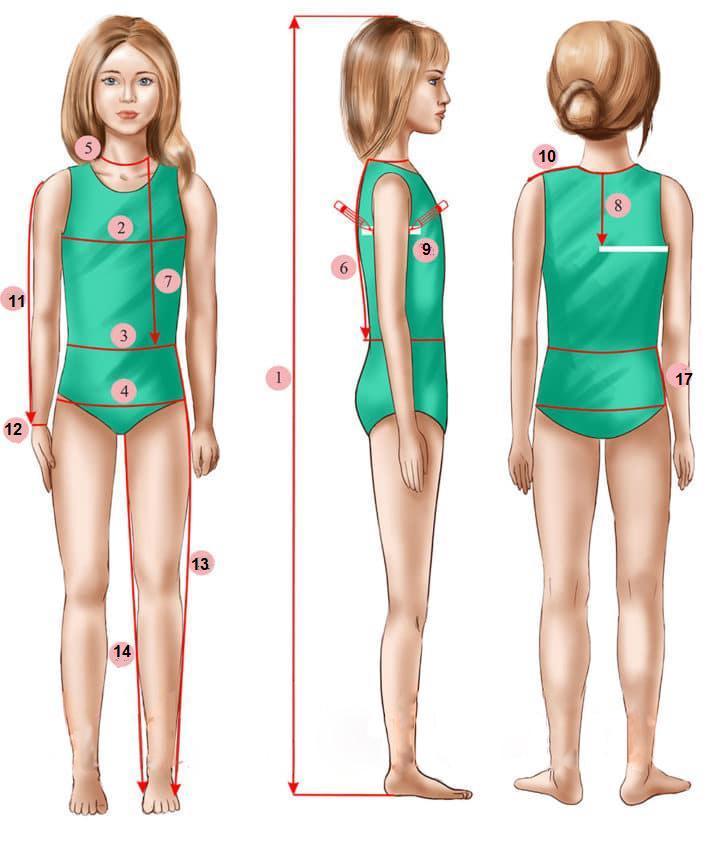
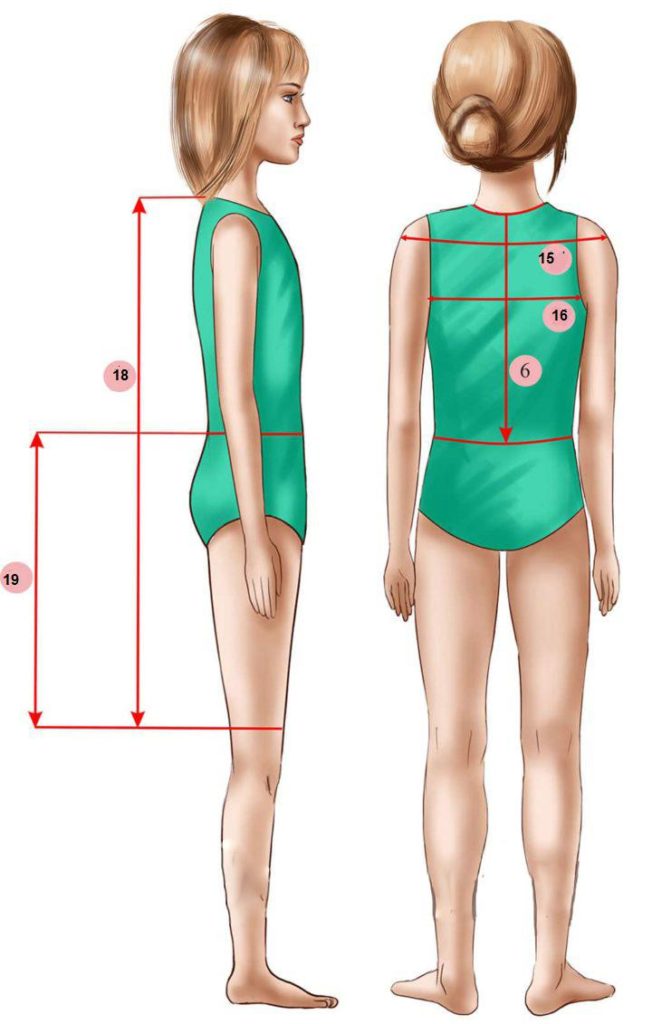
Dimensions you may need:
- Height.
- Chest circumference.
- Waist circumference.
- Hip girth.
- Neck circumference.
- Back length to waist.
- Front length to waist.
- Armhole depth.
- Armhole width.
- Shoulder length.
- The length of the sleeve.
- Wrist circumference.
- Leg length from the outside.
- Leg length from the inside.
- Shoulder width.
- Back width.
- Hip height.
In order not to lose the measurement numbers from memory, we write down all the parameters on a sheet of paper.
IMPORTANT! The measuring tape should fit snugly to the body.
Pajama pattern
Let's start creating a pajama pattern with one-piece sleeves. This means that you won’t have to cut out or sew on a sleeve separately. For beginner needlewomen, this will be the easiest option.
 Building a pattern step by step:
- First, draw a rectangle on a large sheet of paper. Its length should be equal to the length of the finished product. The width is equal to 1⁄4 of the chest circumference. We add 3 centimeters to the seams. We put the main points A, A1, H, H1.
- We retreat 3 centimeters from A down. We sign point P1.
- From the same point A we retreat 8 centimeters and place point P1. This will be the beginning of the shoulder.
- We connect A and P1 with a rounded line. This will form the neck of the back.
- From point A we retreat 8 centimeters down, put point P2, connect it to P1. This will create the front neckline.
- Let's start with shoulder tilt. We retreat 3 centimeters from A1 and mark point P2. We connect P1 and P2.
- Next, draw the waist line. To do this, from point A we retreat down the length of the back to the waist. Mark point T.
- We draw a parallel straight line to the segment H-H1 and place point T1. From point T we step back 1⁄4 of the waist circumference to the right, add 3 centimeters and place point T3.
- The length of the sleeve in this model will depend on the length of the shoulder + how far the sleeve will go down. We'll take 25 centimeters. We retreat this length from point P1 and mark point P3.
- From it downwards we measure the required sleeve width and put P4.
- From point T3 we draw a straight line upward, at the intersection with the straight line from P3 we place point O. We connect P4 and T3 with a rounded line.
- We connect H1 and T3. We retreat 2 centimeters from H1 upward and mark H2. To N we draw a smooth line.
Sewing steps
- The first step is to stitch the shoulder seams. Next, they should be overlaid or overcast to prevent the fabric from unraveling. Be sure to iron each seam.
- The second step is to sew the side seams, finish and iron. Trying on should not be neglected.
- The neck width should be checked very carefully. If the shirt does not come off easily enough, the neckline should be enlarged. From the remaining material we cut a strip 5 centimeters wide, the length should be equal to the circumference of the head plus 2-3 centimeters at the joint. We sew the resulting strip together and iron the seams. Next, fold it in half and sew it to the neckline.
- Let's start processing the bottom of the product. We overlock or zigzag the bottom edge, then bend it 1-2 centimeters, sew it together and stitch it. We do the same with the sleeves.
The girl's nightgown is ready!
Sewing pajamas for a boy 10–12 years old
Pajamas for a boy will be a little more difficult to sew. Since it consists of two elements: a T-shirt and trousers. How to take measurements is described above.
Let's start by creating a pattern.
Constructing a pattern
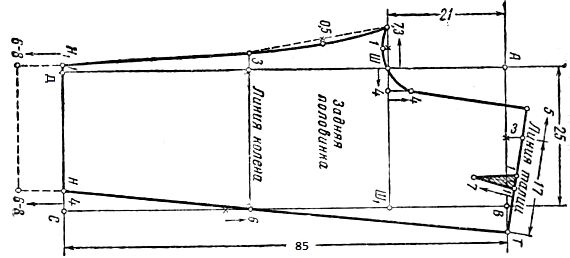
- Front half of trousers.


- Draw a rectangle, the height of which will be equal to the length of the trousers along the outer edge. We put ABCD points. The width is equal to 1⁄4 of the circumference of the hips plus 6 centimeters for the seams.
- From point A downwards, measure 1⁄4 of the circumference of the hips and add 2 centimeters. Mark point W.
- From point Ш to the right we draw a line and place point Ш1. It must intersect with the sun.
- We retreat 4 centimeters to the left of Ш1, and another 4 centimeters upward perpendicular to the first point. We draw the line until it crosses AB. We smooth out the right angle.
- Next, retreat 1⁄4 of the waist volume and add 3 centimeters. We retreat this dimension to the left of T. We get point T1.
- Straight line Ш1С must be divided in half and set aside 6 centimeters upward. This will be point 6. From it we draw a straight line to the left and intersect with AD.
- Divide ShSh1 in half. We draw lines up and down through the middle of it. Upper – T2.
- We retreat 3 centimeters from point D, we get point H1.Draw a connecting line to N.
- We retreat 17 centimeters down from point A and connect it to T1.
- For darts, we retreat 3 centimeters from T1 downwards, draw a rectangle 1.% centimeter wide. They need to be sewn first.
- Back half of trousers.

- We begin the construction with a rectangle ABCD. AB – add 6 centimeters to 1⁄4 of the width, AD is equal to the length of the trousers along the outer seam.
- Down from A we retreat 1⁄4 of the circumference of the hips and add 2 centimeters. Mark point W.
- To the right of point Ш we draw a line until it intersects with ВС. This will be point Ш1.
- To the left of it we retreat 1⁄4 of the distance between W and W1 and add 1 centimeter.
- We divide Ш1С into two equal parts. From the middle we measure 6 centimeters. This will be point 6.
- From point 6 to the left we draw a straight line and extend it by 3 centimeters after crossing with AD. Let's put point 3.
- From point 3 to the right, draw a waist line 1⁄2 of the waist volume. From point 3 we draw a line to the left 5 centimeters.
- Next, we divide the segment 7.3 Ш into two equal parts and measure 1 centimeter down. To the right of point Ш we measure 4 centimeters to the right and up. Draw a straight line.
- To get point H, you need to move 4 centimeters to the left from point C.
- We retreat 1 centimeter to the left of D, this will be H1.
- We connect H and H1, T and N.
- Using a dashed line we combine 7,3 and 3 and divide into two equal parts. From the middle to the right and left we put aside 1 centimeter, down – 7 centimeters.
- Connect 1 and 7.
- T-shirt.

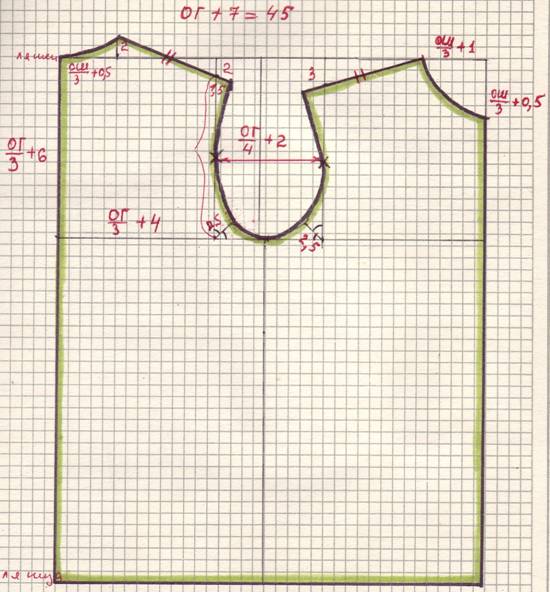
For the T-shirt pattern, we build a rectangle. The width is equal to the chest circumference, the height is the required length of the product. Next, follow the instructions in the picture. In this pattern, the T-shirt will have one side seam. Material: elastic knitwear.
Sewing steps
- The first step is to fold the front halves of the trousers right side down.Sew the center seam. Let's do the same with the back halves.
- The second step is to place the halves on top of each other and sew up the inner seam. The distance from the edge must be at least 7 millimeters.
- The third step is to sew the side seams.
- Next comes the processing of the bottom of the trousers. We bend it twice and stitch it.
- To sew a belt, cut a strip of 10 centimeters wide from the remaining material; its width should be equal to the waist circumference plus allowance for elastic and seam allowances. Sew around and iron. We sew the belt to the trousers, remember that we do not sew it all the way, as you will need to insert an elastic band.
Sew a T-shirt:
- We start with the shoulder seams.
- Next, move on to the side seam.
- To process the neckline, we cut off a strip of material, as when sewing a shirt for a girl, and sew it to the future T-shirt.
- We process the armholes in the same way as the neckline.
- We go through the bottom of the product with a zigzag or overlock, bend it 1.5 centimeters and stitch it.
The boy's pajamas are ready!
 0
0