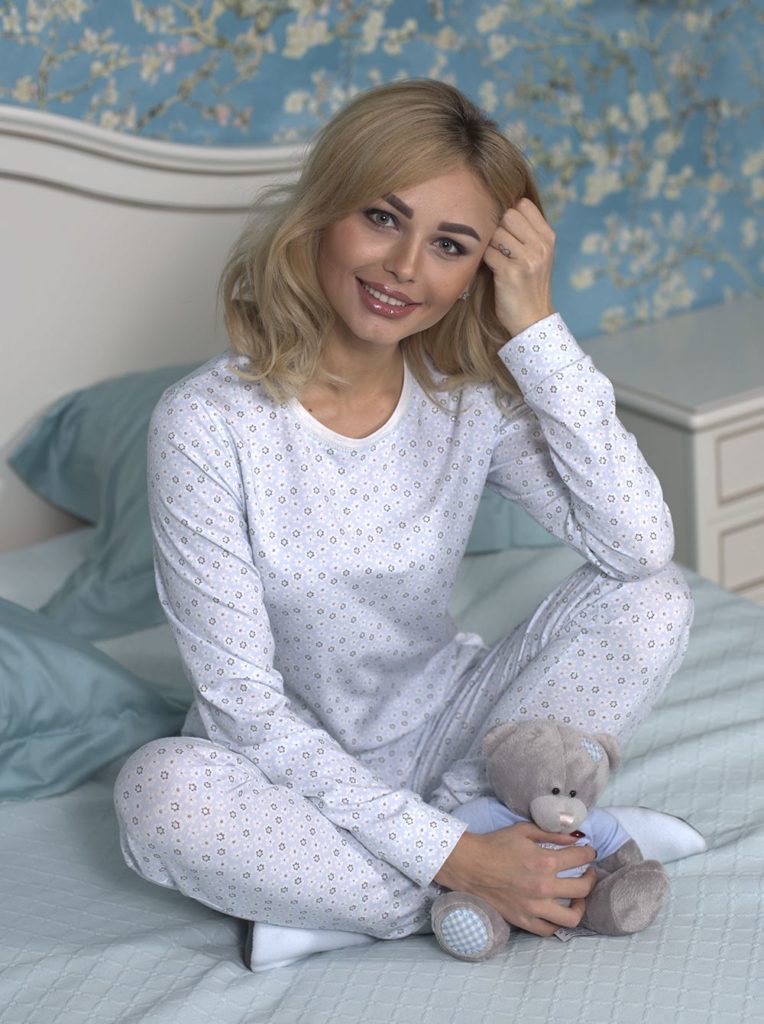
 It’s not for nothing that pajamas are considered the ideal sleepwear. Women's pajamas can be strict and creative, classic and seductive. It does not restrict movement, it can be made of warm fabric to keep you warm in cold weather or thin fabric to keep you cool. In a word, it gives you the opportunity to sleep well and restore strength after a hard day.
It’s not at all difficult to sew such a thing with your own hands, you just need to decide on the model. Those who like warm clothes for sleeping can choose pajamas with long sleeves and pants, and for those who like lighter clothes, a set of a sleeveless T-shirt or sweater and shorts is suitable.
We sew pajamas with our own hands
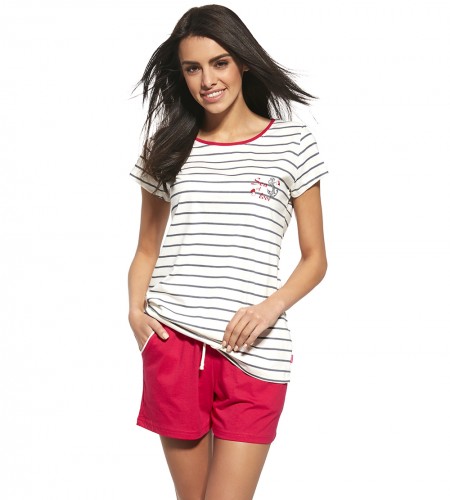 Even a novice dressmaker can sew pajamas for women quickly and without much difficulty.Moreover, you have the opportunity to choose the style, material and color of this product yourself. We will tell you how to sew simple pajamas consisting of a T-shirt and shorts in this article.
Selection of materials
Pajamas can and should be stylish, but we must not forget that their main purpose is to be comfortable and pleasant to wear. It is best to use natural fabrics for sewing pajamas. They are hypoallergenic, breathable, and do not accumulate static electricity.
The most common are cotton, linen, bamboo, jersey, fleece, flannel and silk. Fleece and flannel retain heat well, and silk fabrics keep you cool in hot weather. The presence of synthetic fibers in natural fabrics is acceptable. However, it is better that there are no more than 20%. The main criterion for choosing fabric is a pleasant feeling when touching the body.
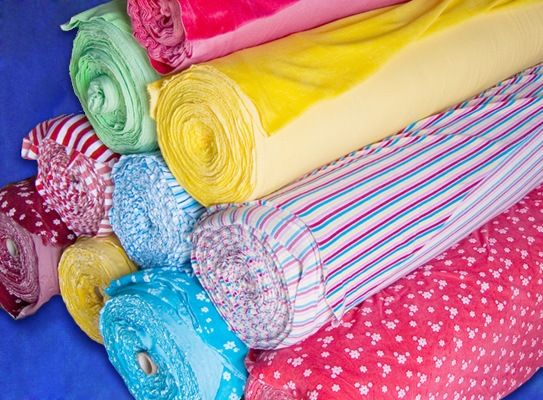 We will use knitted cotton fabric. Knitted fabric comes in different types - jersey, knitted openwork and relief fabrics, velvet based on knitwear, fabric with pile or terry on the back and others. These fabrics are soft and stretchy, they are pleasant and comfortable to wear.
When sewing things from knitted fabric, you need to take into account some nuances:
- It is more correct to sew parts of the product with a fine zigzag stitch.
- Use a machine needle for knitted fabrics, which does not damage the material.
- Sew the bottom hem with a double needle to keep it elastic.
- Use bias tape to sew seams that should not stretch later.
- If there is a fastener, its edges are fixed with adhesive fabric.
Let's determine the material consumption for the product based on calculations:
- Fabric consumption for a T-shirt, with a fabric width of 150 cm, is calculated by the formula: DI (product length) + 0.4 m.
- Fabric consumption for shorts or trousers, with a fabric width of 150 cm, is calculated by the formula: CI + 0.2 m.
Thus, the fabric consumption for a top (T-shirt) with a fabric width of 150 cm will be approximately 90 cm, for shorts - approximately 80 cm.
Pajama pattern
The top part of the pajamas - a T-shirt - is assembled from one solid back piece, one solid front piece and two sleeve pieces. Please note that the pattern shows ½ back, ½ front and ½ sleeve. The front and back patterns are cut out by applying them to the fold of the fabric. And the sleeve is cut by unfolding the pattern.
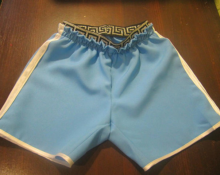
The shorts pattern is assembled from 2 front pieces and 2 back pieces. Please note that the pattern shows ½ front and ½ back.
What measurements are needed
In order to create a pattern you need to measure your figure.
Length of T-shirt and shorts; neck girth; chest girth; waist circumference; hip girth; chest height; back height; shoulder length; shoulder circumference and sleeve length measurement.
How to make a pattern
Correct body measurement is already half the success. Before you begin, you should secure your waistline with a thin braid, this will make it easier to take measurements. The person being measured stands straight and relaxed. At the same time, you should not slouch, retract or, conversely, stick out your stomach.
It is advisable that the clothes are not thick, so as not to distort the real parameters of the body. The measuring tape should fit snugly, but not squeeze, the figure of the person being measured.
DI T-shirts – measured from the shoulder line to the bottom of the T-shirt;
DI shorts – measured from the waist to the bottom of the shorts;
OS – measured through the base of the neck and closes above the jugular cavity;
OG – horizontally around the body, passing through the protruding points of the mammary glands;
FROM – at the narrowest part of the waist;
ABOUT – through the protruding points of the buttocks;
VG – from the line of the shoulder slope down to the most protruding point of the chest;
Sun – from the base of the neck to the waist line;
ShP – from the base of the neck to the shoulder point;
OP – measurements must be taken with the arm down.
Making a T-shirt pattern
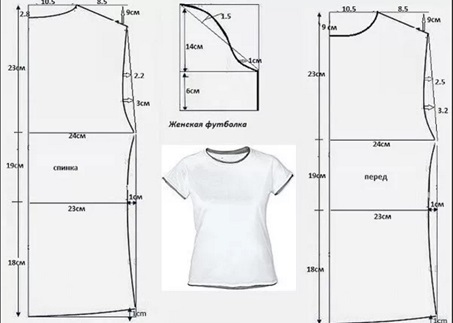
Making a paper pattern for the back of the T-shirt:
- From the top right point (VPT) we put 2.8 cm down, and to the left of the VPT measure OSH/4 (10.5 cm).
- From this point to the left we put another measurement of the width (8.5 cm). From the obtained point we go down 9 cm.
- From VPT down DI (60 cm), from it to the left OB/4 (96 cm).
- From the VPT down – VG (23 cm), from it to the left OG/4 (24 cm).
- From VPT down - BC (42 cm), from it to the left OT/4 (23 cm).
We connect the points: the line of the neck, bottom, shoulder and side using a pattern, the rest with a straight line.
Before:
We build the front pattern similarly to the back pattern, only we make a deeper neckline. To do this, set aside 9 cm from the VPT downwards.
Sleeves:
- From the VPT downwards we put the DR measurement (20 cm), from this point to the left OP/2.
- From the VPT downwards we put 14 cm, from this point to the left OP/2.
Let's connect all the dots. We connect the sleeve piping line using a pattern.
Constructing a pattern of shorts
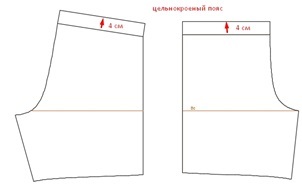
When creating a pattern for shorts, we will use a simplified version. To do this we will need shorts or jeans that fit. So:
- We fold the old shorts along the seams (without turning them inside out), place them on tracing paper or graph paper and use a ruler to trace first one, then the other leg (you should get two parts - front and back).
- If narrow shorts were used for the pattern, then you need to add 2-3 cm from the side seams.
- We draw a straight line from the femoral line up and down. Since our shorts are sewn using elastic, the waist should not be narrow.
- It is also necessary to note the length of the product. To do this, we will use the DI shorts measurement.
- From the waist line up, add 4–5 cm to bend the drawstring and insert the elastic.
These pajamas can also be sewn with trousers; to do this, simply add the desired length.
The pattern is ready.
Cutting fabric
Before cutting the fabric, it is better to iron it over the entire surface from the wrong side.
ATTENTION: Before cutting, it is necessary to wash the fabric to avoid further shrinkage. The fabric should be washed at the water temperature at which the finished product is supposed to be washed in the future. If the model uses fabrics of different colors, then when washing you need to make sure that they do not fade. Pre-wash a 10x10 cm piece of fabric.
T-shirt:
- Fold the material right side inward. We apply the pattern of 1/2 of the back of the T-shirt to the fold of the fabric, trace it with a pencil or chalk.
- Let's add allowances: 1-1.5 cm on all cuts. We outline the second time with allowances.
- We cut out the front part in the same way.
- We cut the sleeve in a mirror image so that we get two symmetrical parts. Leave an allowance along the sleeve length of 3–4 cm.
Shorts:
- We fold the material face to face and apply the pattern of 1/2 of the front of the shorts onto it. We trace the outline of the pattern with chalk or pencil.
- Let's add allowances: 1 - 1.5 cm on all cuts. We trace a second time with allowances.
- We cut out the back part in the same way.
- We will also need to cut out two cuff parts. Its length is equal to the circumference of the leg, that is, the width of the bottom of the front plus the width of the bottom of the back, and the height will be about 4–5 cm.
ADVICE: If you cut all the parts with the same allowances, then it is not necessary to trace the pattern along the contour the first time. You can simply replace the sewing machine foot with a foot with a ruler, and sew the parts together, setting aside the same width of allowance.
Sewing pajamas
We sew the top part of the pajamas - a T-shirt:
- We wrap all sections of fabric to prevent it from fraying.To do this, we use an overlocker or a zigzag stitch, having previously selected the length and width of the stitch on an unnecessary piece of fabric.
- Sew the shoulder seams. Iron them towards the back.
- Sew down the edges of the neck strip. Fold inside and out. Let's iron.
- Align the neck seam with the left shoulder and secure with a pin. Stretching the neck strip, we sew it to the front and back. Iron from the neckline.
- We bend the bottom of the sleeve twice and stitch it using a double needle.
- We adjust the sleeves and sew them into the armholes of the front and back of the T-shirt.
REFERENCE: To fit a part means to reduce its dimensions by creating assemblies in order to give the required shape and length.
- Iron seam allowances. On each side, use a single stitch to sew the side seam and the sleeve seam.
- We bend the bottom and stitch it with a double needle.
We sew the lower part - shorts:
- We sew all the cuts using an overlocker or a zigzag stitch.
- We fold the parts face inward, baste them, and then sew the inner and outer side sections. Iron the seams.
- We fold the parts face to face (inserting one trouser leg into the other) and baste it, and then sew the middle seam. Iron the seams.
- Sew the elastic on the sides.
- At the waist we make a drawstring for an elastic band. Fold approximately 1 cm inside the product. Then we turn it inside again to the width of the elastic +0.6 cm. We put the stitched elastic there and sew the allowances along the bottom hem line. We sew the drawstring from the inside out, retreating 1–2 mm from the edge.
- Take the cuff and baste the edging tape to its front side. Then we flash it.
- Sew the side sections of the cuff.
- We baste, then sew the cuff along the bottom edge of the shorts, folding it facing inward. Fold the cuff right side out.Let's iron.
- Sew on the cuff. At the same time, we make a minimum indentation from the edge seam.
Your pajamas are ready! Wear it for your health!


 0
0

