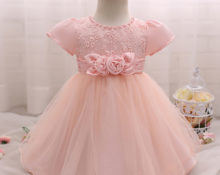
Every girl has a little princess inside her, and the future queen must have a dress with a fluffy hem in her wardrobe. It can be solemn and serious or cute and naive, but it must be beautiful and suitable for a particular child.
Features of sewing a fluffy dress for a girl
To make a well-fitting outfit, you will need the correct measurements. Notes on receiving them:
 do not tighten or loosen the measuring tape;
- before the procedure, the girl should be asked to undress down to her underwear or dress her in light clothes made of thin fabric;
- The waist circumference is easily and accurately determined using a rope or lace tied around the body;
- the top fits correctly only when the shape of the shoulders is taken into account (they can be straight, sloping, normal or high);
- neck girth is determined by the base of the neck;
- to girth the chest, the tape is placed along the protruding parts of the shoulder blades and the widest part of the sternum;
- The waist is measured at the narrowest point;
- to get the width of the back, stretch the tape between the left and right shoulder blades;
- The length of the back is measured by attaching the upper edge of the tape to the 7th vertebra, and the lower edge to the lace tied around the waist line.
 do not tighten or loosen the measuring tape;
The length of the back is needed to determine the length of the bodice. Back length formula (back of top): back length + 1 cm. The width of the back is needed to understand the width of the top. Back width formula: back width + 1.5 cm.
Materials and tools
Recommendations and notes on choosing fabric:
 Tulle produced in the European Union and America is better suited for children's clothing. This fabric is soft, pleasant to the body and does not flare up when hit by a spark. The material of the same name, produced in China, is usually rougher than the European one and does not meet international fire safety requirements. When exposed to flame, it instantly bursts into flames.
- Stiff tulle has scratchy seams and edges, so a dress made from it must have a petticoat, otherwise the tights will tear or the legs will be scratched. The underskirt can be made from knitted fabric, thick satin, or from the same fabric from which the bodice is made.
- For a long skirt, buy soft material, it will fall beautifully. Hard tulle is more suitable for a tutu. If in doubt, then choose a medium-hard material. It will make a fluffy bottom that will neither puff up nor fall down.
- It is easier to form a multi-layered or long hem from a wide cut. A narrow cut - this is usually how stiff tulle is sold - use it on a very short tutu skirt.
- Soft tulle needs to be purchased with a reserve. Hard ones have less consumption.
- In addition to tulle and material for the petticoat, you will need fabric for the top. When choosing fabric, consider whether a tight-fitting or slightly loose top looks good with a tutu..
 Tulle produced in the European Union and America is better suited for children's clothing. This fabric is soft, pleasant to the body and does not flare up when hit by a spark. The material of the same name, produced in China, is usually rougher than the European one and does not meet international fire safety requirements. When exposed to flame, it instantly bursts into flames.
Important! If you don’t have sewing skills, then don’t take complex top models. Opt for a top that consists of a front and back, connected by side seams and held in place by straight straps.
A simple dress pattern with a full skirt
When creating a pattern, it is important to remember that the side seams on the top should eventually match the side seams on the skirt. Difficulties arise when the top and bottom do not match each other in width. To prevent this from happening, when creating a pattern, start from the girl’s waist circumference and add the same number of cm to the allowances.
Important! Many problems with the compatibility of top and bottom are solved by elastic. Due to it, errors in the width of the lower cut of the bodice and the upper cut of the hem become uncritical.
The tools that will definitely come in handy are a measuring tape, a needle, thread, scissors and a sewing machine. Additionally, you may need pattern paper and chalk. Pattern example:
Sew a bodice
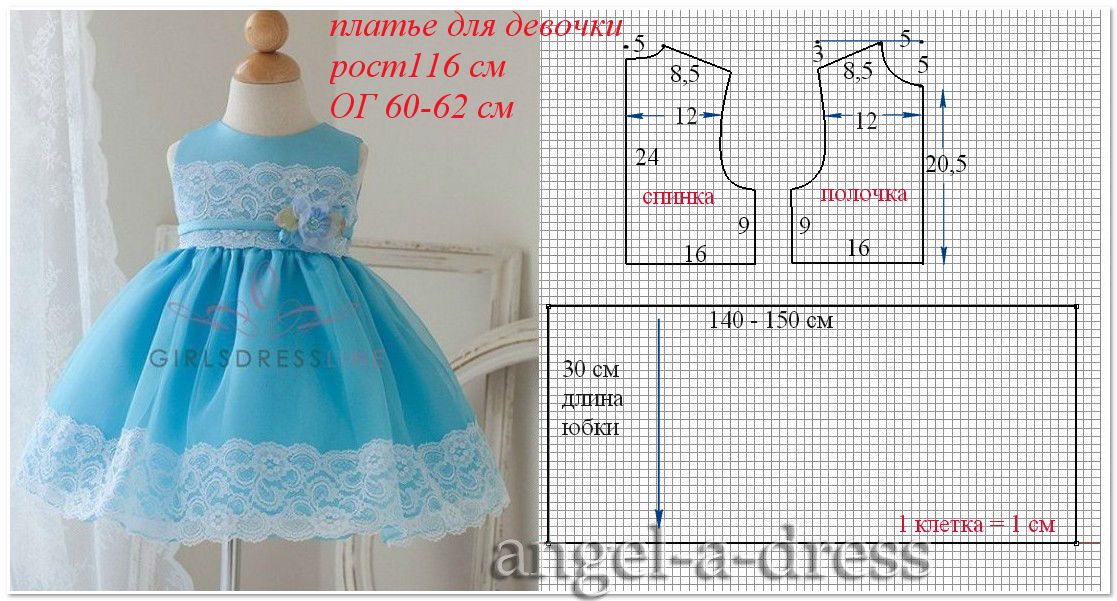
The bodice will go along the waistline, neither higher nor lower. To create a pattern for this version of the model, we need 6 measurements:
- semi-circumference of the neck;
- half chest circumference;
- half waist circumference;
- semi-circumference of the hips;
- back length;
- back width.
Important! Where half-girth is indicated, the girth value must be divided by 2.
The pattern for a simple top consists of only 5 lines. They are drawn inside a pre-drawn rectangle (the figure is placed standing).
Formula for determining the size of the original rectangle:
- height: back length + ½ back length;
- width: half bust + 3 cm.
Further On the resulting rectangle, mark the waist length. To do this, a segment departs from the upper edge of the rectangle, the length of which is equal to the length of the back. Next is the mark of the edge of the neck. The manipulations are carried out as follows:
 the middle of the width of the rectangle is located (this is nothing more than the middle vertical axis of the pattern);
- the found middle is drawn with a straight, even line;
- on both sides of the upper point of the middle vertical axis the classic width of the neck is laid out (formula for determining the classic width of the neck: half-circumference of the neck/3 + 0.5 cm);
- at this stage, you get 2 points equidistant from the center;
- these points need to be moved 1 centimeter above the pattern (just draw these points 1 cm above the top border of the rectangle);
- then on the upper side of the rectangle we lay it off from the middle vertical axis to the left and right along half the width of the back (this way we get the shoulder border points);
- the shoulder border points will need to be lowered down by 2.5 cm (if the shoulders are high, then by 1.5 cm, if sloping, by 3.5 cm);
- then the left point of the shoulder border is connected to the left point of the classic neck width, and the right point to the right (due to this, the shoulder line is obtained);
- to obtain a neckline, you will need to connect the left point of the neckline width to the right point of the neckline with a semicircle (if you need a round neckline), a rectangle (if you need a square neckline) or a narrow triangle;
- the next step is to designate the chest line (divide the half-chest girth by 4 and add 7 to the resulting value);
- Next, we mark the chest line and show with a concave vertical line the difference between the chest circumference and the waist circumference (if the waist is pronounced and much narrower than the hips, then the difference between them should be about 5–8 cm, that is, 2.5–4 cm less on the left and right );
- then we connect the left point of the shoulder border with the left edge of the waist line with a concave line, and the right point with the right (thereby getting an armhole).
 the middle of the width of the rectangle is located (this is nothing more than the middle vertical axis of the pattern);
Important! A sleeveless top has back armholes equal to the front armholes.
The top of the dress itself is easy to sew using this pattern. You need to cut out the back and front, and then connect their straps and side seams.
Making a skirt - 4 options
Let's look at several options here.
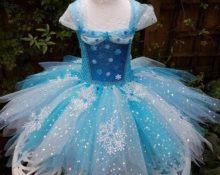
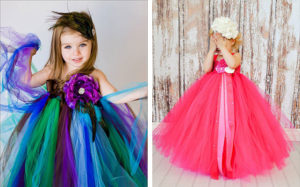
Model No. 1. Tutu skirt made from a large number of individual tulle flaps
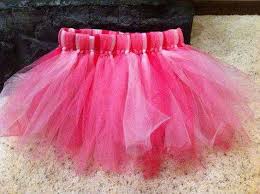 To make it you will need a wide elastic band and tulle from a narrow roll (width 10–15 cm). The elastic band should be cut along the child’s waist in such a way that the resulting skirt does not tighten, but does not fall off. Next, determine the length of the hem. Moreover you need to find out specific numbers, they will be useful when determining the length of tulle cuts.
So, a hem 40 cm long says that the tulle needs to be cut into pieces about 82 cm long. To get the last value (82 cm), you need to multiply the hem length (40 cm) by 2 and add 2-3 cm on top.
The process of creating a skirt comes down to threading pieces of fabric through an elastic band and tying them in a knot.. The already fixed flaps must be placed very close to each other, otherwise the hem will fall apart and the legs will become visible through it. A denser and more fluffy skirt is obtained by tying strips in 2 layers - this is when 1 piece is placed on top of the other.
Model No. 2. Classic look of a tulle skirt
Necessary materials and accessories:
 each individual layer is formed from fabric whose length is 4 times the waist circumference;
- for a petticoat, buy about 2 m of satin or satin;
- a satin ribbon is required for the belt (width: 10 cm);
- zipper or elastic band.
 each individual layer is formed from fabric whose length is 4 times the waist circumference;
Manufacturing process:
- manually form folds on each layer;
- fold layers;
- step back 2 cm from the top edge and sew the folded layers;
- set the widest stitch pitch on the machine;
- pull down your skirt;
- make a basting stitch;
- sew a cover (petticoat);
- connect all layers to the cover;
- sew on a zipper;
- sew on a belt.
Model No. 3. Tutu skirt according to pattern
In the traditional presentation, a wardrobe item comes with 12–16 layers, but as an example, let’s use a simplified version with 4 layers. To create them, we will need to draw rectangles (4 pieces) on the pattern. The height of each subsequent one should be 2.5 cm less. If the height of the first is 38 cm, then the height of the second is 35.5 cm. Pattern example:
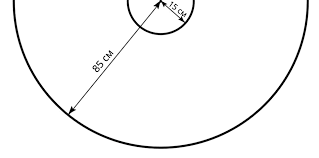
The length of the rectangles is determined based on the design. If you need a very short dress, then you need to multiply the waist circumference by 2.
The sewing process itself:
 cut out the base for the hem according to the pattern;
- cut a wide belt from pre-prepared knitwear;
- stitch the sections for the first layer and tighten them at the waist to the actual size of the dress;
- repeat the procedure with each subsequent layer;
- sew the connected layers to the belt.
 cut out the base for the hem according to the pattern;
Model No. 4. Ball dress
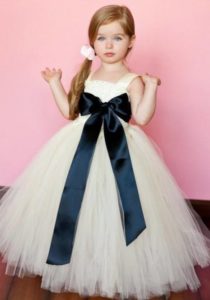
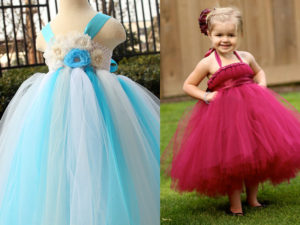
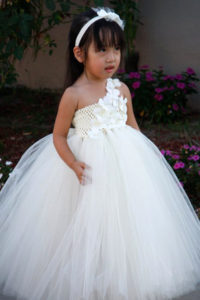
This outfit option combines a tight or slightly loose top with a very simple cut and a ball skirt. To create a skirt with a height of 25 cm, which will then be worn by a girl with a waist circumference of 38 cm and a hip circumference of 40 cm, you will need about 2.5 m of soft tulle.
Step-by-step instructions for making a hem:
 cut tulle into strips (width: 10 cm);
- cut a 25x80 cm rectangle from the material for the cover;
- stitch the rectangle with a ring;
- Sew a strip of tulle onto the bottom of the petticoat (the line should go in the middle);
- while sewing, you need to periodically make folds (The splendor of the dress depends on the frequency of placement of folds and their length);
- at the end, the ruffle-folds close into a circle;
- iron folds on 1 side;
- stepping back a little from the previous stitched flap of tulle, sew on the second strip (while also forming folds);
- repeat the algorithm with the third and subsequent tapes;
- when there is 5 cm left to the upper end of the hem, you need to insert an elastic band and tighten the skirt at the waist.
 cut tulle into strips (width: 10 cm);
Connecting the parts
The skirt, tightened at the waist, is attached to an elastic band or belt, and a top is already fitted to them. Stitch length: 2.5.
Important! Be sure to ensure that the top and bottom seams match each other. To combine them, it makes sense to first sew the skirt to the bodice with a simple needle and see if the parts of the outfit fit together. If not, and displacements appear, you will have to do suturing.
Another option for creating a dress with your own hands
A casual dress can be created from a blouse. This method is good because saves a lot of time. No need to sew top or bodice. The bottom will look like a ballet skirt.
Necessary materials:
 jacket (one-piece, not with buttons or zippers);
- tulle (1 meter);
- knitwear for petticoat (50 cm);
- wide elastic band (note that it will go over the top and not be sewn in).
 jacket (one-piece, not with buttons or zippers);
Dress making process:
- Try on the jacket. Mark the place that coincides with the girl's waist line.
- Cut off everything from the jacket that lies below the marked line.
- Sew an elastic band to the bottom of the blouse.
- From the knitwear, cut 2 trapezoidal sections for the front and back of the petticoat. To determine the width of the edge, use a jacket.
- Form a two-layer skirt from tulle.
- Sew the petticoat to the skirt
- Sew the bottom of the dress to the elastic from the top.
Instead of a sweater, a crocheted or knitted top is also suitable. Determining the number of loops is easy. To do this you need to know your chest circumference.Based on these parameters, a seamless bodice is knitted in a circle.
Important! Buy cotton yarn for the top of the dress.
 You can get an interesting ball gown if you use a wide mesh elastic band (not underwear, but mesh) as the top and base for the skirt.. Cut and form a bodice out of it, and then through several lower rows of elastic, pass the required amount of stiff tulle, cut into ribbons. This method is good because it allows you to get an asymmetrical hem without creating a complex pattern. And at the same time you can play with the level of the beginning of the hem. To do this, the pieces of fabric on one side of the mesh begin to be woven several holes higher than on the other.
A long tutu skirt formed from tulle patches can easily be turned into a dress. To do this, a closed elastic band is threaded through the layers of tulle (closed means that its ends are sewn together and form a circle). Each ribbon is tied around an elastic band and secured with a knot. Having finished tying the first elastic band, take the second elastic band, place it a little lower than the first and do exactly the same actions with it. The result is a top that fits tightly to the body around the elastic bands. The loose remnants of the cuts in this dress become the hem.
If the transition from a tight-fitting corset with elastic bands to a fluffy hem seems too abrupt, then it’s worth decorating with a belt. Usually, a 10 cm wide ribbon is used for it. If a silk strap is inappropriate, try a tulle cut or a wide linen elastic band. Since tulle fabric, due to its rigidity, does not always make a beautiful bow, it is worth looking at a brooch for the place where the ends are fastened. The decoration will cover the knot.
 0
0