creativecommons.org
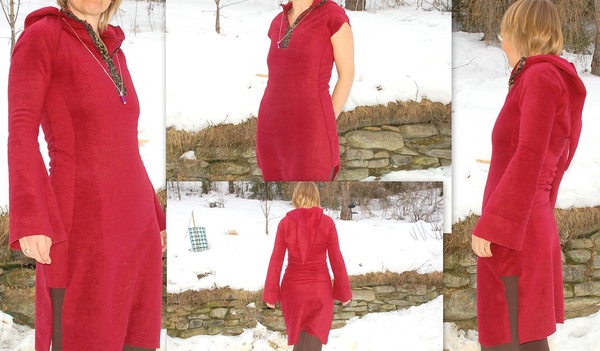
The popular hoodie dress, photos of which can often be seen on the famous diva Alla Pugacheva, is ideal for walking in hot weather. It is loose, does not hug the body, and allows the skin to breathe. This model is perfect for girls who want to hide some flaws in their figure. Much depends on the material used to sew the outfit. The hoodie can be sewn from luxurious fabrics with beautiful ornaments and patterns, decorated with elegant buttons or rhinestones. This dress can be safely worn to a party or social event. Solid colors also look great with a variety of accessories.
Many girls choose this style as a home outfit. It does not hinder your movements, allows you to do household chores, or sit comfortably in your favorite chair with a cup of coffee. At the same time, in such a dress you will always be ready to meet unexpected guests. Sewing a product with your own hands is not at all difficult.The pattern of a robe, like Pugacheva’s, is so simple that even a girl who has never done sewing can cope with the task. Products made from satin, crepe, and silk look beautiful, and it is not necessary to use natural fabrics. A cotton or linen hoodie is a great option for a hot summer. The main thing is that the material is pleasant to the body, light and thin.
Pugacheva’s hoodie – cutting and sewing
The pattern for the dress is extremely simple to construct. The base can be a square, triangle, rectangle. The last option is the easiest. Let's build a pattern and consider the principle of creating a product based on a rectangle.
- We measure the parameters - length of the product, chest volume, shoulder width, hips. The required amount of material is the length of the dress, doubled, plus 20 centimeters. The fabric must be folded in half across its entire width, and the cuts must be perfectly joined.
- Choose any angle, set aside ½ the volume of the hips from the bend. We add from five to ten centimeters - depending on how loose the dress should be. Add another three centimeters to the seam. Excess fabric is trimmed following a straight line. This fold is the location of the neckline and shoulders; it is recommended to draw a chalk line along it.
- Now we make the neck. Again, fold the material along double the length of the cut to accommodate the cutout. The center point of the throat will be at the intersection of the folds of the material. Choose a shape - oval, triangular neck, boat neck. On the transverse fold we drew a line in chalk - this is the line of the shoulders. If the robe is without an open back, then the deflection of the back line should be no more than two centimeters from the chalk line.
- On the transverse fold we find the central point, count seven centimeters from it.Using chalk, draw a smooth line for the cutout of the selected shape. Using scissors we go along this line, leaving a centimeter for the seams. We process the neck in any way. The main thing is that the throat does not stretch during processing.
- Let's move on to the armhole. It is approximately 22–26 centimeters. We find the transverse fold and count this distance in both directions. These are the sleeves of the dress. We process the edges.
- All that remains is to fold the outfit, focusing on the transverse fold, with the right sides inward and sew the side seams. We trim all the edges of the material, the dress is ready.
How to sew a robe like Pugacheva’s - the second option
creativecommons.org
An interesting option, which Pugacheva also often presented on stage, is a hoodie with straps. The pattern consists of only two parts - the straps and the fabric for the dress itself. We measure sizes individually. The average length is from 100 to 115 centimeters. Sewing pattern:
- We bend the straps with the wrong side out, grind along straight transverse and longitudinal sections. We do not go through inclined cuts. We trim each seam to five millimeters and turn the straps right sides out. Gently straighten it along the edges and go over it with an iron. We take the right tie, at the end we make loops for buttons, we process the edges with thread.
- Fold the back and front of the dress, wrong side out, and stitch along the front middle edges. We grind the back sections down to the slots. In this case, you need to start near the horizontal back seam, do not touch the allowances.
- We go along the back horizontal seams without touching the allowance. We process the lower edges of the dress using a zigzag seam. In this case, the cut needs to be bent by three to four millimeters.
- We cut out the neckline in a boat shape, trim the edges, sew in the straps and turn the outfit inside out. Now you need to carefully straighten the product and run the iron along the edge of the collar. By analogy, we proceed with the sleeve cuts - we grind and iron. All that remains is to sew the buttons onto the strap where the loops were made, and the outfit is ready.
 0
0