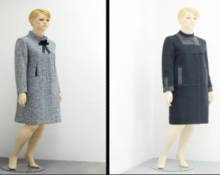
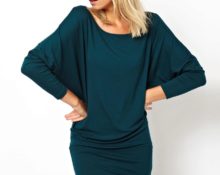
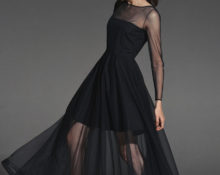
In summer you always want to look fashionable, fresh and feminine. Pants don't quite fit this description, but a dress is a better option. A tight style will restrict movement, although it looks elegant. Wedges – that’s what will be relevant! A dress with wedges that literally flow and fly apart as you walk, revealing your legs and catching the eyes of passers-by. It is not hot, comfortable, movement is not constrained - it has everything you need for a decent look in the summer.
Sew it yourself
The recommended material for the dress is poplin or chintz, satin or linen. It all depends on taste and comfort. The lighter dress is made of cotton fabric, and the thicker one is made of denim. Therefore, before sewing, it is important to think about this point. The fabric consumption will not be small, you need to prepare for this, you don’t need to skimp on fabric for some elements. You may choose to leave no seams on the wedges or, conversely, decide to have seams on several of them.
Everything you need for sewing is shown in the two pictures below.The diagram already provides a small allowance. It is needed for simplified assembly of the dress, so as not to fiddle with the bottom for several hours. In Figure 2, the fabric is folded in a special way - in half. It is also important to consider what size the dress is made for. In the example, size 54 is given, if you take a little more, it will go to size 56. There are wedges here, but only four of them have seams, all of them located in the middle.
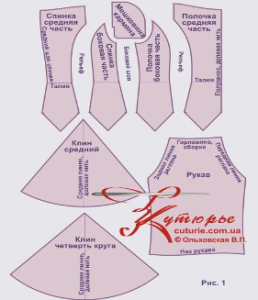
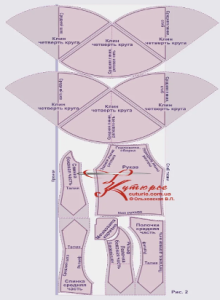
The most important thing in such a dress is the sequence of execution. First, take the front, the back, then the side seams, moving on to the sleeves (don’t forget to stitch the sleeves and sew the wedges). If you want to make the skirt fluffy and sweeping, then the middle wedge is best placed in the middle of the dress. Visually it will look like the outfit is voluminous in the front. Where the seams are located on the wedges, place them on the sides, connecting everything with the common side seam of the dress. Further instructions on bottom allowances:
- the assembled bodice allows you to perfectly connect it with the wedges, the allowance allows for precise assembly without making a single mistake;
- if the shapes of the wedges are marked, then the corners of the bodice can be marked again;
- if you need more convenient markings, then you will need a triangular-shaped cardboard template; it will allow you to make precise marks along the middle part of the shelf;
- on a cardboard template you can make control markings and iron the top of the wedges to the size of the corners (again, to taste and imagination);
- It is important to put small notches on the wedges so that the seams can be connected along the bottom;
- All that remains is to overcast and edge the bottom of the allowances or, conversely, open the edges (it all depends on imagination and taste).
Now the sewing of the dress is finished. All that remains is to try it on for the final point and personal approval.You can sew belt loops, if this was part of the dress’s design, or buttons along the line right in the middle as a mini-attribute to the whole look.
Are allowances that important?
If there are no allowances, then the dress will not work. It will either be too small, or not enough fabric, or an asymmetrical look, or something vaguely reminiscent of a dress. At the bottom of the details, let there be a bodice of a couple of cm. Thus, you will get an option for leveling. If desired, an allowance can be made even at the bottom of the wedges; it all depends on how the dress sample was originally chosen.
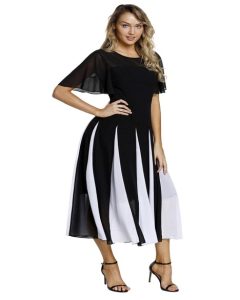
This is what a dress with wedges will look like, pay attention to the white inserts that fit well into the style. These are the very wedges that will flow and swell beautifully with a light wind and walking. Every girl will feel feminine, desirable and sophisticated in such an outfit.


 0
0
