A poncho is an interesting version of a cape that is now very popular. Initially it was a square of dense material with a hole for the head in the middle. This cape protected well from the cold.
In modern times, the poncho retains the same protective functions, and additionally serves as a stylish element of clothing. There is no specific canon of styles for this cape! It can be made at your discretion in such colors and patterns, and from such materials that you like.
REFERENCE! The idea of loose women's clothing appeared back in the 70s, and was borrowed from the Indians of South America. Since that time, women all over the world have liked ponchos so much that they have turned this product into a current wardrobe item.
Crochet and knit a poncho
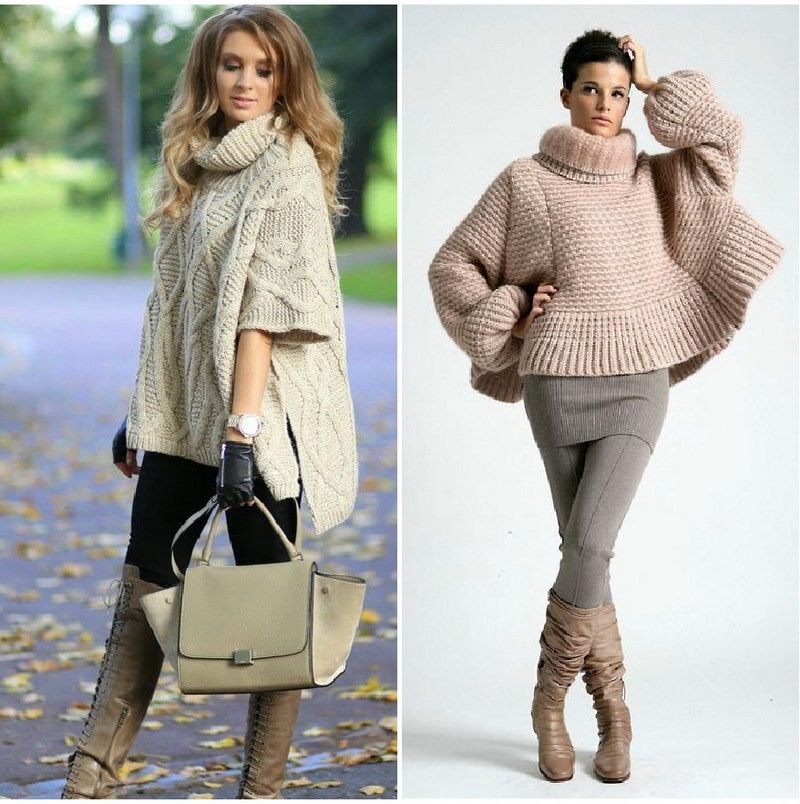
Every year, designers continue to delight with interesting ideas for interpreting national clothing in a modern style. A poncho is a successful element that lends itself easily to experimentation:
- Cardigan poncho.A bold decision that combines a long, loose-fitting cardigan.
- Coat-poncho. They provide excellent weather protection and are made from warm materials such as wool and cashmere.
- Poncho dress. It is distinguished by its abundance of decor, the presence of a belt and the use of expensive materials.
- Summer poncho. For this model, it is important to remember some restrictions on your body type and height. Ideal for going to the beach.
- Cape poncho. The option is ideal for a casual style, since the length of the model usually ends at the waist.
Making a poncho yourself is not difficult. It can be knitted by hand, because handmade work is especially valued and will definitely not leave anyone indifferent. Even a beginner who is just starting to learn how to knit can cope with this task.
How to knit a poncho with knitting needles
Any needlewoman can knit a poncho on her own: both a beginner and a pro! First you need to decide on the model and size of the product.. And if there is no problem with the size, since in any case the product is knitted from top to bottom, and it can always be knitted if necessary. But with the model the task is a little more complicated:
- Traditional Mexican cape.
- Half jacket.
- Short coat.
- With a hood or not.
- With buttons or whole cloth.
- With or without collar.
- With sleeves.
It all depends on which product you like best.
Materials and tools
The choice of material is one of the most important issues when deciding to knit a poncho yourself. If you plan to wear a poncho in the summer for going to the beach, it is better to choose light cotton yarn. For the cold season, it is better to take yarn from wool, for example, merino or sheep. This product will keep you warm in the cold.
Having decided on the yarn, the next step is the correct knitting needles. Typically, the recommended needle size is indicated on the yarn label. But, you can also choose larger knitting needles, then the product will be more airy.
IMPORTANT! Before you start working on creating a poncho, it is recommended to knit the sample with the selected materials. Firstly, this will help determine the amount of material needed, and secondly, determine the knitting density, since each needlewoman has her own.
The model has been chosen, the materials have been decided - all that remains is to knit your unique product!
DIY women's knitted poncho: simple and quick
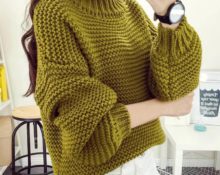
An elegant and lightweight option even for a beginner would be to knit a warm poncho with a hood for the cool season. This is the model we will now consider.
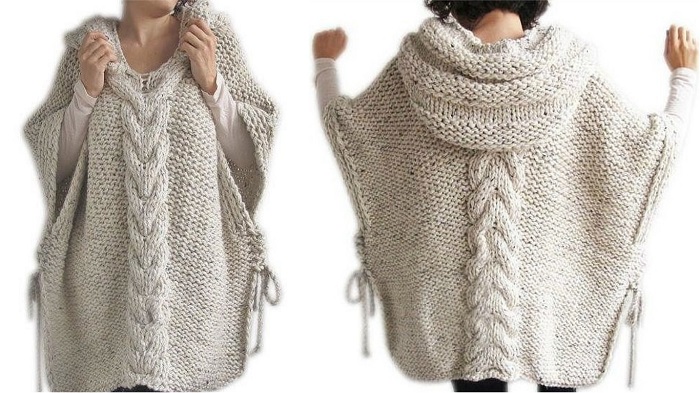
In order to knit such a product you will need 800 grams of yarn and knitting needles No. 6. The yarn we chose was 50% wool, 50% acrylic, 80 meters in 100 grams.
Please read the diagrams carefully before starting work! In fact, they are very simple. The main pattern is garter stitch, and in the middle of the product there will be strands - the so-called volumetric braids.
Scheme of the pattern of plaits or braids:
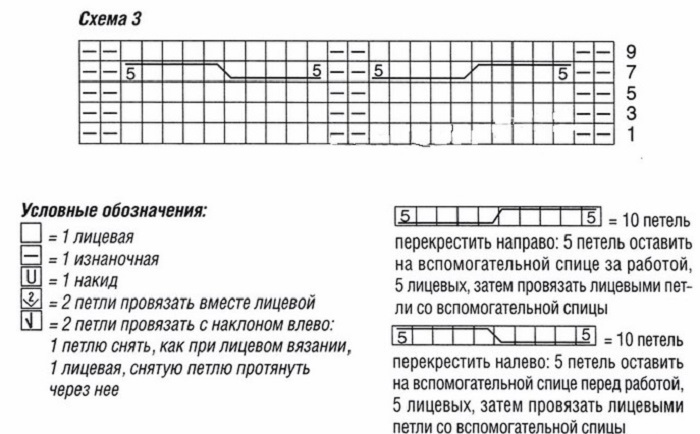
The diagram shows only odd rows, so the even rows should be knitted as they are - where the front one is, there is the front one; where there is a purl, there is a purl. Looking ahead, we would like to inform you that the pattern for the hood is an alternation of rows of front and back loops.
We will knit a poncho from the bottom up. Therefore, you can divide the knitting into 2 halves, that is, the back and the front, and knit them alternately. Or you can do it differently - knit the product in the round (then it will turn out to be one piece, like a sweater) and when you get to the armholes, proceed to knitting both parts separately.
To knit the front side, cast on 44 stitches.Every 6th row from the strands should be added 1 loop - the product will be voluminous. Knit 39 rows in this way, and from the 40th row, you can add an elastic band along the edges of the front side - this way the main fabric and the armhole will be separated, and the product will look more interesting.
In the 65th row from the edge loop (bottom) you should start knitting the neckline. To do this, you need to close part of the loops, starting from the first loop of the plait pattern. And then knit the product with the main garter stitch pattern to the level of the shoulder line.
ATTENTION! Knit the back similarly to the front. Close the loops for the neckline on the back 3 rows earlier than you reach shoulder level.
Hood. To knit a hood you need to cast on 45 loops. The pattern for the hood will be alternating rows of stockinette stitch and purl stitch. That is, we knit 5 rows in stockinette stitch, 5 in purl stitch.
In order for the hood to be voluminous, after knitting 20 rows, divide the fabric into 3 parts of 15 loops each and knit only the middle 15 loops. Knit 14 loops in the middle part, and combine the 15th from the 1st side part. After this, unfold the knitting and continue knitting, combining the last loop of the middle part of the hood with the first loop of the side parts. Continue knitting until the 1st loop remains on the side parts.
The last step in making a poncho is assembling it. You should gather the shoulder seams of the front and back and sew on the hood.
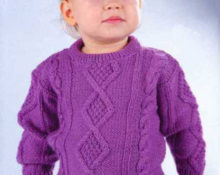
Knitted poncho for girls - a simple model for beginners
Most often, girls, having seen some interesting thing from their mother, want the same product for themselves. So now we'll look at how to easily and simply knit a very beautiful poncho for a girl with your own hands.
We will knit the following product:
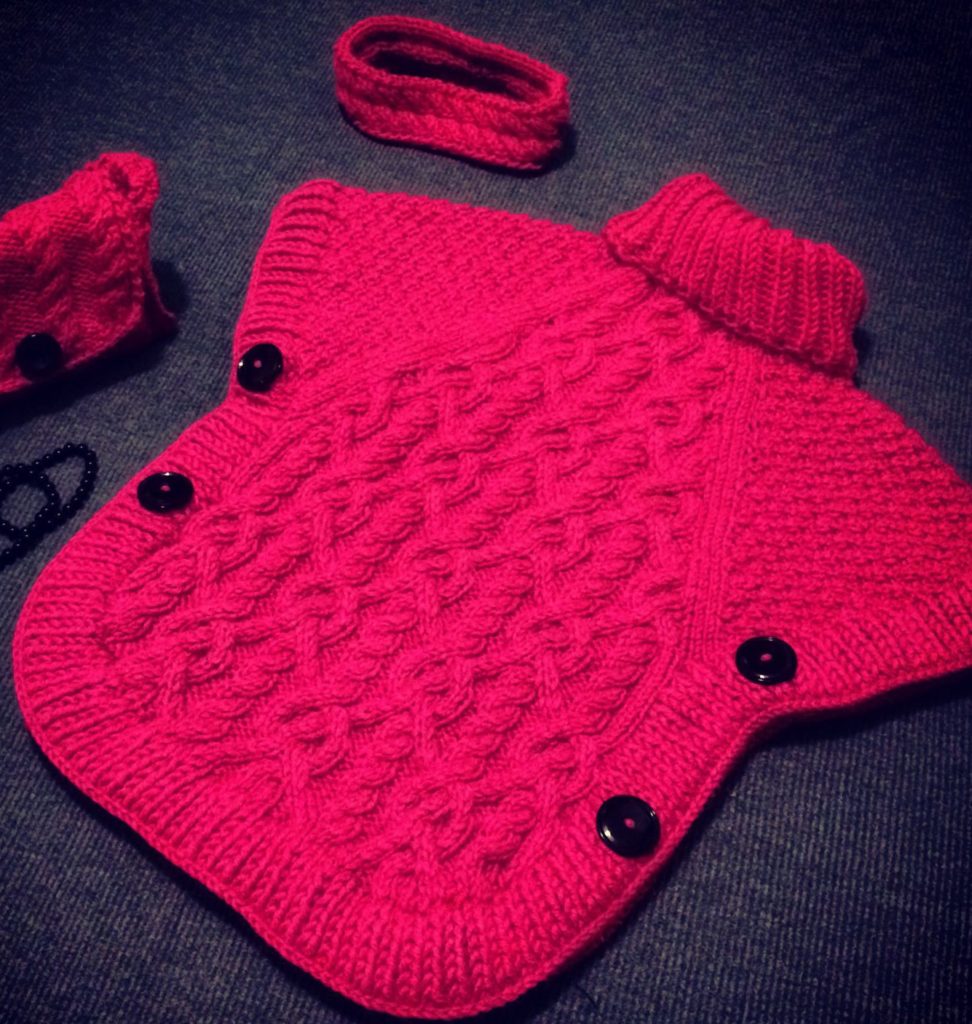
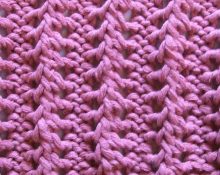
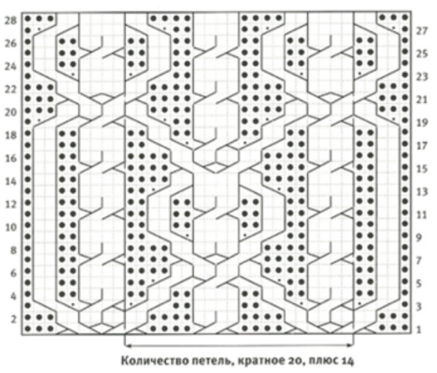
The main pattern on the canvas will be the interlacing of braids.In the diagram, the slope of the line means in which direction to tilt the braid in the product, and the dots indicate the loops of the purl rows.
Pattern diagram:
The size of our poncho is designed for 110–116 cm. Materials you will need: Poncho yarn, 100% wool, 70 meters in 100 grams. Circular knitting needles No. 7.
The knitting density in a 10*10 cm sample is 13 loops and 20 rows.
ATTENTION! We knit the poncho in the round from top to bottom like a raglan.
At the beginning of knitting, we cast on 52 loops and collect them into a ring. This will be the neck of our product. We knit a fisherman's elastic pattern, that is, 1*1, approximately 12 centimeters of fabric. Then knit 1 row with facial loops, at the beginning and end of which evenly add 1 loop.
At the beginning of the next row we need to hang a marker - this will allow us not to get lost in the knitting process. In this row we begin knitting braids (starting with the central element), knit 14 loops in this way, then 3 knit stitches for the raglan line, after 7 loops according to the “block” pattern, again 3 knit stitches for the raglan line and another 14 loops for the braid lattice. After again 3 knit stitches, 7 block loops and 3 more knit stitches. The first row of the future pattern is ready!
Blocks are an interweaving of knit and purl stitches. For example, rows 1 and 2 – knit 2, purl 2 to the end, rows 3 and 4 – purl 2, knit 2 to the end.
We knit in a circle. In every second row, make 1 increase on each side of the raglan line. There should be 8 increases in every second row. The added loops need to be knitted into the corresponding lines of the patterns for the front, back and sleeves.
Having reached 22 centimeters after starting a series of patterns, you should remove the sleeve lines along with the raglan lines onto an auxiliary needle and continue knitting the back and front as separate parts in a straight line to the desired length.
ATTENTION! To make the poncho look neater, you need to close 1 loop on each side of the front and back 11 centimeters from the armhole. And after 4 rows in every second row, sequentially close 1, 2, 3, 4 and 5 loops. Set aside the remaining loops.
In order to make a binding for the product, you need to collect loops from armhole to armhole, grabbing the set aside loops of the sleeves and knit with a 1*1 elastic band for about 4 centimeters, and then tightly close all the loops.
All that remains is to sew on the decorative buttons that secure the front and back together. This will be the last step upon completion of the poncho. This outfit will definitely not leave any little princess indifferent!
How to crochet a poncho
In order to crochet an excellent poncho, you should remember some important nuances:
- Use only natural materials.
- Take extra yarn.
- Keep the yarn label so that you can purchase additional material if necessary.
- Carefully study the knitting pattern and description of the process.
- Take care of the finished product - this will extend its service life.
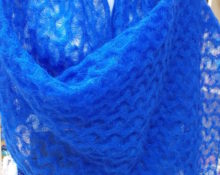
A distinctive feature of the new season in poncho fashion are bright colors and interesting designs. Nowadays it is fashionable to tie a poncho with fringe - this gives the product a certain zest and a peculiar charm. However, it is worth remembering that fringe is a rather material-intensive decoration.
Women's poncho: crochet
Crocheting a poncho is very simple. Consider an option that is suitable for different sizes.
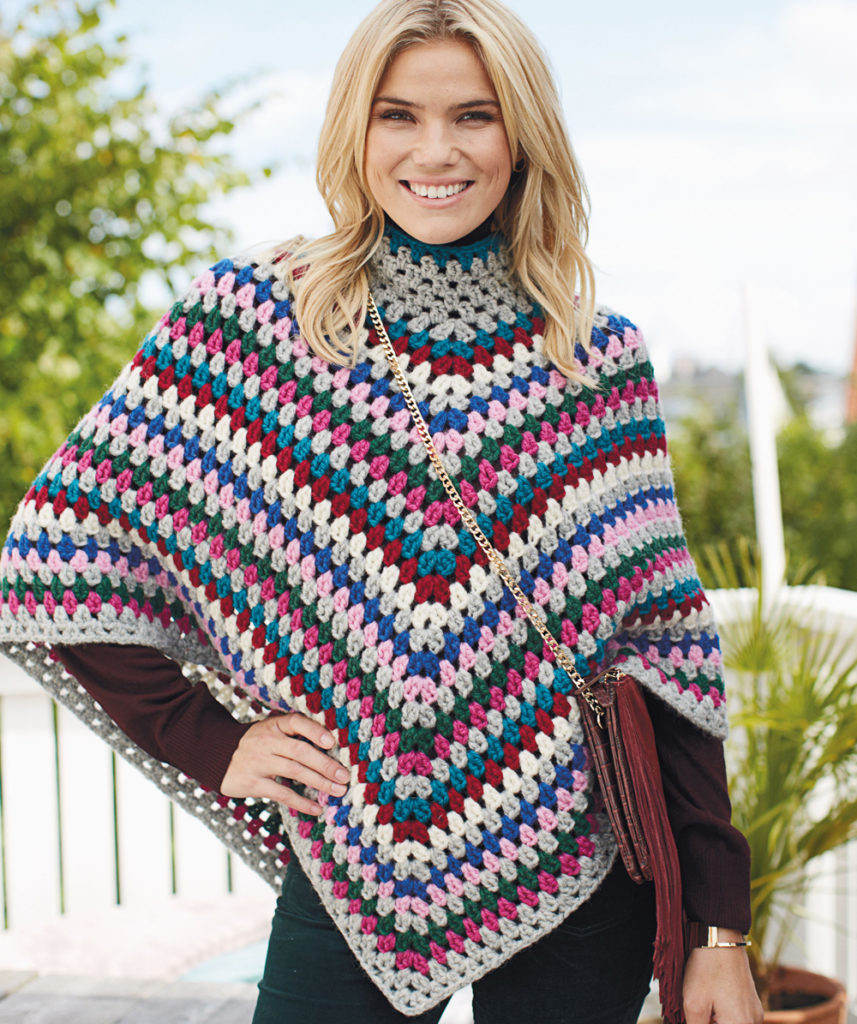
To knit this version of a poncho, you will need 100% wool yarn, 50 grams 70 meters. Number of skeins: 4 skeins of gray, 1 blue, 1 plum, 1 white, 1 each of blue and pink, and 1 more skein of green and cherry yarn. And also hook number 5.
IMPORTANT! To make the poncho bright, use a new color at the beginning of each new row.
You need to alternate colors in 1 row: light gray, blue, plum, white, blue, pink. Then again light gray, then cherry and light gray. In this way, knit until the end of the product.
To begin, you need to use a No. 5 crochet hook to cast on 72 outer loops with light gray yarn and close its ring. We carry out further knitting in a circle:
- 1st row: 2 outer loops. In the same loop, perform 1 double crochet. Skip 1 outer stitch, next 2 sts. p. and knit 2 double crochets into the next loop. Repeat 5 times. Tie 1 st. p., skip 2 outer loops and knit the next air loop.
- Knit 1 more time from start to finish and finish with 1 outer loop and 2 double crochets in the first loop of the round. Close the row with 3 chain stitches and connect 2 chain stitches at the beginning of the row. Break off the remaining thread.
- 2nd row: attach a thread of a new color to 1 chain loop behind the last 3 loops of the previous row. Work 2 double crochets for each outer stitch of the previous row and 1 chain crochet between 2 double crochets. Repeat the second row 5 times, attaching a new thread with each new row.
- On the shoulders, skip 2 double crochets and 3 chain stitches. Work in the round with 2 double crochets on the sides of the work and only 2 double crochets in the middle of the front and back.
- Repeat the stripes in the same sequence for the 30th round. Be sure to knit the last color row with cherry-colored yarn, and finish knitting by knitting 2 rows with light gray thread.
At this stage, the knitting is finished and the product is completely ready! If desired, you can decorate it with colored fringe or one color.
Crochet poncho for girls
There are many outfit options for little fashionistas. A poncho is one option that you can make yourself.
Let's look at how to make an elegant crochet cape for a girl. For materials we will need Merino Bulky yarn from Yarn Art and hook number 7.
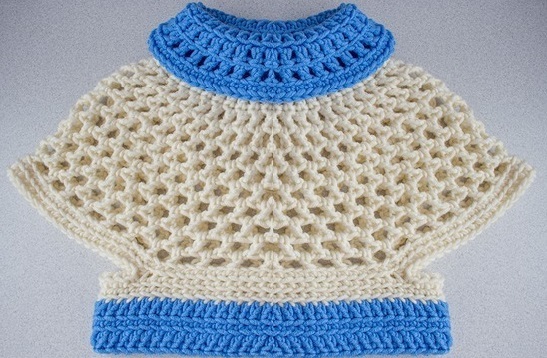
Before starting knitting, you need to measure the diameter of the child’s head, since the poncho will be put on over the head. First, we cast on a number of loops equal to the diameter of the baby’s head minus 1 centimeter, since the yarn tends to stretch.
We knit the second row with air loops, and in the third we make 1 increase. We tie 1 row with single crochets. We knit in a circle, evenly adding 2 loops in each row. We knit in this way to the desired sleeve length. Then tie the fabric with 2 rows of single crochets behind the back wall of the loop.
In the next row you need to skip the sleeve loops, and instead make 3 loops in increments. Knit the next rows with air columns to the desired length. In our copy, we knitted 2 rows with double crochets and 1 more row with single crochets.
Thus, it turned out to be a wonderful poncho cape for a little fashionista.
We hope that by following our tips, you will be able to knit a unique cape that will keep you warm in the cool season.
 6
6