Imagine the situation: winter is coming, and you in a hurry take out your down jacket and see that your previously favorite jacket fits you baggy or is so big that walking in it is uncomfortable and ugly. You can buy a new jacket or take it to a studio, where craftsmen will quickly and efficiently sew your item. However, all this costs a lot of money. Don't worry, there is a third option. It is quite possible to sew a down jacket at home, but you need to act carefully, following all the instructions. Then the thing will warm and delight you again.
What will you need for this?
In order to sew a down jacket yourself, you need the following tools and materials:
 sewing machine;
- threads in color;
- scissors;
- steamer or nail scissors;
- ruler or measuring tape for sewing;
- chalk or dry piece of soap;
- tracing paper;
- interlining;
- iron.
When choosing a sewing machine needle and thread, be careful! It is best to choose sharp, thin needles from No. 60 to No. 100. It is recommended to sew at low speed, because the layer of fabric and filling is quite thick. As for threads, choose reinforced ones. They are particularly durable because they have a twisted weave and contain various fibers.
How to fit a down jacket to your figure?
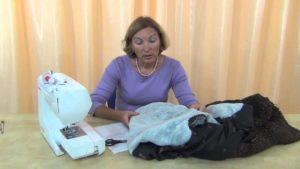 To begin, put it on, stand in front of the mirror and carefully examine yourself from all sides. Don't forget to wear underneath the items you plan to wear it with in the future. This will help determine the required width and prevent in the future the possibility that a sewn down jacket will be worn too closely with a woolen sweater or warm trousers.
Stages of work
Once you have decided how many centimeters you need to sew on your down jacket, you can begin to work directly.
Sew on the sides
 Turn the jacket inside out. Using a sharp object (small scissors or a special seam ripper), open the side seams and carefully remove the old threads. Some modern products are factory-treated with adhesive tape. If this is present, then it is necessary to peel off the hem allowance and, if possible, remove the sticky layer from it. Fabric soaked in glue will be more difficult to stitch.
- Afterwards you will need tracing paper or other thin paper. Some housewives use thicker paper, for example, wallpaper, but for inexperienced seamstresses we recommend tracing paper, on which you can easily stitch. Place it on the side seam and draw a taper line along it, then mark half the distance from the taper line to the edge. Connect the marks. Do not skip this step so that in the future there are no gathers and constrictions on the front side of the product.Now use your sewing machine to make one stitch along the drawn line directly on top of the tracing paper, then remove the paper.
- The next step is to remove the factory threads using scissors using upward movements. The allowance must be cut at a distance of 1 cm from your stitching. If the seam was taped at the factory, then repeat this action using non-woven fabric and an iron. Apply the hot iron for a couple of seconds and remove the hot iron: the material sticks very quickly.
- At the end, open the seam on the lining fabric, sew it along the side seams according to the size of the front fabric. After this, you can connect the lining to the outer material. Next, you just need to sew the cut and turn the down jacket inside out. All that remains is to try it on!
Shortened into a jacket
If you think that the down jacket is too long and you decide to cut it yourself, then follow the instructions:
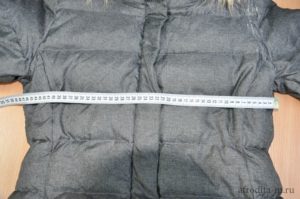
 open the bottom seam of the product and remove the factory threads;
- open the lining material by 15–20 cm;
- Carefully cut the length you need with scissors. If feathers or fluff get on the cutting line, it is better to carefully remove them so that they do not come out when sewing;
- form a hem from the outer fabric, turning the top 0.5 cm of the fabric inward, and sew an even seam;
- trim off the excess lining and sew to the inside of the down jacket.
How to sew a sleeve with your own hands?
If you are not satisfied with the length of the sleeves on your down jacket, then shortening them will not be difficult. Here you need to follow the same pattern as when cutting the bottom. By the way, now the current sleeve length is just below the elbow. If you wear this jacket with long gloves, you get a stylish and fresh look. If you are not satisfied with the fit, armhole or width of the sleeve, then it will be much more difficult to recut and sew it yourself. This is possible if you have sewing experience.If you decide to do this, then pay attention to the following tips:
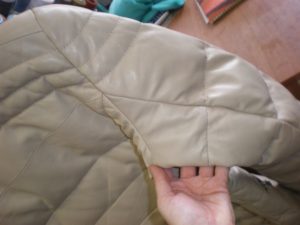
 do not rip off the sleeve immediately. Try using a coat hanger. If the result does not satisfy you, carefully open the side seam of the product, open the sleeve;
- find a pattern (you can find a diagram on the Internet or use a sleeve from an old jacket that suits you), attach it and trace it with chalk along the contour. Draw a new armhole line, first adjusting the side seam line;
- if necessary, decide on the sleeve width
- sew the side seam of the down jacket (see above for how to do this), then sew the side seam on the lining and the sleeve itself;
- fit the sleeve correctly. Using chalk and pins, carefully mark fit reference marks on the sleeve and jacket itself, pin the pieces together and begin basting. It is important to ensure that the sleeve head does not begin to wrinkle;
- turn the sleeve inside out, straighten the lining, carefully sew the rest of the seam;
- Turn the sleeve right side out.
Do not try to re-cut a sleeve without a pattern. Even professional seamstresses always use it so that the sleeve does not twist or wrinkle when worn.
Sewing a down jacket is quite possible if you have at least minimal sewing skills. The main thing is to take your time: once you cut off the excess, you won’t be able to put it back. The quality of your work determines whether you will wear this item in the future.


 sewing machine;
 Turn the jacket inside out. Using a sharp object (small scissors or a special seam ripper), open the side seams and carefully remove the old threads. Some modern products are factory-treated with adhesive tape. If this is present, then it is necessary to peel off the hem allowance and, if possible, remove the sticky layer from it. Fabric soaked in glue will be more difficult to stitch.
 open the bottom seam of the product and remove the factory threads;
 do not rip off the sleeve immediately. Try using a coat hanger. If the result does not satisfy you, carefully open the side seam of the product, open the sleeve;
 0
0




Good afternoon, Alexandra.This is my first time sewing a jacket and no one taught me how to do this. I have a question: how to sew the inside seam of a jacket on a machine?