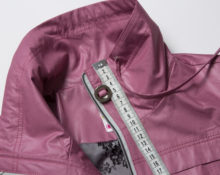
When choosing a shirt, a problem often arises: it fits perfectly on the torso, but the sleeves are longer than necessary. Because of such a shortcoming, you should not refuse the thing you like. An excessively long part with cuffs can be shortened to the required length.
Sequence of procedure
To ensure that the result of the work does not disappoint, you need to perform several basic actions in a certain sequence:
- Determine exactly the required length.
- Rip off the cuff.
- Shorten the part.
- Re-sew the cuff.
Useful tips
When determining the required length of a shirt, two basic rules must be followed.
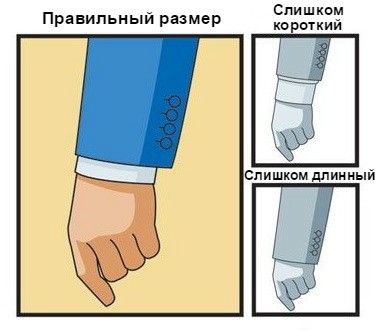
- The correct sleeve length is determined by the location of the lower edge of the cuff: the cuff should reach the bone on the wrist that marks the attachment of the thumb to the hand.
- The optimal ratio of shirt and jacket: the shirt should extend beyond the edge of the jacket sleeve by 1.5 - 2 cm.
How to shorten the sleeves on a cuffed shirt
The main way to shorten the length is to alter this part of the shirt.
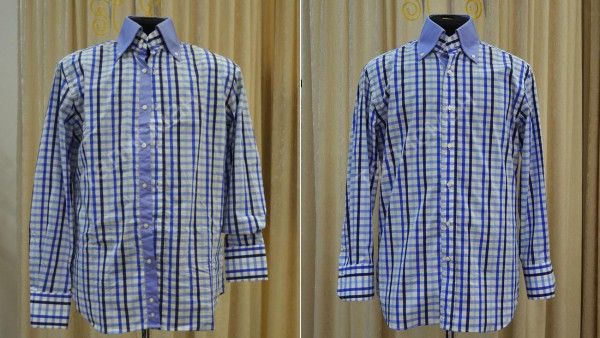
Reference! The sleeve can be shortened by cutting it on both sides: from the bottom and along the edge. The easiest way is to cut off the excess fabric at the bottom. Sewing a shirt along the edge is a more complex method, which is recommended for experienced seamstresses.
Necessary materials, tools
Before starting work, you should prepare all the materials and tools that will be needed during the re-stitching process:
- sewing machine;
- threads matching in color and thickness;
- needle for hand basting;
- safety pins;
- centimeter.
What will help you neatly shorten the sleeves of a shirt with cuffs?
To shorten, you must first correctly determine the required length. The shirt is put on, the excess fabric is pinned, and the new length is checked.
You can shorten the length in two ways: the simpler one does not involve altering the spline; with the complex method, the spline has to be redone.
1 option
- Carefully rip off the cuff and secure the existing folds with pins to preserve them.
- Measure the required length to be cut.
- Cut off excess fabric.
- Sew on the cuff, leaving folds on the product.

Important! When drawing a cutting line on the fabric, it is necessary to add 1 cm to the new length for an allowance.
Option 2
- At the beginning of the work, the cuff is also separated and the folds are marked with pins.
- The elements with which the slot was processed are stripped off.
- Apply a new line to the bottom edge (required length + 1 cm allowance).
- Measure the size of the slot on the sleeve.
- Mark a new spline: from the shortening line on each side of the spline, mark the same length that it had. Cuts are made for a new spline.
- At the top of the slots, a triangular cut is made, similar to the one that existed.
- Cut off excess fabric at the bottom of the product.
- The splines are turned.Start working with a narrow element. Having attached it completely, they go into a triangle at the top. Then a wide facing is attached.
- Sew on one surface of the cuff, placing folds on the sleeve fabric.
- Finish the work by sewing on the second fabric of the cuff. Perform stitching.
- Work in the same way on the second sleeve.
How can you do without shortening
Even if the length of the product does not require alteration, on hot days there is often a desire to shorten it for a while. There are several ways to help with this.
Application of decorative elements
The pata clasp and decorative button will make you feel comfortable and look elegant.
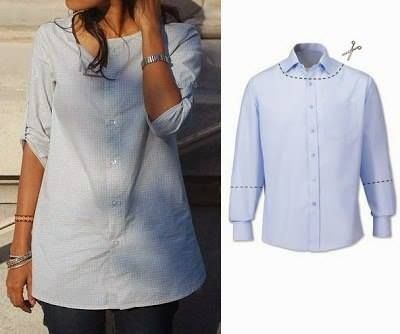
Reference! Pata is a special piece in the form of a strip of fabric that is used as a decorative element and also has a practical purpose.
To do this, you need to select a suitable fabric (you can use a contrasting fabric or companion fabric), cut a rectangle out of it for the pata. Folding it in half, outline the contours of the fastener. You should get a narrow rectangle (width 2 - 3 cm). One edge of the strip is made sharp-angled; this is where the buttonhole will be located. The patch is stitched from the inside, turned inside out, and ironed. A loop is made at the pointed end. Sew the fastener on the wrong side of the product.
Reference! The place where the patch is sewn is determined in the center of the outer side of the sleeve (opposite the side seam). From the shoulder line to the pata leave 10 to 15 cm.
Sew on the fastener using a double stitch. A button is sewn on the front side in the middle of this line. If necessary, the sleeve is rolled up and the pata is fastened with a button.
Rules for beautifully tucking sleeves with and without cuffs
A simple way to change the length is to tuck it.

To make a shirt with rolled up sleeves look beautiful, you need to follow some simple rules.
- Ironed sleeves look better after rolling up than wrinkled ones, so if possible, the shirt should be ironed.
- Rolling the cuff to fit gives the lapel a neat look.
- Having rolled up the sleeve to the elbow, you should straighten the folds so that the shirt looks somewhat careless.
What can you do quickly if it turns out that your shirt has too long sleeves?
A simple method that will not require time for alteration will help to slightly change the length of an important part of the product. You need to unbutton the cuff, fold it once so that the wrong side is on top, and then fasten the button again and straighten out the folds.
What not to do when shortening shirt sleeves
When shortening the length by more than 2 cm, you cannot simply cut off the excess fabric. This will cause the length of the spline to shorten. A minimal cut with additional folds makes the product look unattractive. In this case, not only the excess fabric is cut off, but the vent is also redone.


 0
0
