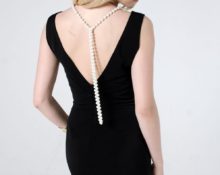
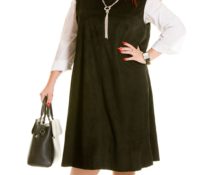
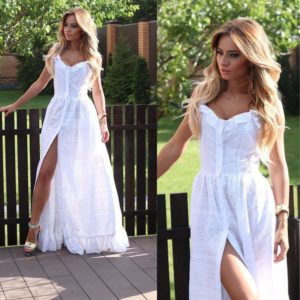
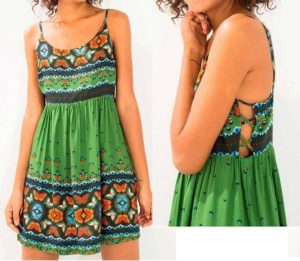
 A sundress is technically a sleeveless dress with straps. They come in both summer and winter, while some sundresses can be worn in warm weather, alone or with a T-shirt. It’s possible in cold weather, you just need to complement it with, for example, a turtleneck and a new chic look is ready!
Choosing a style and fabric for a women's sundress
Once you have decided what season you want to sew a sundress for, you can move on to choosing fabric.
Which fabric to choose?
For summer sundresses, fabrics such as:
- guipure;
- lace;
- silk;
- chiffon;
- jeans;
- staple;
- linen;
- gauze;
- cotton.
 For winter sundresses you can choose something from the following materials:
- suede leather;
- velours;
- jeans;
- gabardine;
- wool;
- velvet;
- thick knitwear;
- leather.
Choice of style
What styles of summer sundresses exist?
- sundress without straps;
- with open back;
- short sundress;
- long sundress;
- straight cut sundress;
- with an asymmetrical skirt;
- trapezoid;
- combination.
Winter sundresses come in the following styles:
- fitted;
- trapezoid;
- business sundress.
Taking measurements to quickly make a sundress
 For that to make your work easier, you can take measurements not from yourself, but, for example, from a sleeveless T-shirt. You can take a T-shirt fitted or loose, depending on what kind of product you want, the main thing is that it does not stretch.
By making patterns using this method, you can sew, for example, a tight-fitting sundress from knitwear, or a flared, flowing sundress from chiffon or satin.
In order to remove patterns from a women's T-shirt, you need to prepare the following tools:
- paper (for example, newspaper), tracing paper or construction transparent film;
- marker or pencil;
- a ruler, it’s also good to have tailor’s patterns on hand, but they can be replaced with improvised means;
- scissors;
- safety pins.
 Once all the tools are collected, Let's move on to making patterns:
First, you need to fold the ironed T-shirt in half, turning it inside out, aligning and pinning the side seams and shoulder seams, and lay it out on a flat and smooth surface on top of the material prepared for transferring patterns (if you use film, it is usually placed on top of the product and pinned and trace the contours with a marker).
Then they work with the outlined contours. Determine and designate the desired length of the product and its silhouette.
If you are planning a trapeze sundress, then the bottom of the product is expanded by the required amount, the wider, the larger the coattails will be. The lower cut is made slightly rounded.
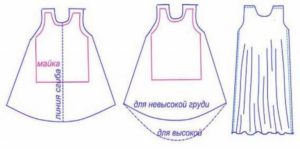 To create a fitted knitted sundress, you just need to extend the side lines to the desired length, because this type of material requires strong stretchability and a precise fit.
A quick and easy way to sew a summer sundress
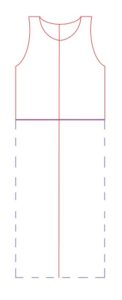
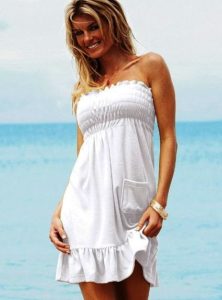
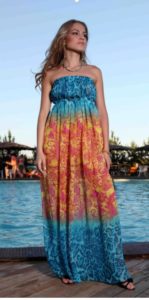
This method can be called one of the options for machine-made “column” buffs. This the method involves the presence of a piece of fabric of a rectangular or trapezoidal shape, elastic band or elastic thread and two measurements:
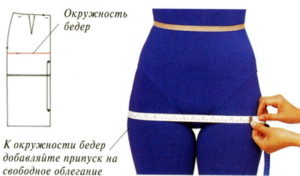
- Hip circumference + 4-6 cm - this will be the width of the product.
- The length of the product, depending on desire, can be either knee-length or maxi, and in this method it is measured from the armpits.
Before you sit down to sew this sundress, you need to decide where the elastic band will be pierced.
But you can position it in several ways: either across the entire area of the bodice, as if creating princess style, either from the top cut to the waist or 2-3 cm along the top and the same in the waist area.
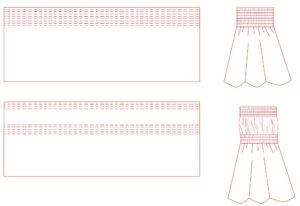
There are several options for creating buffs:
- Sew a linen elastic or elastic thread with a zigzag;
- Insert the elastic thread into the bobbin.
 The second method is much more convenient, because if you don’t have to monitor the location of the elastic, you don’t have to do preliminary work in the form of marking it, but you can just stitch as usual.
Then it’s all up to you to decide what the sundress will look like in the end.
If you decide to fill the entire part of the bodice or even up to the waist with puffs, then we lay a line from the top cut to the intended end with an interval of 1 cm.
If the elastic band is located above the chest and at the level of the waist or hips, then we lay about 4 lines or more at each position with the same intervals, so the elastic will definitely fix the sundress on the body well.
Advice! If the gathering is located at the level of the hips, the area between the elastic bands can be slightly fitted, then the product will not look baggy.
 After the elastic is stitched from one edge to the other, you can stitch down the seam, which at your discretion will be either the side or the back.
All that's left to do is process the bottom cut of the sundress.
To do this, you can either overcast the edge of the product and stitch it by about 0.5 cm, or fold it twice by about 0.7-1 cm, iron it and stitch it.
At the end you will only need to iron the product thoroughly.
We sew a tunic sundress without a pattern
Chiton is a traditional outfit of the ancient Greeks, in it every woman will look like a goddess!
 Who would have thought that it is easy to sew, all you need is desire and a little free time.
Such a sundress will be ideal both for going to the beach and for an evening out, it all depends on the material from which the product is made and on the accessories selected for it.
A linen or cotton chiton is a good option for a casual summer outfit; made from chiffon or silk, it will look perfect at a party. These models are also suitable for short girls.
A chiton is sewn from two identical pieces of rectangular fabric, the width varies from 80 to 150 cm, and the length can be different - at least above the knee, at least maxi to the floor. Chitons whose back length exceeds the length of the front look very beautiful.
Pieces of fabric are sewn together on the sides, as if forming a pipe, but you can also leave slits on the sides, after which they are permanently fastened in the shoulder area, or using special fasteners - brooches.
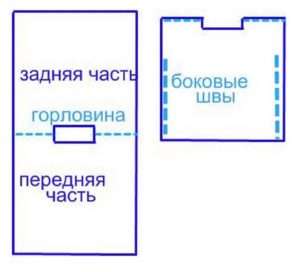
It is customary to belt such sundresses at the waist or under the chest, forming beautiful flowing tails along the entire length.
Important! In order to smoothly process the edges, you can pull out the longitudinal and transverse threads; with this simple manipulation you can lay perfectly even lines on highly sliding fabrics.
We sew a summer sundress with straps
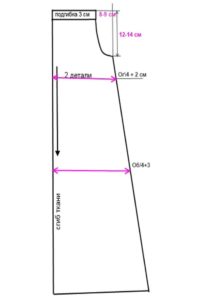 You can easily sew a sundress with straps using the pattern of the first model, made using a T-shirt.
To do this, you just need to cut off the top, everything else is the same as in the first option - the length and width of the sundress varies depending on your desire.
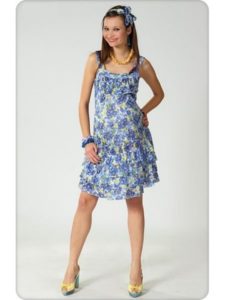 To To make a pattern for this sundress we will need:
- wrap the T-shirt at the level of the armpits;
- give allowance for the strap, depending on its width;
- draw a strap, its length can be different, depending on preferences;
- You can also use various cords, ribbons or even a chain as a strap.
The side seams of the product are ground down, after which the assembly allowance is turned up and the armhole is processed. After that, one or two straps are inserted into the resulting blanks in order to maintain the assembly; fastenings can be made at the edges of the straps.
Sewing and constructing a winter sundress
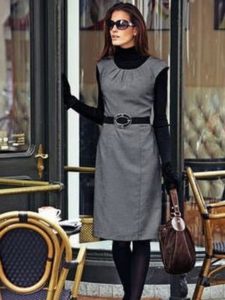 In order to sew a warm sundress with your own hands, you need to have pattern for the base of the sheath dress.
Based on this pattern, you can create many interesting sundress models.
In order for a dress pattern to turn into a sundress pattern, you just need to use a drawing of the back and front. Further, such a base pattern can be modeled taking into account personal preferences.
Fitted sundress
But You can also create a pattern “from scratch” according to your measurements, such a sundress will definitely fit perfectly on your figure.
Measurements needed to build a winter sundress:
- Сг - half chest circumference + 3-4 cm for freedom of fit.
- St - half waist circumference + 3-4 cm.
- Sat - half hip circumference + 3-4 cm.
- Lts – back length to waist.
- Vg – chest height.
- CG - center of the chest.
You can do it yourself make a sundress pattern according to individual sizes directly on the fabric:
- Align the lower and upper sections of the fabric.
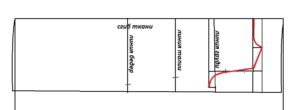
- We fold the well-ironed fabric twice the width of the back + an increase for finishing the seams. It is necessary to fold in the direction of the grain thread.
 We set aside the length of the product from the base of the neck, for example, one meter and add a couple of centimeters below to process the cut.
- Draw a straight line - this will be the base of the neck. From this line we put 3 cm down, and from it 10 cm to the side, we connect everything into a rectangle, then we draw a smooth curve for the neck.
 From the bottom line of the neck down, we put the Dts measurement down and put a mark there - this is our waist line.
- Divide the dts by 2 and put the resulting value up from the waist line - set the chest line.
- Along the chest line we lay off the width of the back, divided by two, and from the resulting point, we put a perpendicular upward - we get the armhole line.
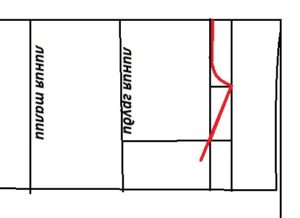
- Then we connect the top point of the neckline with the point obtained in step 7 - thus, we have a shoulder bevel line.
- We set aside ¼ of the waist length along the same line in the drawing and put a mark.
- Next, we set aside the chest volume. To do this, we measure the resulting armhole. Since we are making a sundress, it is better to make the armhole looser; to do this, we add a line down a couple of centimeters and stand perpendicular - this is the new chest line along which we will plot its volume.
- We divide the distance from the shoulder to the chest into three equal parts and smoothly round the lower one.
- Then we draw the armhole by eye. In a sundress, the armhole can be made to your taste.
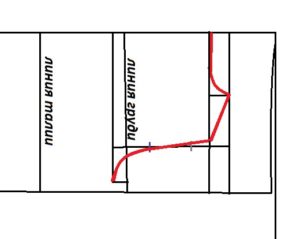
- From the waist down, set aside approximately 18 cm and place the hip line, on which we mark our measurements St/2 + 4 cm.
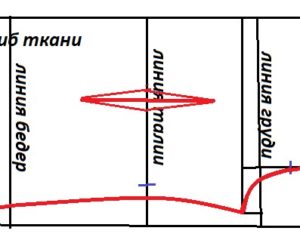
- The bottom of the product can be left straight or narrowed, it all depends on personal preference.
- We connect all the resulting points with a smooth line.

- As you can see from the picture, there are a few unused centimeters left at the waistline, which will need to be tucked into the dart for a perfect fit of the product to the body. But you can leave it this way.
- At this stage you can cut out the back and make darts. We cut out the part with an allowance of 1.5 centimeters. The neck can be cut along the contour, then its recess will be approximately 1 cm, but you can make the neckline deeper.
- To draw darts along the waistline, you need to turn the back to the wrong side. Fold the fabric in half and transfer the waist line marks inside out and draw a straight line. Next, you need to divide it in half, from the resulting point in both directions we add perpendiculars approximately 10 cm down and 14 cm up.
- We remove the remaining section along the waist line according to the drawing into a dart. For example, if the segment was 2 cm, then we put 1 cm on both sides of the vertical line. If the dart seems too small or large, then it can be altered a little.
- We transfer the dart to the other side using pins, which must be pinned along its contour through both layers of fabric. Next, the part is turned over to the other side and the dart lines are drawn using a ruler and soap.
- Again, fold the fabric in half along the width of the cut out back and transfer everything along the contours - this will be the front of our sundress. We transfer the line of the waist, chest and hips to the shelf - these are control marks, in the future they will be needed in order to evenly connect the back and the shelf.
- As soon as all the lines are translated, we remove the back part and work with the shelf. First you need to build a chest dart. To do this, we put down from the base of the neck a segment equal to the height of the chest and ½ of the measurement, the center of the chest + 1 cm.
- We draw the dart directly, its solution depends on the volume of the chest and ranges from 6 to 9 cm. The dart can be positioned quite arbitrarily, the main thing is that its angle is at the point found in the previous paragraph.
- Now you need to extend the side cut by a distance equal to the tuck opening.
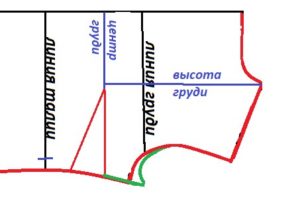
We lay the dart, overlapping the contours on top of each other, and extend the upper side cut of the shelf. This is necessary in order not to cut off excess fabric when cutting. And it will look something like this:
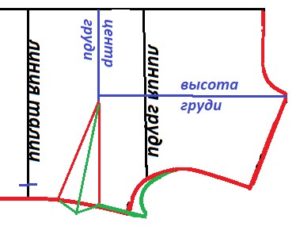
We move on to the neck, which needs to be deepened; the value can be taken arbitrary, for example, 10 cm.
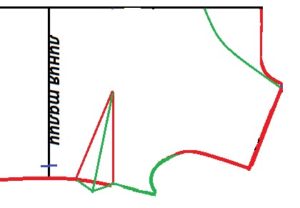
We give allowances for seams only for darts, since the part was translated taking them into account. You can cut it!
As soon as the part is cut out, transfer the darts to the other side, similar to step 19.
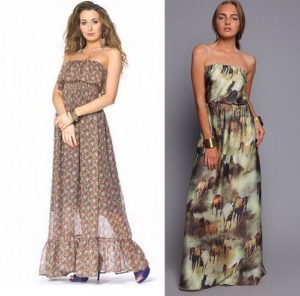 Additional modeling can be done using the cut out parts if desired.
If the edges of the fabric crumble, they must be treated with non-woven fabric.
Cut out the facing of the neckline and armhole.
Sew darts along the chest and waist. Iron the chest darts down the sundress, and the back darts into the center of the back.
We process all sections of the product - overlock or zigzag.
Sew the shoulder seams and one side seam at a distance of 1.5 cm from the edge and iron them.
We sew the zipper into the other side cut.
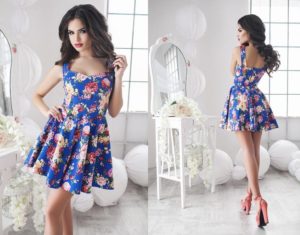 note that If you don’t have darts in your sundress, then you don’t need a zipper, since it will be easy to take off and put on.
We process the bottom cut of the sundress. To do this, we lay 1 cm of fabric inside twice, iron it and sew a line.
We duplicate the facings with non-woven fabric and stitch along the side that will be free. We lay out the facing along the armhole and neckline, aligning face to face. Next, we bend the facing inward so that 1 cm of the main part peeks out, baste and sew with a finishing stitch about 1-1.5 cm.
Attention! Before stitching the facing, the ends of the shoulder seams must be trimmed so that they do not look too voluminous under the facings.
Iron the product and you're done!
We sew a denim sundress
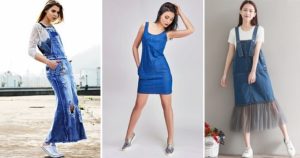 You can sew a denim sundress yourself very easily using a ready-made pattern.
You can also use the previous method by altering the finished patterns according to your preferences, for example, deepening the neckline and armholes and changing their shape.
Now you can sew your own sundress from any fabric.


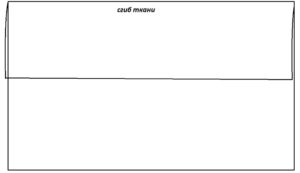 We set aside the length of the product from the base of the neck, for example, one meter and add a couple of centimeters below to process the cut.
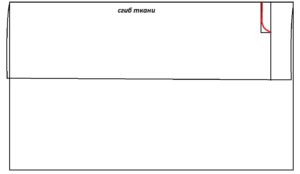 From the bottom line of the neck down, we put the Dts measurement down and put a mark there - this is our waist line.
 0
0
