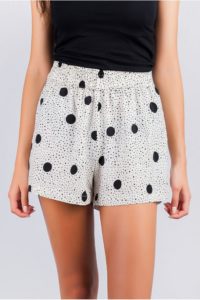
 Most girls at the beginning of the summer season have already changed their wardrobe, diversifying it with a couple of new shorts with elastic. Comfortable, loose-fitting model - idealif you are planning a trip to the beach or a sports activity.
And if you don’t yet have such a convenient and practical thing, then it’s time to create it.
It’s not at all difficult to create a pattern and then sew women’s shorts with an elastic band based on it.. Even those who are just learning to sew can cope with this. In addition, this model does not require the presence of complex sewing equipment in the arsenal. All seams will be finished using a regular straight stitch machine.
What measurements are needed to create a pattern?
To work you need the following data:
- hip girth;
- length of the product.
Prepare also:
- measuring tape;
- thin braid or lace.
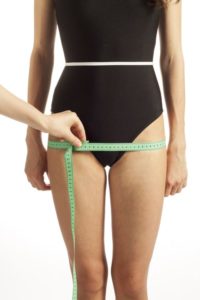 Taking measurements correctly is half the success. Therefore, it will be very good if you find an assistant for such a responsible action.
Advice. During work, the model should not be wearing bulky clothing that could affect the accuracy of measurements. You should take a natural position. Slouching or arching your back, trying to become slimmer and tighten your stomach will only cause harm later.
First of all, you need to tie a thin braid or twine around your waist. This will help you find out the exact data.
- To take hip measurements, a measuring tape is laid along the most protruding parts of the figure, making sure that it is parallel to the floor surface.
- Product length - on the side. The beginning of the measuring tape is applied to the braid and the desired size is noted.
- Note. Even if you plan to make low-rise shorts, measure from the intended waist.
IMPORTANT. The work starts with the basic foundation. You can use it to model any product you like.
- The shorts, like their pattern, have a back and front halves. That's why Waist circumference is divided by 2.
How to make your own pattern for shorts with elastic
As an example, let's look at the construction of a paper blank using the following measurements.
- DI – 40 cm;
- FOB – 50 cm.
Advice. It is most convenient to draw on graph paper. The grid applied to it allows you to draw straight lines without additional measurements. You can get by with regular wallpaper or whatman paper, but it’s better to avoid using newspapers.
Step-by-step construction of a pattern for women's shorts
Front half
Step #1
Draw a rectangle with sides:
- Vertical AB = A1B1 = product length (measurement taken);
- Horizontal AA1 = BB1 = ½ POB + 3 cm.
3 cm is added for loose fitting. If you plan to make shorts from a jersey fabric and want them to be tight, reduce this value to 1 cm.
Example:
AB = A1B1 = 40 cm;
AA1 = BB1 = 50: 2 + 3 cm = 28 cm.
Step #2
Draw a step line on the drawing, setting it aside from point A. Distance downwards = ½ POB + 4 cm. Place point C and draw a straight line parallel to AA1 and BB1 through it.
Example:
AC = 50: 2 + 4 = 29 cm.
Step #3
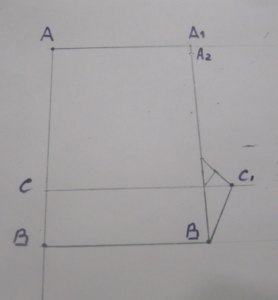 Extend the resulting line and set aside a distance on it = 1/10 OB. Put t. C1. From the resulting corner, draw a bisector 2.5 cm long.
Example:
1/10 POB = 50: 10 = 5 cm.
Step #4
Set aside a distance of 1/10 POB upwards and connect the three points with a smooth line.
Example:
1/10 POB = 50: 10 = 5 cm.
Step #5
From t. A1, set down 1 cm, place t. A2.
Connect all the resulting dots.
Rear half
The second piece can be built on top of the first, and then the pattern can be copied onto a separate sheet.
Step #1
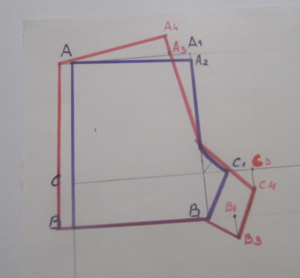 Extend the step line and set aside 1/10 POB from point C1 and place point C3
Example:
C1C3 = 50: 10 = 5 cm.
Step #2
From point C3, lower the perpendicular = 4 cm. You get point C4
Step #3
From point B, set aside 1/10 POB + 1 cm. Place point B1.
Step #4
From point B1, lower the perpendicular down = 4 cm. Mark point B3
Step #5
From point A1, set aside 5 cm to the left. Place point A3
Step #6
Rise from point A3 up to a distance of 1/10 . Mark item A4.
Step #7
Extend the bisector of the angle to 3.5 cm.
From point A, set aside 3 cm to the left and lower the perpendicular to the bottom line.
Connect all the dots.
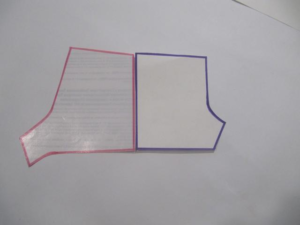 Transfer the pattern pieces onto separate sheets and cut them out.
It is necessary to check the correctness of the construction. The step and side lines on the two halves must converge.
Modeling
If desired, you can lower the planting line or decorate the lower sections, rounding them on the sides. Complete the product with pockets, a yoke or colored inserts.
Sewing
Advice.Before cutting out, wash the fabric in hot water and iron it.
Pre-decatation will save you from unpleasant surprises in the form of shrinkage of the finished product during the first wash.
After all, many fabrics are capable of significantly changing their size after exposure to hot temperatures.
 Fold the material in half. Place paper blanks on top and outline them with chalk or a special fabric marker. However, an ordinary soap remnant is suitable for this purpose.
- Set aside seam allowances of 10 - 15 mm. Along the top edge 5 - 7 cm. Cut out. You should end up with 2 front and 2 back halves.
- Align the pieces and stitch along the front side. Remove excess seam allowance, fold the pieces face inward and sew another stitch along the inside. The seams will be closed on both sides, which means there will be no need for overlock or zigzag processing.
- Connect the left and right pant legs. Baste the two halves along the bow line, and then add a connecting stitch.
- Start basting from the middle, this will allow the parts to line up perfectly.
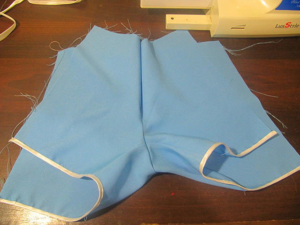
- Decorate the bow line with bias tape.
- Process the bottom edges in the same way.
- Sew the sides right side together.
- Trim the seam allowance and stitch bias tape on top.
- All that remains is to fold the top and insert the elastic.
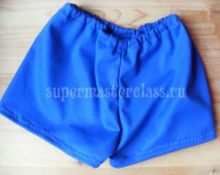
The result will look like this.
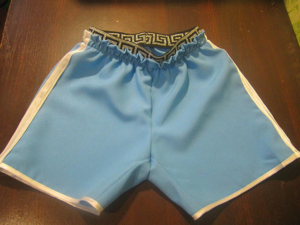
And from the inside out like this.
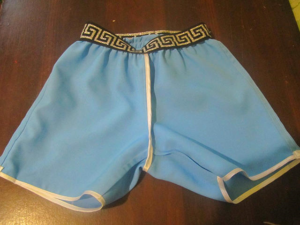
As you can see, there are no open cuts or frayed edges.
Other ways to make a pattern for shorts with an elastic band
 You don’t have to waste time creating a pattern with your own hands. There are plenty of alternative options.
- Rip out old shorts, iron the part and use them as a pattern.
- Download the pattern from the Internet. On the World Wide Web there are a huge number of sites offering this service for a certain amount of money. However, you can also find free resources.
- Buy a magazine with ready-made blanks and use them.
Either option is equally good.


 Fold the material in half. Place paper blanks on top and outline them with chalk or a special fabric marker. However, an ordinary soap remnant is suitable for this purpose.
 0
0



Thank you, everything is described in detail and clearly. Good luck to you.