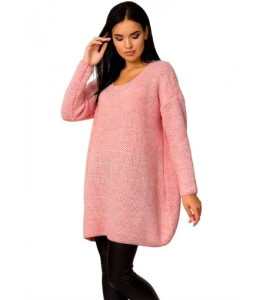
An oversized tunic is a universal wardrobe element that women of any age and size prefer to wear. The store has a wide selection of models, each of which differs in color, material, length and style. But if you want to wear something unusual and original, you can sew it yourself.
Fabric selection
Before you start creating clothes, you need to select the material. The versatility of the tunic is that absolutely any fabric is suitable for sewing it. It is important that the material is light and thin. Natural fabrics will allow the skin to “breathe” during the heat, while artificial fabrics will make the product durable and wrinkle-free. You can choose the following types of fabrics:
- Linen. An excellent choice for summer. The material holds its shape perfectly, so the item acquires light volume.
- Cotton. This material has not lost popularity for many years. This is already a classic, which is so loved due to its convenience and comfort. You can sew an airy tunic dress from cotton.
- Staple.Another option for a summer tunic. Most often the material is decorated with a floral print.
- Guipure. This material is suitable for girls who prefer to create more romantic images. Well, rich colors will add brightness to the look.
- Jeans. An excellent choice for sewing a tunic dress. This product can be combined with high-heeled shoes, sneakers or ballet flats.
- Chiffon. Airy, lightweight fabric that makes spectacular tunic dresses.
- Knitwear. The material is draped, so it does not wrinkle and has an attractive appearance.
- Crepe. Used for sewing loose-fitting tunics.
- Pleated. Suitable for making a pleated tunic dress that can be worn for a walk or work. You can combine the product with a feminine jacket, vest or blazer.
Quantity of material
After the fabric has been selected, you need to move on to the next point and calculate its quantity. To do this you need to follow these tips:
- Determine the length from the shoulder to the expected length of the tunic. Measure the sleeve.
- Add the resulting values. Since the tunic is supposed to be made oversized, it should have a dropped shoulder. It is necessary to measure what the length of the new shoulder section will be. This is done like this: apply the tape from the neck and bring it to the middle of the shoulder.
- From 1/2 of the shoulder, measure the value that will correspond to the length of the sleeve.
- At the point where the outer shoulder is supposed to be, measure the circumference of the arm, and then add 2-3 cm to this value. They are needed to give the sleeve volume.
Sewing
The creation of the finished product is carried out according to the following plan:
- Fold the material in half along the edge twice.
- There will be a neck in the upper right corner, so put a mark there.
- Measure 1 cm from the top, which will be used for increases.
- From the right end, lower 7 cm and put a notch.
- In the place of the fabric where the bend occurred, mark a point 3 cm below the top cut.
- Go through all the points with an arcuate line. The result was a neck cut.
- From the left corner at the top, go down 4 cm and put a mark. Connect the resulting point with the neck with a straight line, which is called the shoulder line.
- From the outer shoulder point, move down and set aside 1⁄2 of the shoulder girth, adding 2 cm.
- From the resulting point, bend the fabric to the right side and go down to the very end.
- Cut the material, focusing on all the straight lines obtained, without losing attention to the seam allowances.
Now you can move on to preparing the sleeve of the future product. To do this you will need:
- Set aside half of the shoulder girth (+2 cm), moving from the right corner at the top. Mark this place with a dot.
- From the right corner at the bottom, measure 1⁄2 of the estimated sleeve width. If a girl wants a sleeve of 20 cm, then she should set aside 10 cm.
- The points above and below must be connected by a straight line.
Take to work 2 parts of the tunic, folded in half. On the one that is intended for the front, make the neck deeper. To do this, fold the two parts right sides to each other, fix the shoulder sections and sew them together. Open the product with the front side up, and place the wide part of the sleeve towards the armhole so that it is directed face down. Secure with pins and stitch. All that remains is to sew the seams on the sides, fold the tunic over the shoulders with the wrong side up, and sew.
Neck and cuff processing
The procedure is as follows:
- Trim is suitable for finishing the neckline.
- But first you need to measure the length of the neckline along the back and front. Add the resulting values.
- If you need the neck to stand securely, then the obtained values should be reduced slightly (by 2 cm).
- Cut a strip for the neck. Set aside the length, to calculate which you need to multiply the resulting value by 2. At the end, add 1 cm to the seams.
- The width of the binding can take any value.
- Cuffs can also be of any width.
- To calculate the length you need to measure your wrist.
- Fold the cuffs in half with the front parts facing each other, secure them and sew. Do the same with the binding.
- Turn the completed elements right side out and fold them in half. Place the cuff at the bottom of the sleeve and secure with a pin. Just make sure the seams line up.
- Pin the wrong side of the sleeve and cuff together. To make it more convenient to work, you can do similar actions around the entire circle of the lower part of the sleeve. Machine stitch again.
- By analogy, fasten the binding to the neck and sew the stitch. At the end, it is advisable to walk over the binding with hot steam.
Processing the bottom
For these purposes you need to use an overlocker. If such equipment is not at hand, then an ordinary sewing machine will cope with the task. You can make the product a little more interesting if you add some decor. Alternatively, a ribbon with fringe. Secure it with a pin and stitch along the edge. If you need to turn an oversized tunic into a dress, you can simply increase the length to the required value.
 0
0