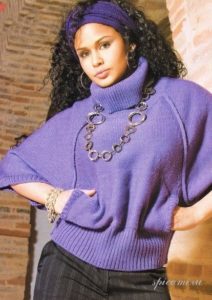
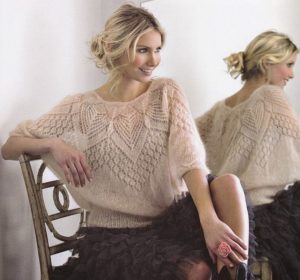
 The “bat” sweater appeared quite a long time ago (during the years of the long world war). The muse for the item was the Japanese kimono, and that is the only reason why the first models had very impressive “bat wings” (sleeves).
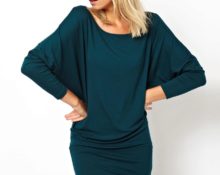
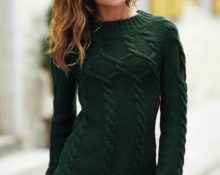
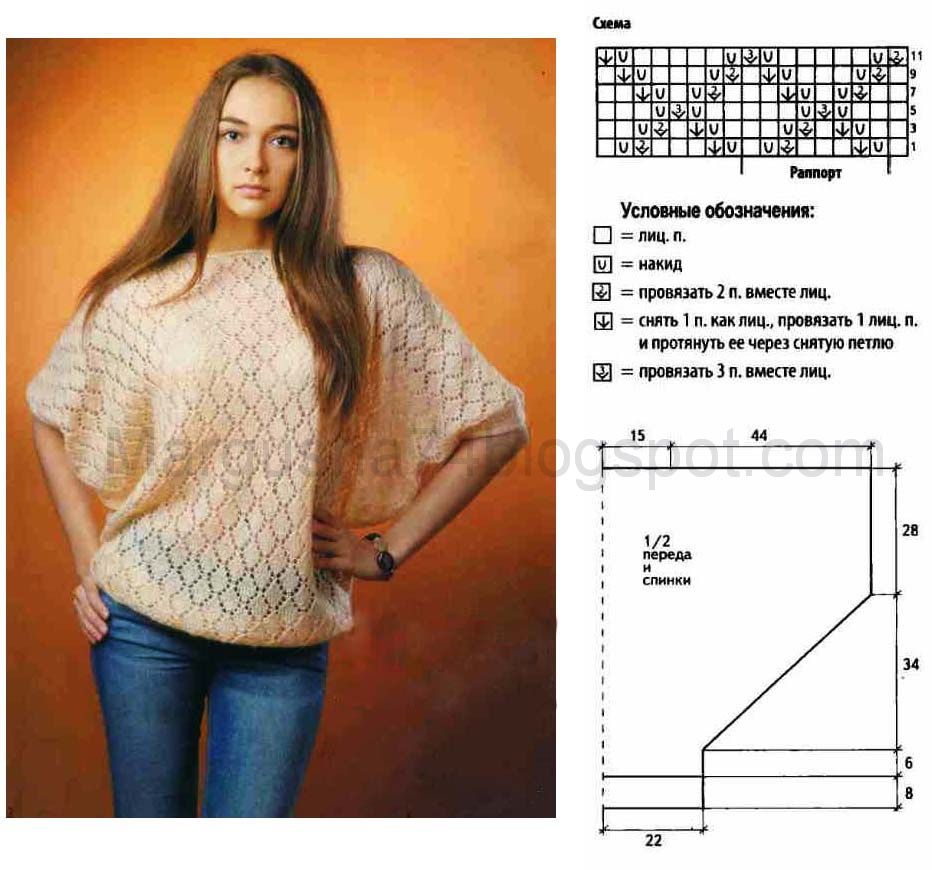
Now the sweater is not so voluminous, it has become much more feminine and comfortable. And if the first products were made exclusively of silk, then modern models can be made of knitwear. The knitted bat pattern will be beautiful and very warm.
You can wear a “bat” with tapered trousers, a miniskirt, or a pencil skirt. Complement the sweater with your favorite jeans and heels.
Selection of yarn and knitting needles
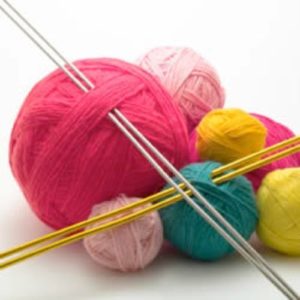
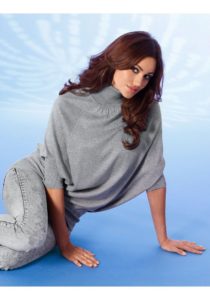
For the women's bat sweater model, you should not use too heavy threads or thick yarn. This will not create an airy product, and it will be uncomfortable with heavy sleeves.
 As for wool, you can safely add it in any proportion, depending on the need for warmth. The knitting needles are matched to the yarn accordingly. The number will always depend on the thickness of the yarn.The knitting needle model for such a sweater is regular knitting needles, but stocking knitting needles can be useful for the collar.
 Before knitting any product, you must try to create a sample. Each sample must have a design similar to the product. This will make it easier to count the stitches. Attach a ruler to the sample and count how many loops are contained in 10 cm. Then convert the loops to the desired size.
For beginners, a set of loops on knitting needles:
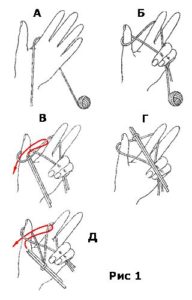
Set of first stitches for 2 knitting needles
Then, after counting and determining how many loops the product will require, you can proceed to the initial stage of knitting.
Knitting pattern
You can take the simplest patterns:
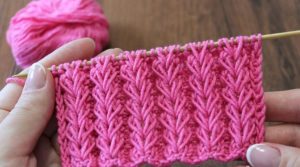
Knitting “English rib”
Usually a traditional set of loops is used, but if you want to make the elastic more elastic, you can resort to some others.

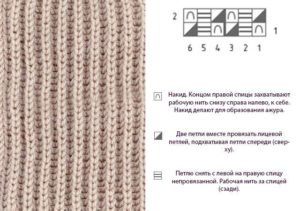
False gum pattern
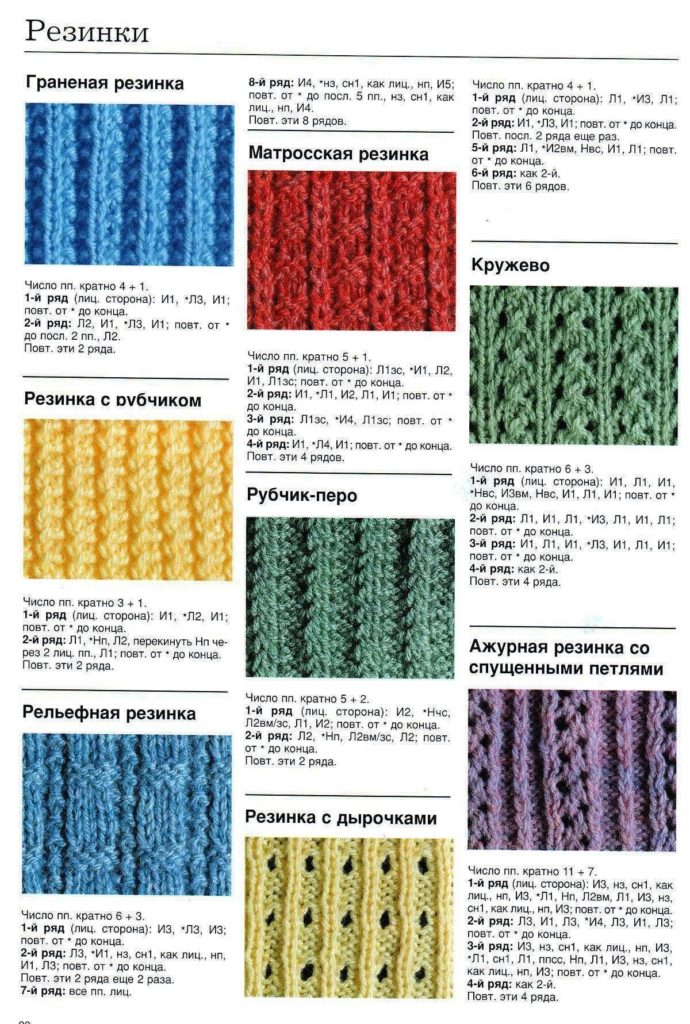
Several types of rubber bands
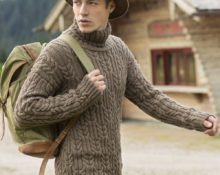
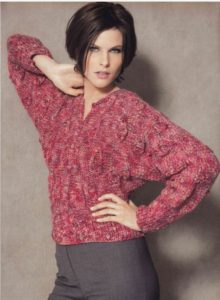
Some needlewomen value the history of this item so much that they like to create it from threads with a silk composition. These are very interesting models. It’s very pleasant to wear them even in hot weather, because real silk gives off a slight coolness. The fabulous shine of such fibers also beckons. Therefore, it is worth thinking about what exactly to create your models from.
Step-by-step instructions for knitting a bat sweater
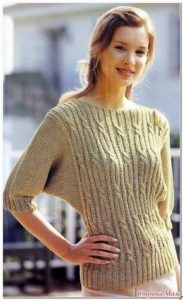
The bat model has approximately the same pattern for creating a sweater. It has a fitted elastic band and wide sleeves. Differences may be in sizes, fabric patterns and collars.
Let's analyze the classic model by stages of creation.
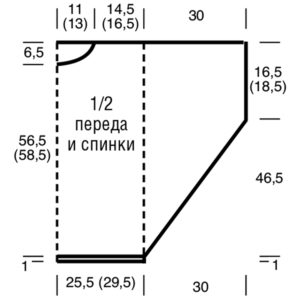
Pattern 1 “bat”
Other examples of patterns:
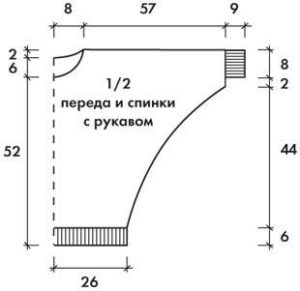
Pattern 2
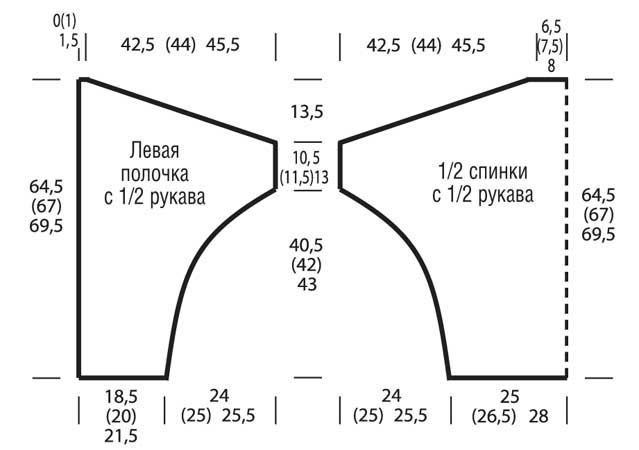
Pattern 3
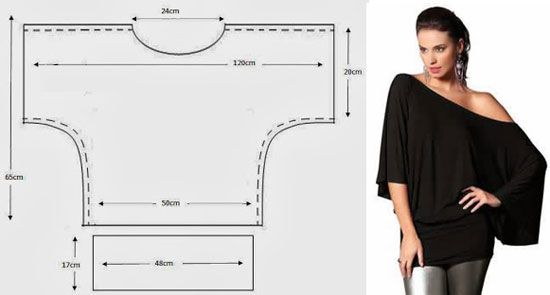
Pattern 4
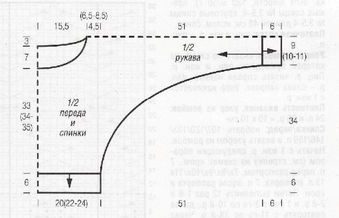
Knitting the back
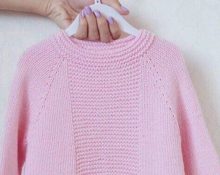
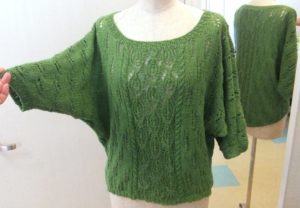
The back on the pattern is a rectangular piece and this is how it actually looks. It's fitted with elastic and the rest of it just hangs off the shoulders. They start knitting the back from an elastic band. Usually the elastic band is high, from 10 cm. This is necessary so that the sweater fits well and does not ride up.
 The neckline on the back can be very small; this pattern simply doesn’t have one. The elastic is picked up from the middle loops, after sewing the shoulder seams.
Before
 The front shelf is simply a twin of the back. The elastic band is the same in length and thickness, the rectangular part itself is also the same in height. The only difference is that there is always a neckline at the front shelf and it will be deeper than the neckline on the back.
The loops for the collar are also cast on after the shoulder seams are completed.
Sleeves
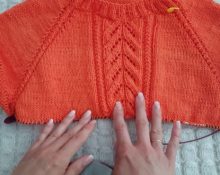
The shape of the sleeve resembles a trapezoid with a right angle. Closer to the elastic band, the sleeve is narrowed. They begin to knit it from the elastic band and then increase in each row to obtain such a wide sleeve in the area of the humerus.
Assembly of finished parts
When each element of the bat is ready, you can begin to carefully stitch it together. The principle of connecting such a blouse is also no different from connecting other blouses:
- perform shoulder seams;
- sew on sleeves;
- sew side seams at the sleeves;
- make a side seam between the front and back.
 The collar of the product can be knitted on stocking needles or crocheted.
As a result, you can get such a lovely blouse.
Knitting patterns
Scheme 1 with description
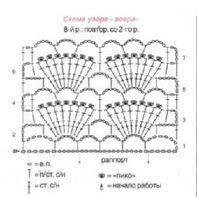
Diagram 2 with description

Scheme 4

Diagram 5 with description
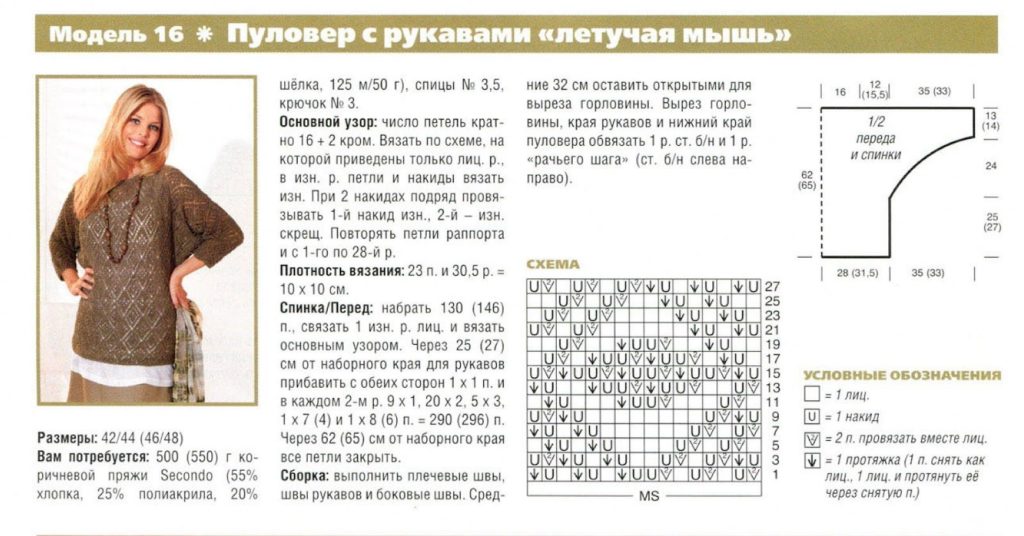
Diagram 6 with description
Scheme 7 for a sweater

The beautiful “bat” model is actually not as difficult to perform as it might seem. Therefore, not only the most experienced masters, but also beginners can take it on. So go ahead and knit another nice knitted thing.
 0
0