 You need to sort wearable items based on frequency of use. If you have worn a piece of clothing at least once within 12 months, leave it. Products that have been gathering dust on shelves unused for several years should be thrown away.
But you shouldn’t throw away such valuable material. Take them and breathe a second life into them. Make a blanket with your own hands, for the production of which you will need old sweaters, jackets, scarves and other woolen and knitted items.
Which sweaters are best to take for making a blanket?
Take all available products. The wider the color palette, the more varied the materials, patterns and reliefs of the patches, the brighter, more original and unique your plaid will be.
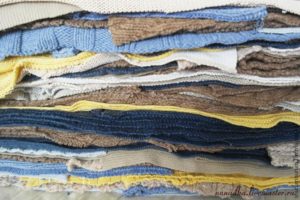 For a bedspread with dimensions of 200x200 cm you will need approximately 8-10 blouses. If you do not have a shortage of the required amount of consumables, but, on the contrary, have a surplus, select products for alteration that meet the following parameters.
- Color palette. First, decide for what purpose the blanket is being sewn and in what room it will be used. For going on picnics or relaxing at the dacha, choose a darker tone, and choose a denser and warmer fabric composition. If the item will serve as a bedspread for a bed or sofa, select the palette of the product taking into account the color scheme of the interior and its style.
- Composition of sweaters. There are two ways to go. The first option is to select materials that are similar in composition, and in the other, play with contrast, using products made from both natural wool and the addition of synthetic threads.
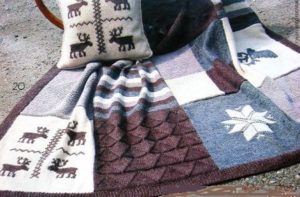
- Texture. Knitted sweaters come in a variety of patterns. This can be a straight stockinette stitch, purl stitch, ribbed stitch, braids, squares and diamonds. The more varied the pattern of the patches, the more interesting the final result.
- Aesthetics and suitability. Things must be clean, not eaten by moths. They may be old, but not dilapidated. This is necessary so that the blanket lasts longer. After washing, we iron the items, do not recycle areas with defects, cut out buttons and seams.
Once items have been selected, washed and ironed, the creative process begins. In order for the result of your work to be positive and you want to repeat a similar experience again (to create another masterpiece), you must clearly understand the stages of production and the tools necessary for it.
DIY knitted sweater blanket: step-by-step guide
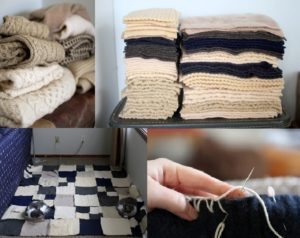 To sew a blanket, follow the instructions provided.
- From the selected blouses we cut strips 12 cm wide and about 36 cm long.
- Mix and sew three stripes into a square.
- Then we cut the stitched multi-colored strips crosswise at intervals of the same 12 cm. Now we have stripes, but already made up of squares.
Important! Knitted and woolen fabrics fray and unravel at the cut site, so they need to be overcast by hand or with an overlocker.
- Take a comfortable position on the floor and arrange the patches the way you want to sew them.
- Change the pattern until you are happy with the result.
- All that remains is to connect all the parts. We sew, making sure the seams match, and tighten the fabric to make the squares even.
If you are careful, the plaid is beautiful both from the front side and from the back.
How to make a patchwork blanket from knitted sweaters
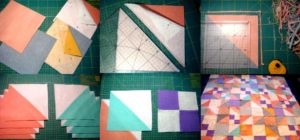 This method is more time-consuming and complicated.
To work you must have:
- threads of different thicknesses;
- needles;
- sewing machine;
- sharp scissors;
- pins;
- cardboard or plywood blanks.
There will be several templates. Large square (12x12 cm), triangles (large squares cut diagonally), small square (6x6 cm). We will make patchwork from the parts cut out with their help.
- Applying templates to the cut knitwear, we cut the required number of blanks.
- We iron and connect with pins, combining parts of different colors and textures into large squares.
- We sew together.
- We sew the squares into stripes. One strip will be equal to the width of the blanket. By analogy, we connect and stitch all the strips, forming a lengthwise fabric.
If you decide to make a warm blanket, then you need to combine three layers - lining, synthetic padding and a sewn blanket with an ornament.. Before stitching, secure all layers with pins.
Advice! Start chopping from the middle and move diagonally towards the edges. This will help avoid unevenness.
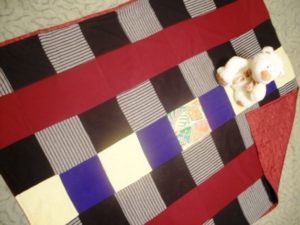 We quilt our blanket starting from the center. To improve the appearance of the blanket, we trim the edge with a knitted strip. We fasten it with a seam from the wrong side, bending it to the front. Sew with a decorative stitch.
We sew a blanket from old sweaters using a decorative seam
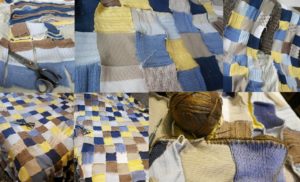 A decorative seam adorns the product. A white wool thread running along the edge of the blanket and around the perimeter of the squares closes the seam between them. Decorative stitching is done by hand using a needle with a wide eye. If you follow the diagram, it will be easy to lay such a seam.
The eyes are afraid, but the hands are creative. Even if at first it seems to you that this task is overwhelming, then in the process you will gain confidence in your strengths and talents.


 0
0


