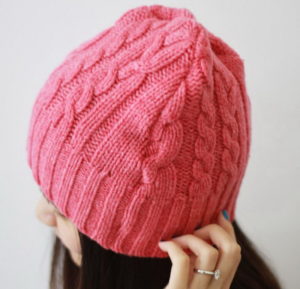
 In inclement weather, you always want to feel warm and comfortable. And many people have an unnecessary sweater that they might be too sorry to throw away. In this case, you can make a headdress out of it, because such a dense material is just suitable for creating a fashion accessory.
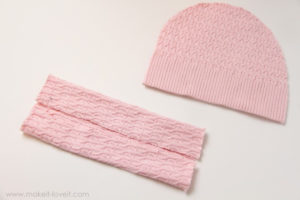
How to sew a hat from an old sweater with your own hands
To make the process more productive and not require much time, you need to prepare for it in advance.
Preparatory stage
 We will need:
- old thin sweater;
REFERENCE!
It is better to take a sweater with elastic at the bottom.
- scissors or sharp knife;
- safety pins;
- bright highlighter/marker or chalk;
- tape measure;
- ruler;
- threads;
- sewing machine.
The preparatory stage also consists of taking measurements and drawing up a pattern.
We take head measurements
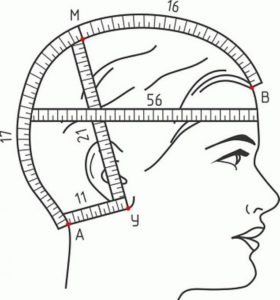 In order to sew a hat, we need to know the volume of the head. So first we'll take a measurement.
- To do this, take a measuring tape and wrap it around your head.
- After this, subtract five centimeters from the real value.Less needs to be done so that the product looks neater when worn.
- The next step is to find out the length. It will depend on your personal preferences. Let's consider an option with a slight overlap. It is necessary to conditionally hang the desired distance from the back of the head, from which the desired size will be determined.
Making a pattern
 Already, based on the measurements, you can proceed to the main part.
- We measure the duration from the beginning of the sweater. And we fix these places with pins.
- Next, cut off that part of the material that is located above the spaces you marked.
- Turn the resulting product inside out.
- Mark with a marker the edges that were previously pinned for volume.
- After this, you can remove the pins and straighten the fabric.
- Where there was a mark, it is necessary to draw a straight line along the ruler. This is necessary so that in the future you can sew a stitch on a sewing machine.
- Then pin again with pins at the site of the beam.
The pattern is ready, and at the same time, the fabric is cut. You can proceed to the final stage.
Sew the hat
 The final stage.
- You need to make a line on a machine in a straight line. To avoid creases, periodically tighten the piece of fabric.
- After the previous step, you need to pull out the products and trim the edges of the future hat, leaving about 1.5 - 2 centimeters.
- It is advisable to try on the resulting outfit; if everything suits you, you can move on to the next step.
- Turn the fabric back inside out.
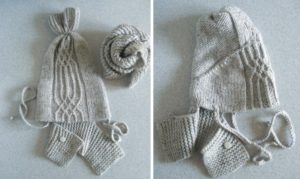
- Gather the volume at the end of the material with threads so that an “accordion” is formed. To do this, make a hand line, also holding from the edge to two cm.
- Pull the thread and carefully take the entire volume, then stitch this area all the way through.Until it is completely secured, all that remains is to wrap the formed bundle several times.
- Secure with a knot.
The hat is ready!
How to easily make a hat from an old sweater
Depending on the type of fabric of the accessory, the manufacturing stages will be different for each. We have already considered it on a fine basis, it remains to learn about other methods.
Hat for women from an old knitted sweater
 This will require almost the same materials as in the previous version. You can only discard the sewing device and add a glue gun.
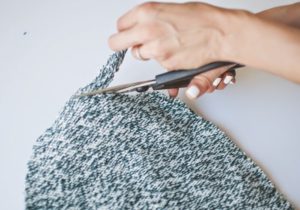
- Cut the sweater into two equal parts. And the resulting part must be cut one seam at a time.
- Fold the piece in thirds.
- Make a round cut at the top.
- Unfold and apply glue to the sides of the resulting pattern.
- The final action will be the following: do the same procedure with the internal spread. This will be the top of the hat.
So the knitted accessory is ready, which will not only decorate the girl, but also perform a heating function.
ATTENTION!
Do not be afraid that a mark from a marker or chalk will remain on the product. You just need to wash it once and the marks will quickly disappear.
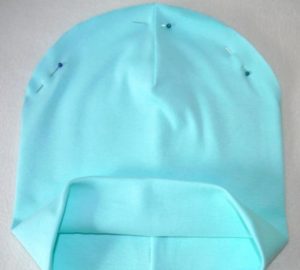
We sew a hat without a pattern from an old cotton sweater
 Yes, indeed, you can create a head bur with your own hands and without a pattern. This will also not be difficult at all and will not take much time. The things you will need are still the same. Only for ease of manufacture, you can take a small scarf.
So let's get started.
- Wrap the scarf loosely around your head and record the measurement.
- Without untying, remove it. Next, you should apply it to the extreme side of the sweater. This will be the upcoming length.
- Then you need to measure the height of the product: direct the tape from the edge upward to the desired length (it may be approximately 25 centimeters).
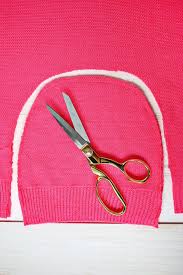
- Draw the future shape with a marker directly on the fabric.Rely on your taste.
- And we begin cutting along the intended path.
- You will get two pieces - the back and front sides. They must be connected with a pistol along the border itself.
IMPORTANT!
There is no need to glue the bottom part, otherwise you simply will not be able to put on the hat.
Now your old sweater will not lie on the shelf, but will serve a useful purpose.
 0
0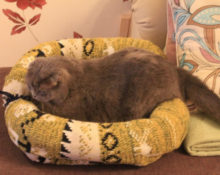


How to sew a hat from a sweater, nothing is clear! Where are the step by step pictures? It is written in such a way that no one understands!