 The beauty of clothing in the usual sense has long been associated not only with clear lines and bright colors, but also with comfort. Hoodie is a versatile garment.
The unusual word “hoodie” refers to a type of sweatshirt with a hood, without a fastener.
There are different opinions about the origin of the word. On the one hand, the “hood” is a hood, on the other, it is an urban area.
Let's assume that a hoodie is clothing with a hood for urban recreation.
Hoodie differences
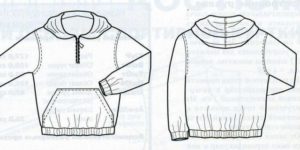 Many knitted items have the right to be called a sweatshirt.
Let's figure out how a hoodie differs from some others.
- From a pullover, sweatshirt - the presence of a hood, a different neckline shape.
- From anorak - by material, the latter is not made of knitwear.
- From a sweatshirt in the narrow sense - the absence of a fastener.
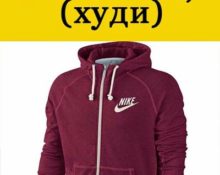
Important! The essential attributes of a hoodie are a front pocket, popularly called a “kangaroo,” a hood, and an elastic waistband.
Choice of style and fabric
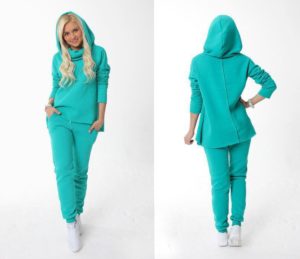 Initially, the hoodie was an element of sports style. It is sewn only from knitted fabric with transverse elasticity.The main advantage is that by stretching only transversely, our product will not lose its shape over time.
Knitwear made from fine high-quality yarn (alpaca, merino) in noble colors will make the product acceptable even for an office where the dress code is not strict.
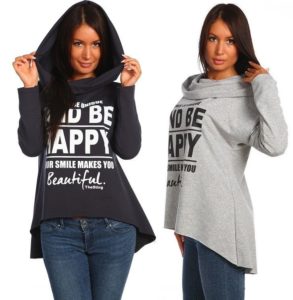
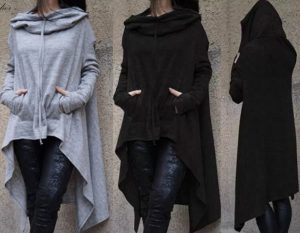
Interesting options are those in which the length of the product is not constant, with a curly bottom.
Original hoodie models with fur trim.
Fashionable colors 2018-2019
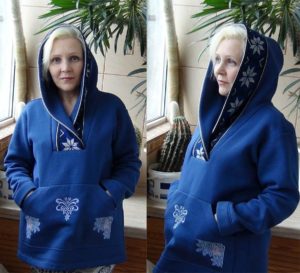 Various colors and patterns are on trend:
- combination of 2-3 contrasting colors;
- plain models in pastel shades;
- various inscriptions, stickers;
- ornaments in the form of snowflakes, deer, and other winter themes.
Important! Elastic fabrics shrink up to ten percent, take this into account when purchasing material. It is recommended to wash and iron a small sample of fabric first.
Hoodie pattern
 Pattern details hoodie with hood:
- Shelf – 1 piece with a fold.
- Back – 2 parts.
- Sleeve – 2 parts (4 if with a seam).
- Hood – 2 parts.
- Hood facing – 2 parts.
- Sleeve cuff – 2 parts.
- Bottom cuff 1 piece.
Advice! By lengthening the hoodie pattern, we get a fashionable dress.
Stages of work
1. Take measurements
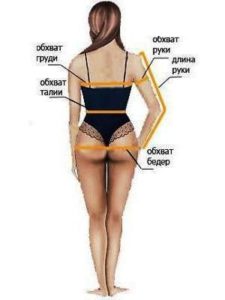 For the pattern you need the following measurements:
- Chest girth - we lay a measuring tape along the natural line of the chest, the most protruding places.
- Waist circumference - we lay a measuring tape along the narrowest part of the body.
- Hip circumference - we lay a measuring tape along the protruding part of the thigh, at the back - along the buttocks.
- Neck circumference - wraps around the neck at the base, along the jugular cavity.
- The length of the product is from the base of the neck along the back to the desired length.
- Sleeve length is along the outside of a slightly bent arm.
- Body length – the length from the armpits to the bottom of the product.
2. Pattern
Important! Most hoodie models are very loose, oversized, keep this in mind.
3. Cut the fabric
Before cutting, steam the fabric through a damp iron. Perhaps the material will “shrink”, but even before you have cut out the blanks.
When laying out the patterns, take into account the direction of the grain thread.
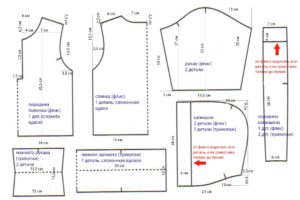
The parts are laid out on a canvas folded in half. Paired in the singular, parts with a fold - along the fold line of the material. If you have a single layer canvas, do not forget about paired parts.
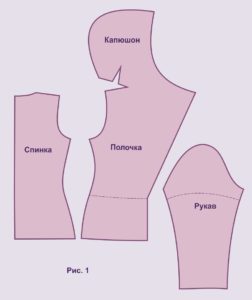
We will need:
- Jersey fabric, fleece, stretch velor. With a width of 150 cm - 1.8-2.0 is required; depends on the size.
- Eyelets for the hood 2 pcs.
- Lace.
- Threads to match.
- Double overstitch foot (optional).
- Double machine needle.
4. Basting
It is preferable to initially baste the knitted fabric - sew it manually using a “living thread”.
It is not recommended to rip seams on knitwear, so it is better to make a running seam on the arms. Subsequently, the estimate is deleted.
If you do not baste, then pin the pieces across the seam line, then sew them with a machine stitch.
5. Stitching
It is necessary to monitor the thread tension - it should not be too tight:
- We sew down the middle seam of the back. Iron the seam allowances on both sides. We sew off the back.
- We process the pocket with an overlock or zigzag stitch.
- Sew the pocket to the shelf. First we stitch all the pocket allowances and iron them inside out.
- Sew down the middle seam of the sleeve (if the sleeve is two-seam). Iron the allowances.
- We sew the sleeve. We iron the allowances, steam the sleeve itself through the gasket.
- We process the bottom of the sleeve with a zigzag.
- We sew the cuff, iron it, and pin it to the edge of the sleeve.
- Attach the cuff to the edge.
- We bend the cuff, baste the free edge, then attach it exactly to the previous seam.
- If you decide to abandon the sleeve cuffs, we turn up the sleeve sections and sew them with a double stitch.
- Sew the shoulder seams. Iron it back and steam it.
- Sew the side seams.
- We sew in the sleeve. First, we cut off the armhole and the sleeve cap with needles and sew it off.
- We sew the hood darts. Iron to the center.
- We process the hood cutout with a facing.
- We pin the sections of the hood to the neck. We sew in the hood. Steam.
- We put eyelets.
- We sew the hem of the bottom with a double needle.
- If you decide to decorate the bottom with a cuff, then do the same with the sleeve cuff.
Important! The sleeve should be basted and stitched from the sleeve side.
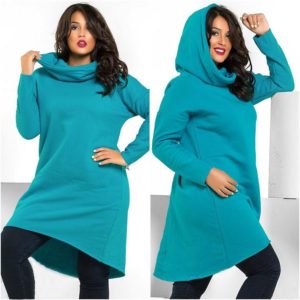 A product sewn with an overlock seam will be of better quality; if such operations are not available for your machine, then we use a “jersey” foot. As a last resort, we sew with a narrow zigzag stitch.
6. Ironing
We use the iron after each operation performed.
Materials such as fleece and jersey guarantee even a novice seamstress a good result.
The hoodie is suitable for any body type and age.
The product is not difficult to sew; basic knowledge and skills are enough.


 0
0