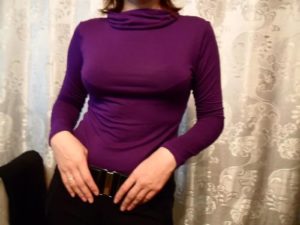
 A turtleneck is a basic item in the wardrobe of not only adults, but also children. With this element you can keep warm by wearing it under a cardigan, shirt or sweater. Turtlenecks look beautiful worn under a vest or overalls. Women often wear them with a sundress. This product is comfortable and practical to wear. In the off-season and changeable weather, it is more difficult to catch a cold in your throat in a turtleneck, because it is covered with a high, tight-fitting neckline. Sewing a turtleneck with your own hands is not difficult.
How to make a turtleneck pattern
The pattern of this convenient model is elementary and uncomplicated. Many craftswomen cut without it, making the necessary calculations and markings on the fabric. If you plan to repeatedly sew similar products for yourself or for a child in the future, then it is more convenient to have a paper pattern on hand. Then you won’t have to do calculations and drawings every time.
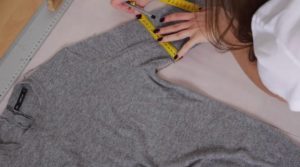
What measurements are needed
To build a children's or women's turtleneck, you will need to take the appropriate measurements.
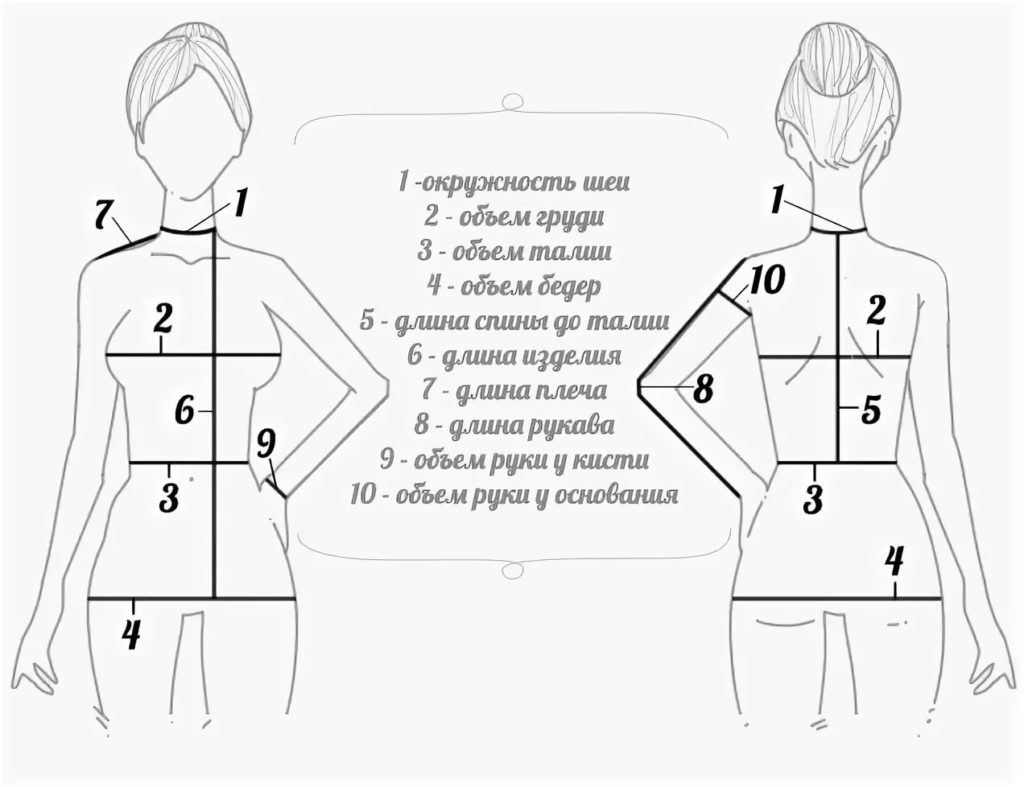
- Semi-circumferences: waist, chest, hips.
- Circumferences: neck, wrist.
- Height: hips, barrel.
- Length: product, shoulder, back to waist, sleeves.
- Sleeve width (forearm circumference).
Creating a pattern for a women's turtleneck
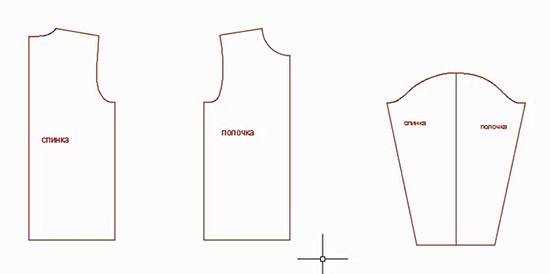
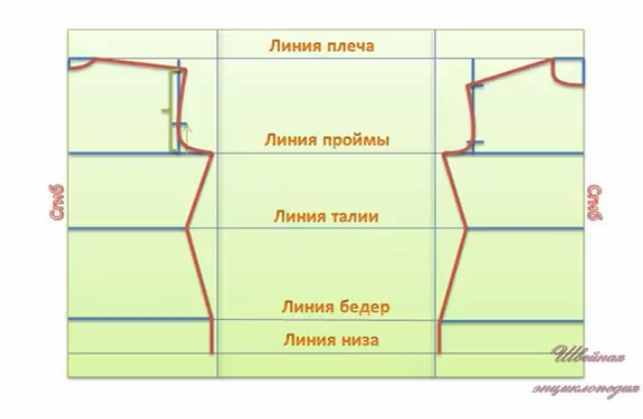
The pattern of the back and front front is built inside a rectangle in a mirror image.
Back and front
- First you need to identify all the main levels. Measure 2 cm down from the top and draw a horizontal line. This will be the shoulder line.
- Measure down 20 cm from it, this will be the level of the armhole.
- Again, from this line you need to set aside the length of the back to the waist (approximately 42 cm) and draw a waist line.
- From the waist down we set aside the height of the hips, this will be the level of the hips.
Important! The hip line can match the length of the product or be higher. It all comes down to personal preference as to where you want your turtleneck to end.
- From the waist up, we set aside the height of the barrel minus 2–2.5 cm (approximately 22-2 = 20 cm) for the freedom of the armhole, and draw a horizontal line for the armhole.
- At chest level, along the back and the shelf from the folds, measure the half-circumference of the chest, divided into two plus allowances.
- We do the same with the waist and hips. Allowances should be 2–3 cm for a loose fit.
- Connect all the resulting points smoothly. This will create the side line of the front and back. (The diagram shows a sharper transition; this is not necessary for the pattern).
- From the top point on the left and right of the rectangle you need to mark the neck, measure 6 cm.
- Place 2 cm down on the back and 5 cm on the front. Connect the dots with smooth lines.
- Now you need to measure the shoulder measurement from the neckline to the sides at 12 cm and mark it with a dot.
- From there, lower the shoulder 1.5 cm down and connect it to the neck.
- From the shoulder point, draw a perpendicular down to the armhole level and connect to the side line. The result is an armhole line, but you need to mark this line more smoothly by cutting off a right angle.
Construction of the sleeve
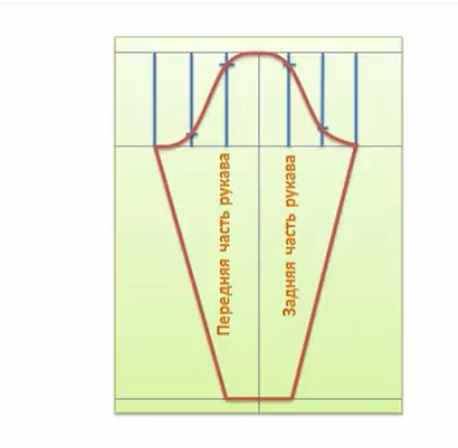
- Draw a vertical line in the middle of the sheet. From the top edge we set the height of the rim down. It can be calculated using the formula: divide the length of the armhole by 3.14. The armhole can be measured with a measuring tape (back + front). It is approximately 47 cm, so the height of the rim is 15 cm (47/3.14).
- Down from the very top, measure the height of the sleeve 15 cm and the length of the sleeve 65 cm. From the point of height of the sleeve, you need to measure to the left and right the width of the sleeve, divided by 2. Design the sleeve with a smooth line.
- Measure your wrist below. For example, if it is 18 cm, then 4.5 cm to the left and to the right. Connect the bottom and top of the sleeve.
Collar
The collar is cut in the form of a rectangle with sides 18 and 38 cm. Where 18 is the height multiplied by 2, and 38 is the neck circumference.
How to make a pattern for a children's turtleneck
In general, the construction is similar, only the measurements will be smaller. Only for children should the shelves be made level. In a turtleneck for women, the lines are more curly, since the waist line is indicated.
Shelves
- The construction of the pattern must begin by drawing a rectangle, its width is 44 cm and its length is 55 cm.
- The width of this rectangle must be divided into 2 equal parts. These will be the back and front halves.
- You need to measure 5 cm from the left and right corners of the rectangle. This is the width of the neck.
- On one side down we measure 1.5 cm. This is the neck of the back, it is shallow. And on the second side you need to measure down 4-5 cm; in front the neck is always deeper.
Important! When the shoulder seams and neckline are sewn separately, you need to try the product on the child. This will help you see how freely the head moves. You can always slightly widen or deepen the neck.
- Between the marked points you need to draw a smooth line to indicate the neck.
- In the center you need to lower the shoulder line by 2–2.5 mm.
- Draw a shoulder line from the neckline to the center. Everything is done mirrored on one and the second shelf. Shoulder length 10–11 cm (depending on the age of the child).
- Now you need to indicate the depth of the armhole. To do this, you need to put 17–18 cm down. This value can change, it coincides with the width of the sleeve (arm circumference + allowances).
- The result is a vertical straight line from the shoulder, then you need to draw it horizontally to the center of the pattern. Since the armhole has a rounded shape, it should be designed that way by cutting off the corner. The shelves are ready.
Sleeves
The main thing is to draw the okat line correctly. This is easy to do by tracing the bottom of the armhole of the shelf pattern you just created. This is clearly indicated in the diagram below. The fact is that if the beginning of the bend of the collar and the armhole coincide, then the sleeve will fit well.
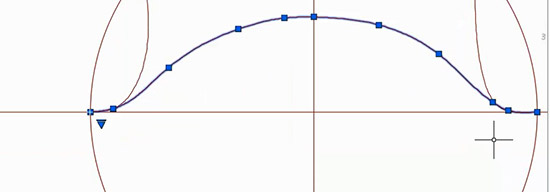
The height of the sleeve is 6–8 cm, and the length is equal to the width of the sleeve 17–18 cm. From the middle of the sleeve, the sleeves should be set down 45 cm (sleeve length). And immediately below draw a perpendicular line, this will be the width of the wrist, that is, the bottom of the sleeve. Connect the top and bottom with lines and the sleeve pattern is ready.
How to sew a turtleneck from jersey
Important! First of all, you should sew a rectangle of the neck into a ring and try on how freely the head fits. And then move on to other operations.
- Sew the shoulder and side sections using an overlocker, connecting the back to the front. Press the seams to the back.
- Sew the sleeve seams, ironing them immediately.
- Sew the sleeves into the armhole.
- Overcast the bottom edge of the product, the bottom edge of the sleeve.Fold it to the wrong side, iron it and sew with a double needle on a machine or use a stitcher.
- Fold the collar in half, wrong side inward. Sew the collar to the neckline, evenly distributing the length and matching the seams. It is better to place the collar seam at the left shoulder seam.
The product is ready!


 Important! First of all, you should sew a rectangle of the neck into a ring and try on how freely the head fits. And then move on to other operations.
 0
0
