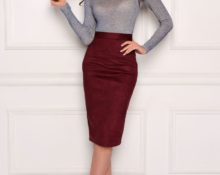
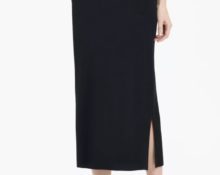
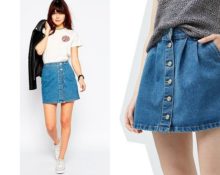
Skirts of various styles and lengths predominate in a woman's wardrobe in great abundance. Among the variety, you can find a product that is suitable for any occasion, outfit and weather. One of the universal ones is the pencil skirt model. It can be used both for a business meeting and for visiting a nightclub or party with friends. The big advantage of such a skirt is its relatively simple tailoring. With a little effort, you can cut out and sew a pencil skirt yourself, based on recommendations and photos.
Features of DIY creation
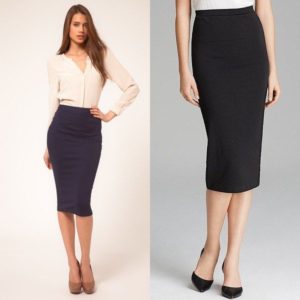
Sewing your own wardrobe items has a long list of advantages. The main ones include the uniqueness of the products. It is important for every girl to adhere to special originality when choosing an ensemble for any occasion. Therefore, independent cutting is the main positive quality.
A key feature is the creation of products according to individual parameters. Despite the wide variety of assortments presented in specialized stores, it is sometimes difficult to choose the right skirt. Many girls face difficulties when choosing: the product may be too narrow or unsuitable in length and cut. Cutting and sewing skills will help you avoid this trouble.
Practicality and economy can also be attributed to the features of creating a pencil skirt yourself. With independent work and the right actions, the finished product will be of higher quality. This will significantly extend its service life.
Reference! Features also include the development of creative skills and gaining new experience.
What you need for work
The initial stage in the work is preparation. When fully prepared, the technological process for creating a skirt will go much faster.
Materials and tools:
- fabric for the product;
- sewing meter;
- ruler;
- cardboard or paper;
- pencil;
- scissors;
- matching threads;
- needle;
- piece of chalk;
- safety pins;
- iron;
- sewing machine.
Special attention should be paid to the choice of fabric.
Suitable material:
- For a classic style, tweed, flannel, cotton, knitwear, and suede are suitable. A product made from this material will help complement a strict business ensemble, and will also warm you up in cool weather.
- Knitwear, linen, and cotton are suitable as an everyday option. Pencil skirts made from denim materials have been especially popular lately.
- For lovers of sophisticated evening dresses, satin, silk, suede, and velor are suitable. The model, tailored for an evening look, can also be used for a romantic meeting or date.
Addition! The evening style can be complemented with lace by placing it in a certain area or over the entire surface of the skirt.
How to make a pattern for a pencil skirt
 After preparing the necessary materials and tools, you can proceed to the main stage: preparing the pattern. First you need to find out the necessary parameters and take measurements. To do this we use a sewing meter.
Taking measurements:
- The waist size is measured at the thinnest point, since the skirt always fits snugly to the body. It is recommended to wrap the sewing tape tightly around the waist area.
- When removing the volume of the hips, we grab the most voluminous area of the buttocks.
- The hip height measurement is taken from the sides. To do this, place the sewing meter at the waist line and draw it to the hip line.
- The length of the product means the final version of the finished skirt. Selected according to personal preferences.
We record the obtained parameters on paper and proceed to creating a pattern. It is recommended to draw all drawings on paper, and then transfer them to fabric. This will help to remove any inaccuracies in a timely manner and correct the results.
Important! When choosing a material with an ornament, it is necessary to build patterns in accordance with the direction of the pattern.
On paper we put the first point (for example, A). From it down we draw a line, the dimensions of which correspond to the length of the product. We grab the extra centimeter, which is spent on seam allowances. From the top point to the right side we draw a line that is equal to 1/2 the circumference of the hips. To the resulting figure we add 2 extra centimeters: one is necessary for a loose fit, the second is a seam allowance. We make the remaining sides in a similar manner. The resulting rectangle is the base.
Divide the resulting figure in half in half, drawing a line along the entire length of the product. From the top point we plot the height of the hips. We draw a horizontal line, which indicates the location of the hip line. A special mark should be placed in the center of the horizontal line, which will be useful when making darts.
In order to calculate the size of the darts, use a special formula: (hip volume - waist volume): 2. We leave half of the resulting figure for the side darts. The resulting number is set aside from the side line and connected to the mark on the hip line. Based on the number obtained, we place the dart on the other side. On the top line we extend the dart strip upward by 1 centimeter. From point A we draw a slightly rounded line, connecting it to the location of the dart mark. We put marks on the other side in a similar way.
The final stage is the modeling of the pattern, namely the narrowing zone of the skirt. On the bottom line we retreat 1-2 centimeters from the center on both sides and put marks. From the central position of the hip line, we draw inclined lines and connect them with the marked marks.
Once again, carefully draw out the pattern and transfer it to the fabric to cut it out. The patterns are ready for further work. This model belongs to the basic version and involves seamless cutting of the front side. The seams are located on the sides. There will also be lightning here (if necessary).
Attention! Don't forget to prepare the second half of the pattern according to a similar description.
How to sew different pencil skirt models with your own hands: step-by-step instructions
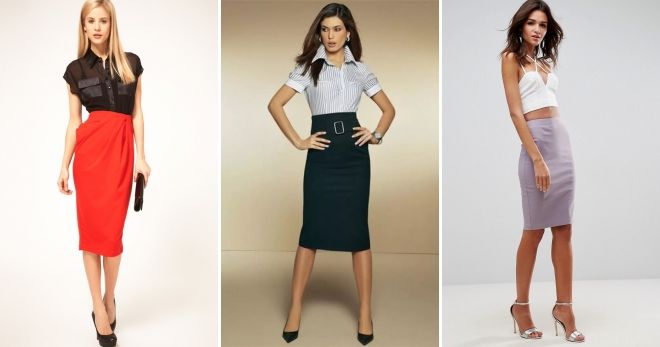
Stages of sewing a classic model:
- This style has fairly simple steps.During the sewing process, the risk of possible errors is minimized.
- First, cut out all the patterns from the fabric. Seam allowances can be further ironed. To do this, add up the excess and go over the hot platform several times. During the process, it is important to observe the temperature conditions.
- From the wrong side we fasten both halves with safety pins. The product must be basted, and only then proceed to actual sewing. To do this, we apply intermediate stitches using threads that match the product.
- Let's move on to working on the sewing machine. We carefully stitch the halves together. Remove previously placed stitches using a utility knife or blade.
- The final stage is the waist and bottom area. We fold the top row several times, capturing about 3 centimeters. Skip the zigzag stitch. On the bottom row, it is recommended to remove no more than two centimeters. We also sew it with a zigzag seam.
- This option is suitable for a skirt made of elastic and soft fabrics. When working with durable material, the side should be supplemented with a zipper. It will help you easily remove and put on the product, as well as fix it on the body.
Sewing a model with a front slit step by step:
- Skirts with a slit in the front are a great success among fashionistas, regardless of style. Patterns for a pencil-type product can be modified by constructing a model with one seam on the front part. We cut out the finished patterns from fabric. We fasten with safety pins from the wrong side and sew. We mark the position of the darts and apply temporary stitches.
- Let's move on to working with the sewing machine. Mark the area where the cut begins with chalk. We sew a line on the machine to the marked mark.Before further sewing, it is recommended to iron the cut area. On one side, the fabric can be folded a little less, then one half will slightly overlap the other. Afterwards you can start sewing. On the machine we set the minimum stitch interval so that the seam does not stand out on the product.
- To prevent the seams from coming apart, you will need to install a reinforcement. From the residual material for the skirt we prepare a strip, the width of which is about 4 centimeters. Fold it several times and stitch it. We outline the location of the amplifier: the end point of the seam. Sew across the lines and cut off the rest.
Advice! Such a skirt can be decorated with a row of buttons, placing it along the seam right up to the slit.
Instructions for sewing a high-waisted model:
- High-rise products are deservedly a great success. They help correct imperfections in the abdomen and waist, making the figure slimmer and more refined. It is very easy to prepare a pattern for such a skirt. When working with drawings, the waist area needs to be extended upward by a few centimeters. Then we transfer the patterns to the material and cut them out.
- We attach both halves to each other using safety pins. We apply temporary stitches and mark the position of the darts. We stitch on a sewing machine and remove the temporary threads. We process the bottom and waist area with a zigzag stitch. The high-waisted pencil skirt is ready.
Tips for Beginners

A few additional recommendations will help you create a popular style:
- When choosing a texture, avoid bulk materials (for example, chiffon). Such fabrics do not hold their shape and are suitable for creating flowing products. In addition, the skirt will require additional lining.
- As an additional decor, you can decorate the belt with a lush flounce. It should be remembered that such an accessory is suitable for owners of a slender, fit figure.
- Before sewing, try on a rough version of the product (after applying temporary stitches). This will help eliminate possible errors and take into account all the shortcomings.
- When applying stitches on a sewing machine, do not stretch the fabric. It will be enough to move it slightly under the foot.
- A reinforcement at the base of the cut is essential. During walking, the material is subject to great impact, which leads to stress on the seams. A line can come apart at the most inopportune moment. An amplifier will help avoid this.
- The length of the cut also matters. It is recommended to leave no more than 10-15 centimeters, depending on the final length of the skirt. This will help avoid a vulgar and provocative look.
A stylish and elegant skirt can transform any combination. Among the variety of styles, the pencil skirt stands out - a universal and always up-to-date option. She is able to complement any outfit, highlight her mistress, favorably emphasizing her figure. With a minimum of effort, you can sew such a product yourself. The task is easy for a girl who does not have special skills to cope with.


 0
0