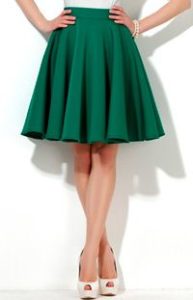
 A circle skirt is exactly the type of clothing that is present in a woman’s wardrobe throughout her life. Such skirts are worn by little girls at their first matinees in kindergarten, and the same models are preferred by graduates at a school prom.
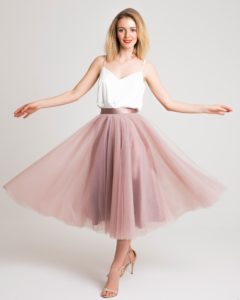
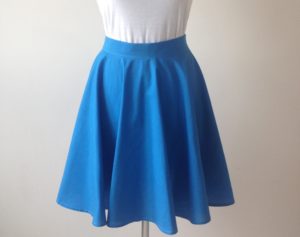
Short or floor-length, made of thin flowing fabric or complemented with numerous layers of tulle and regillin, these are all circle skirts. They fit perfectly on slender beauties and women with a + figure. They organically complement the image of sporty young ladies and accomplished businesswomen. Such a skirt must be present in the wardrobe of every woman, regardless of age and social status.
Another advantage of this type of flared style is that almost anyone can sew a fashionable skirt. To help with this, we will tell you how to make the pattern you need for sewing with your own hands.
Constructing a circle skirt pattern
Constructing a drawing of a circle skirt will not cause difficulties even for those who have never encountered clothing design before.After all, all you need to do is draw a quarter of a circle and mark the top cut line on it.
What measurements are needed
To create a circle skirt You only need 2 measurements.
- Length of the product.
- Hip girthif you plan to sew a skirt with an elastic band, or waist circumference, if a belt or trim is expected.
Despite the simplicity of the design, taking measurements should be taken with great responsibility. After all, 90% of the success of the entire sewing event depends on the accuracy of measurements.
note! The waist is not always the thinnest place, especially when it comes to very curvy people or models with large volumes.
In this case, measurements are taken in the area of the lower hypochondrium. Otherwise, achieving a successful fit of the skirt on your figure will be very problematic.
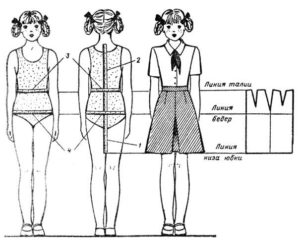
Procedure
- Before taking measurements, the figure is tied with an installation belt along the waist line, placing it parallel to the floor line.
- The waist circumference is measured exactly according to the installation belt.
- The length of the product is measured from the installation belt to the desired mark.
Note! If you plan to wear a skirt with heels, then measurements should be taken with shoes on. This point is most relevant for floor and mini models.
Performing calculations
To construct a pattern, perform the following arithmetic operations.
- The waist measurement is divided in half.
- The radius of the upper cut of the product is calculated using the formula (POT/4) + 2. Where POT is a measurement equal to half the waist circumference.
Construction of a drawing
The circle skirt is a circle with a cutout in the middle. In order to simplify the work and save paper, only ¼ of the pattern is built.
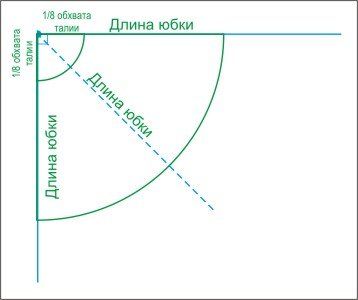
- The construction of the pattern begins with the construction of a right angle.
- On each side of the angle, a distance is laid out, calculated by the formula (POT/4) + 2.
- Connect the points with an arcuate line. You can do this in 2 ways.
- First option. Draw many straight lines from the top of the corner. Mark on them the distance calculated by the formula (POT/4) + 2, and then draw a smooth arc through the resulting points.
- Second option. Use a compass, placing the leg at the top of the corner and connecting the marked points.
- The drawn line corresponds to ¼ of the waist circumference. At this stage, its compliance with the taken measurement is checked. To do this, measure it with a centimeter tape, and the resulting value is multiplied by 4. The result should be a number equal to the waist circumference + 2 cm. If there is a discrepancy, the calculations and constructions are checked.
- From the obtained points, set aside a distance equal to the length of the product and connect them with an arcuate line. They follow the same algorithm as when constructing the upper slice.
The paper pattern is ready.
Uncover
Before transferring the drawing onto the fabric, you need to make sure that there is enough material. For beginning needlewomen, we offer tips on how to cut correctly.
Fabric consumption calculation
Calculating the fabric consumption for a skirt is absolutely easy. To do this, you need to add up the values corresponding to the length of the product and the lunge (dart). On a paper pattern, this is the distance from the top of the corner to the bottom cut line.
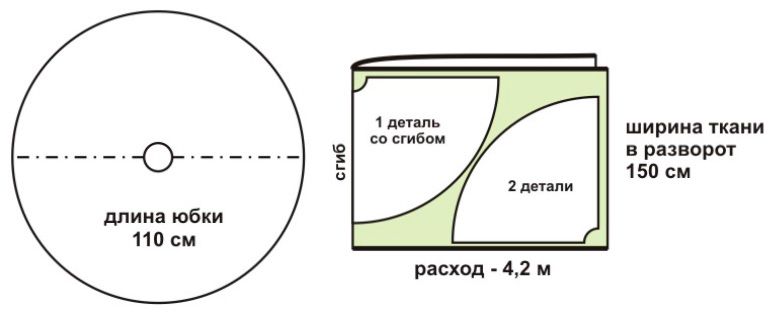
Important! The required piece of fabric must correspond to 4 such distances + 12 cm (3 cm per hem).
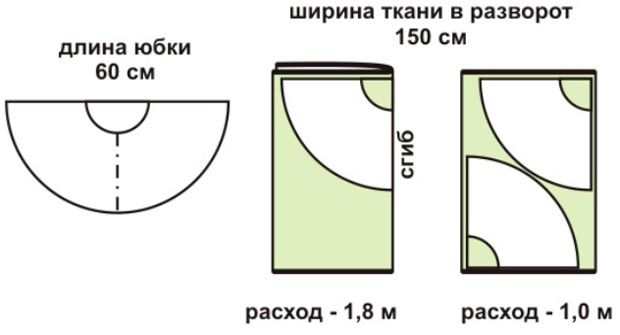
If the width of the fabric allows you to lay the parts in 2 times, forming a semicircle, then 2 lengths of the skirt + 6 cm are required for the hem of the bottom.
There is a simple and practice-tested method for scaling a pattern.Of course, it requires additional time, but the result is worth it. All you need to do is draw a pattern on a scale of 1:4. It turns out to be quite compact. Sewing stores sell special rulers that make the work much easier. On a conventional piece of fabric with the appropriate width, lay out the pattern pieces, taking into account allowances, and measure how much fabric is required for sewing.
Note! Most fabrics shrink after washing, so they are ironed (ironed with steam) before cutting. The percentage of shrinkage is also taken into account when calculating the required amount of fabric.
Pattern layout options for cutting
To correctly cut a product, you need to take into account that in practice different methods are used. They depend on the size of the clothing.
When sewing products of small sizes
If you are sewing a skirt for a girl, in this case it is quite possible to invest in the width of the fabric cut and cut out the sun skirt without any seams at all.
To do this, perform the following steps step by step.
- The fabric is folded 4 times;
- Pin the paper pattern and trace it.
- Apply allowances along the waist and bottom lines.
- The paper pattern is removed and the fabric is re-pinned.
- They cut it out.
For large sizes
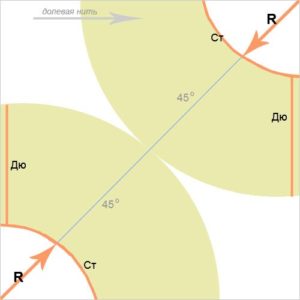
It is impossible to invest in one width of fabric. Therefore, they use different layout options, but always they try to remove the directions of the lobar and transverse threads into the side seams.
Sewing a circle skirt
Sewing a sun skirt begins with combining the side sections and then pinning them together. This method of preliminary connection of parts is quite convenient. It does not take much time and effort; it is what experienced seamstresses use in practice.But if you are new to tailoring and have chosen flowing, unruly fabrics for your work, then it is better to baste all the details by hand.
Step-by-step instruction
- Sew the side seams using a sewing machine, making sure to place bartacks at the beginning and end of the stitching.
Note! When sewing parts on a sewing machine, it is strictly contraindicated to sew on pins.
Of course, the likelihood that the needle will hit the base of the pin and break is negligible. But constant additional load on the rack will certainly lead to its imbalance.
- Iron the seams carefully.
- Place a stabilizing stitch along the top edge of the skirt. This step should not be neglected; the design of the sun skirt involves cutting only on the bias. Thanks to this feature, beautiful flowing folds (folds) are formed on the product. But the fabric is subjected to severe deformation in all directions during the sewing process. Stabilizing stitching prevents the fabric from stretching along the waistline.
- Carry out a control measurement of the upper cut using a regular measuring tape. If the fabric is stretched, then gather it slightly, pulling up one of the threads and evenly placing folds along the entire length.
- Sew in a zipper.
- A belt is cut out, reinforcing it with a layer of dublerin or non-woven fabric.
- Baste and attach the belt.
- Iron the seams.
Final stage
- Place the skirt on a mannequin or hanger, moisten it with a spray bottle and leave it in this state for 2-3 days. This time is enough for the threads of the fabric to stretch under their own weight.
- The hemline is adjusted during fitting. Moreover, measurements are made not from the waistband to the bottom of the product, but from the floor to the bottom line of the skirt.As a result of such measurements, the length of the front panel may be several centimeters shorter than the back panel or vice versa. However, the difference can be significant when combining side cuts. You should not be afraid of such inconsistencies; this happens because the human figure has a certain asymmetry. It is unlikely that you will be able to get the correct circle along the bottom edge when sewing a skirt for an adult woman after installation. Therefore, this process should be treated with special care, evenly measuring the same distance from the floor to the bottom of the product at short intervals and making notches with chalk.
- Trim off excess fabric along the bottom line.
- Form the bottom cut. This manipulation is very difficult to perform alone, so if you are sewing for yourself, try to find an assistant.
Sewing a circle skirt with elastic
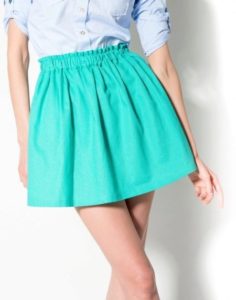
Sewing a model with an elastic band differs little from sewing a product with a belt or facing. The sequence of operations remains the same, with the only difference being that the zipper is not inserted. But it’s still better to sew a belt under an elastic band. And this is not necessary at all in order to introduce additional difficulties into the seamstress’s work. Carefully tucking a few centimeters along the upper cut is quite problematic, because the inner radius is smaller than the outer one.
Procedure
- Baste and stitch the side edges.
- Press seams.
- Sew the waistband or facing under the elastic.
- Hang the skirt and moisten with a spray bottle.
- Straighten the bottom cut.
- Process the bottom line.
As you can see, sewing a fashionable skirt does not require much effort. And the result will please a fashionista of any age.
 0
0