The knitted vest looks very elegant. Long knitted models can visually lengthen and for women this is a huge plus. They can easily hide their flaws and immediately become slimmer. Below are three excellent knitting vests that are designed not only for the master, but also for the beginner. Therefore, feel free to look at the knitted pattern you like and reproduce it along with convenient diagrams and a clear description.
What do you need for knitting?
You can't do without good yarn when knitting. Depending on the season and model, it can be completely different. You should not take prickly models, they will only be uncomfortable. There are different models of knitting needles. For circular knitting, it is better to use circular or stocking stitches. But the vests in this collection are best knitted with straight classic knitting needles with caps along the edges. Cable patterns will require additional needles to transfer stitches and create crisscross stitches. It is convenient to knit patterns with markers. These are bright details that help you avoid mistakes when counting rows.
Walkthroughs
You can start creating the product.It is important for the model to take the correct measurements. Typically a vest requires measuring the width of the back to create the back flap. For the front ones, divide this indicator by two and, according to the model, make decreases for the fastener. Of course, you will also need to measure the length of the vest.
Next, in order to somehow indicate all these indicators with loops, you should knit a sample. A sample is a small piece that is created using knitting needles with the fabric pattern of the model presented. Knit and count how many loops and how many rows there are in 10 cm. Two indicators make up the knitting density. Using them you can easily calculate how many loops will be needed for the whole fabric. Next, we will analyze in detail the three most fashionable knitted vests.
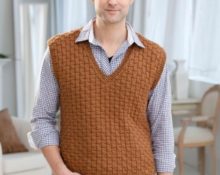
White grass vest for beginners
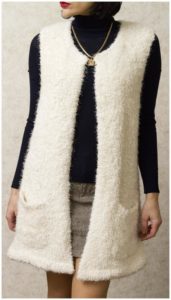
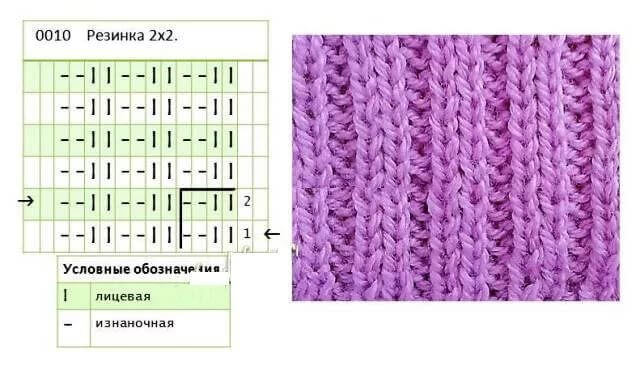
This product looks so expensive and who would have thought that ordinary white grass is to blame. Knitting needles and a little time will help you make such a cutie for everyone. The product uses a stockinette stitch pattern and a 2*2 elastic band.
The work will require:
- good white grass yarn with short pile;
- knitting needles according to the thickness of the weed (it is better to use the manufacturer’s advice and purchase the number indicated on the package).
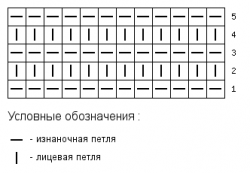
Stages:
- Back. Cast on 110 stitches for size 46 with grass. Knitting occurs from the bottom up. Immediately start knitting the fabric pattern using stockinette stitch. Knit the first 20 cm without changes, and then every 10 rows decrease by 2 loops (one at the beginning of the row and the second at the end of the row). Knit 45 cm according to the proposed pattern and make small decreases for the armhole. To do this, you need to bind off only 4 loops (two in the first row and one each in the second and third). Next, knit 33 cm from the beginning of the armhole and start a small bevel for the neckline.In total, you will need to close 30 loops (20 loops in the first row and then 2 loops in the next row). When 30 loops are closed, close the shoulder lines.

- Front right/left shelf. Cast on 55 stitches and start immediately with stockinette stitch. Knit the first 20 cm without changing and then bind off one loop from the distal side every 10 rows. Tie in this way to a height of 45 cm and make a bevel for the armhole. To do this, you need to bind off only 4 loops (two loops in the first row and one each in the second and third). Knit another 17 cm and start bevelling for the neckline. To do this, close each row according to the following pattern: 4-1-2-1-1-1. Knit further without changing to the height of the back. Make the second shelf in the same way and mirror it.
- Pockets. Cast on 30 stitches for the pocket and knit 30 rows in height. Next, perform 4 rows with a 2*2 elastic band.
- Assembly. Sew the shoulder seams of the product. Next, the side seams. To prevent the edge of the vest from curling, you need to turn it over to the front side and make a hidden seam. All that remains is to sew in the pockets and you can try on the vest.
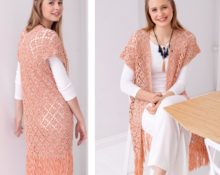
Openwork vest: description of the scheme
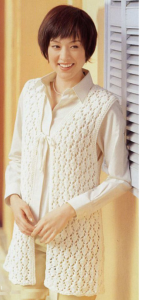
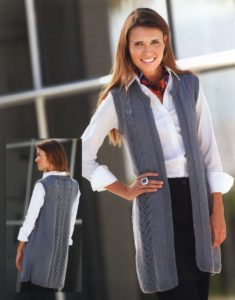
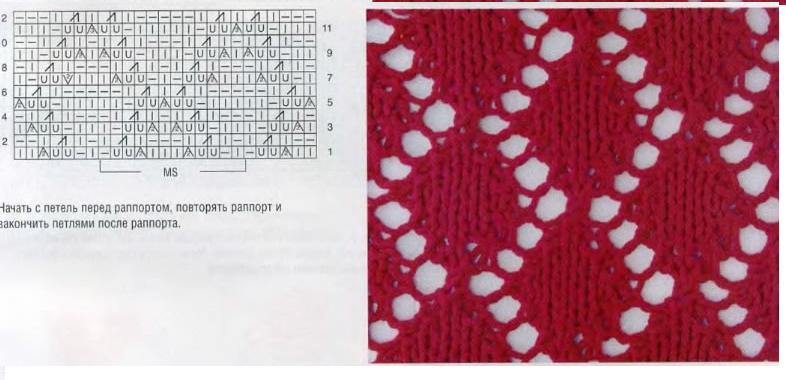
A very attractive long vest model. A pattern of openwork rhombuses is used here. The result is a very small and interesting pattern. It is complemented by garter stitch along the edges, which is why the armholes of the vest look so even.
The work will require:
- pekhorka yarn;
- knitting needles number 2.
Diamond pattern:
- first row (k/p, p/p, 2 yarn overs, knit 2 loops together, knit 3, p, two knit stitches together, two yarn overs, purl);

- second row (purl, knit, two yarn overs together, RS, three yarn overs, RS, two yarn overs together, RS);
- third row (two LP, IP, two yarn overs, two knit stitches together, two yarn overs, IP, LP);
- the fourth according to the pattern of the fabric and cape together;
- fifth (3 LP, IP, two yarn overs, three loops together knit, two yarn overs, IP, two LP), row according to the fabric pattern.
This is how half of the rhombus turned out.
Stages:
- Back. For size 44 you will need to knit according to the instructions. For width you need to cast on loops for 10 repeats. Additionally, two edge loops and 4 knit stitches (two on each side, in order to further stitch the front. Knit 12 repeats at the top without changes to the line of the armhole under the sleeves. Close half of the repeat, and replace the remaining half with garter stitch and continue knitting in such a new one composition to a height of 28 cm from the armhole line. Next, for the bevel, close 4 repeats in the center and knit 6 rows with decreases from the armhole side, one loop per row.
- Front right/left shelf. Cast on 5 repeat stitches for the shelf. Additionally, add 2 edge loops and 6 loops (4 for the smooth edge of the medial side with a garter stitch pattern and two for stitching to the back). Knit the same amount for the armhole and after 4 repeats make a cutout for the neckline. To do this, you will need to bind off one loop in each row, transferring the garter stitch pattern. Close the loops until they rise to a height of 2 repeats. Next, knit to the height of the back.
- Assembly. Sewn at the shoulders and sides. For fastening, make ties from small chains (they need to be crocheted and this is just a set of air loops).
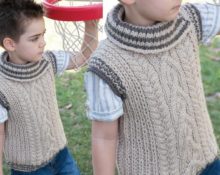
Red vest with braids and hood
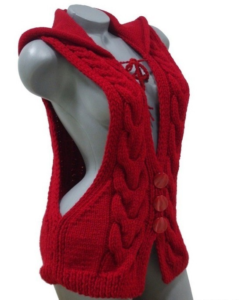
A very elegant model. And very bright, suitable for those who are not afraid to stand out. But the person who paid attention to the model of a vest with a hood already prefers something unusual.
The work will require:
- red yarn with thick thread;
- knitting needles number 4.
Reference! Braid Pattern: These royal braids gradually taper towards the neckline.For a smooth transition, it is necessary to close one loop in each strip at the moment of crossing (4 loops in total).
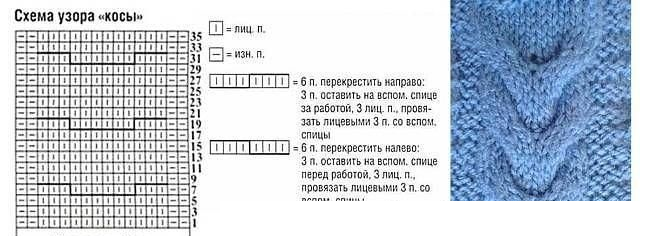 Stages:
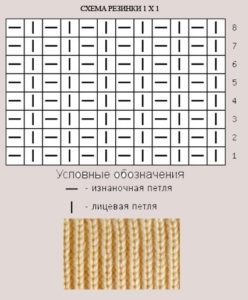
- Back. For size 46, it is advisable to make the back with a simple stockinette stitch. To do this, cast on 60 loops plus edge stitches. Knit 1*1 rib stitch for 6 rows and switch to knit stitch. From each edge, immediately insert 4 elastic loops 1*1. Knit 10 rows without changing and start decreasing stitches on each side. But at the same time keep 4 elastic loops from the edge. Knit 10 rows with decreases and then knit to the desired height without changing.

- Shelves right and left. Cast on 32 loops and knit 6 rows with an elastic band. Next, perform the front stitch, 4 loops of elastic on each side and on the medial side include a fabric with a pigtail. Knit similarly to the back, only half. Knit to the required length and bind off the loops. Make three yarn overs on the medial side for the buttonhole.
- Assembly. Sew at the shoulder seams and sides.
- Hood. For the hood, make a set of loops along the edge of the neckline to the top quarter of the front opening. Knit the fabric in stock stitch. Knit 40 cm and simply bind off the loops. All that remains is to sew the hood, sew on the buttons and make ties from air loops along the front neckline.
How can I finish the finished product?
The finished product may require additional processing. This can be done using a hook. For example, a step is often used to finish the edge. Craftsmen are also very fond of a simple connecting stitch or single crochet. If the pattern of the fabric allows, the binding can be done using an openwork border.


 0
0