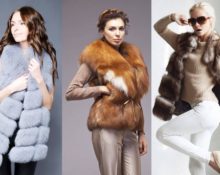
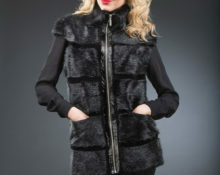
 The fur vest confidently climbed onto the catwalk of many fashion houses last season and still holds its position. The ability to be combined with various wardrobe items, comfort and convenience, external presentability - these are the few advantages for which fashionistas love the fur vest so much.
What if you have a fur coat in your wardrobe that you haven’t worn for a long time? Is it possible to independently transform it into a modern thing? Let's try to figure it out.
Is it possible to sew a fur vest with your own hands?
 Even without experience working with fur, it is quite possible to sew a fur vest. After all, the product pattern does not have complex darts, sleeves, pockets or a tight-fitting silhouette that is difficult to construct. The main difficulty is working with fur, but knowing little tricks and having patience and accuracy, this problem can be solved.
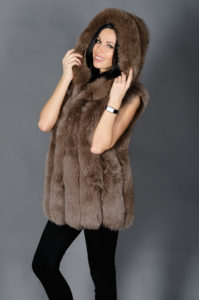
You can decide on the style of a future new thing by studying models on the Internet or in magazines. Or perhaps you can come up with your own design.One way or another, in a fur vest you will look stylish, and most importantly, you will be comfortable and warm!
 If you don't have experience building shoulder products, no problem. There is a proven method. You need to find an unnecessary bulky jacket that fits. Flog the sleeves, and then, trying them on yourself, adjust the degree of fit and length of the product. Next, we rip the jacket at the seams and in front of you is the finished pattern!
Important! Fur vests made of faux fur are sewn with insulation (sintepon), so when cutting the jacket, add some allowance at the seams.
Taking measurements for a vest
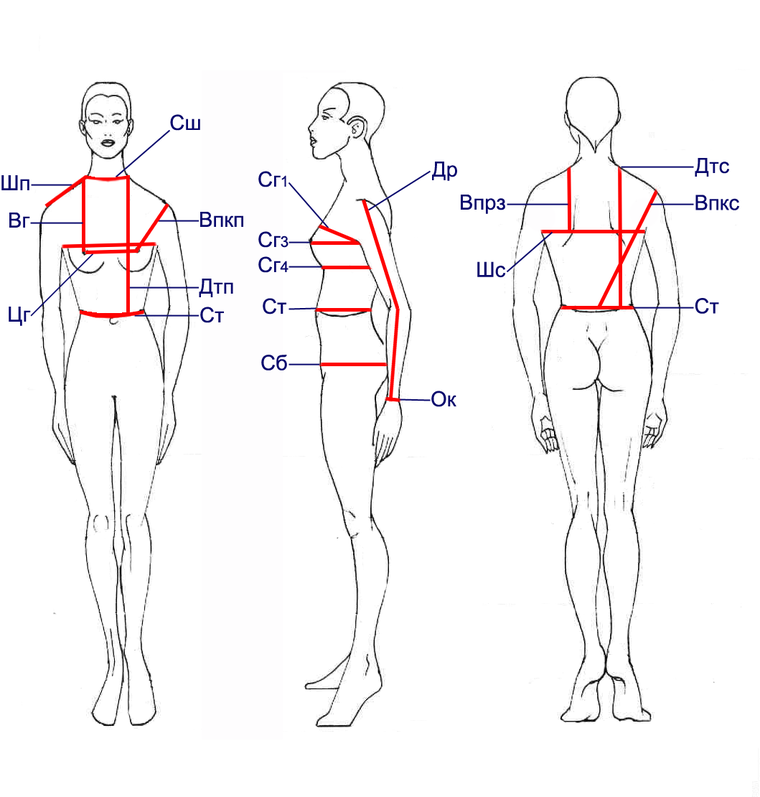
Measurements for a vest are taken in the classic way - standing upright, a ribbon is tied around the waist. Basic measurements:
- chest girth;
- waist;
- hips;
- as well as the length of the product (from the shoulder to the required length);
- neck girth.
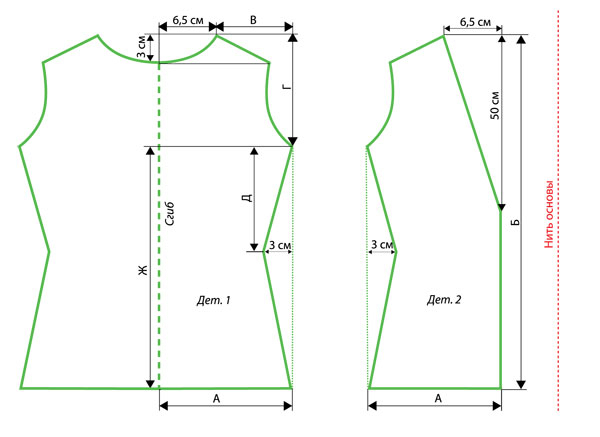
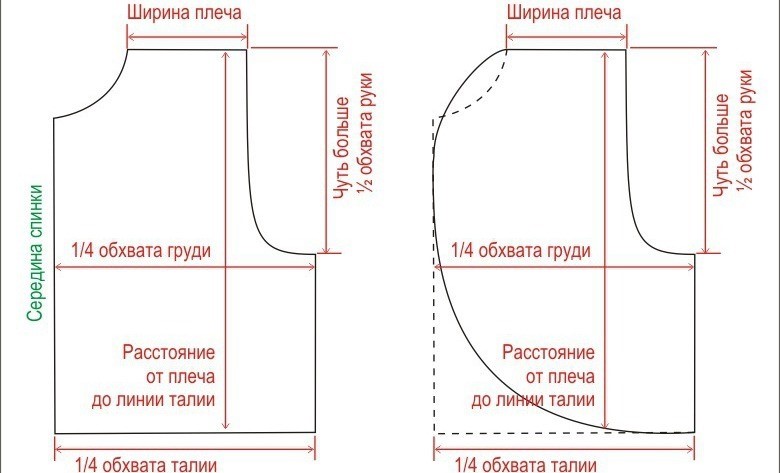
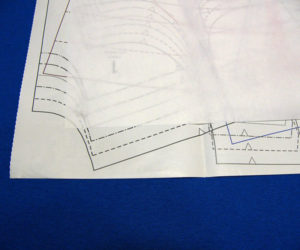
To simplify the task, select a ready-made pattern and transfer your measurements
Advice! This model has a fitted silhouette. In order to make a straight cut, you need to draw the side line straight, without bending 3 cm.
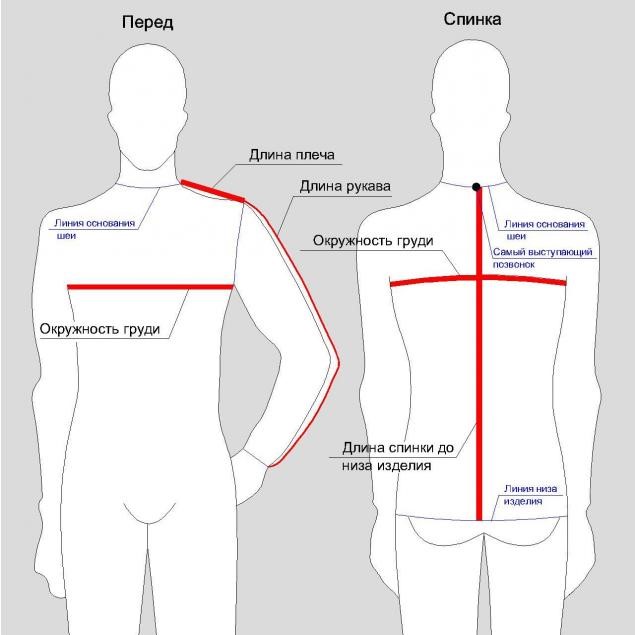
How to take measurements of men correctly
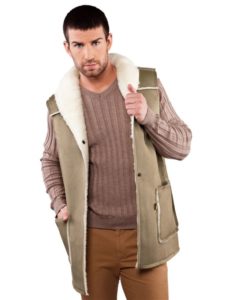 Not every man would risk wearing a fur vest, because this element of a man’s wardrobe is considered shocking and attracts the attention of others. A classic option for the stronger half of humanity is considered to be vests made of tanned leather or short-pile fur.
To create a pattern for a male figure, similar measurements are taken. It is necessary to take into account the features of the figure - narrower hips and broad shoulders. The length of the vest is set based on preference. Most often, a men's vest has a straight silhouette.
Advice! A men's vest can be decorated with a stand-up collar, patch pockets or a small hood.
How to take women's measurements correctly
When taking measurements, the main thing is to adhere to the basic rules:
- Wear the clothes that you plan to wear under the future product. Although the vest is outerwear, you should not take measurements in underwear. Because warm sweaters and layers of clothing can play a cruel joke, and as a result, the new thing will be small.
- Take a natural pose. This is important, because if you slouch or stand tall, you can get incorrect measurements and get the wrong size!
- After receiving the data, you need to compare it with standard indicators. This will help to identify such features of your figure as wide/narrow shoulders, large/small breasts, etc. This knowledge will help in correcting the pattern.
DIY pattern of a women's fur vest
The market for fur products is represented by two directions – natural and artificial fur. In the ranks of natural fur, the skins of animals such as mink, rabbit, wolf, fox, raccoon and chinchilla are especially popular.
Faux fur, thanks to modern developments in industrial production, is not inferior to natural fur either in quality characteristics or in external beauty. Its individual advantages are a more affordable price and humane treatment of animals.
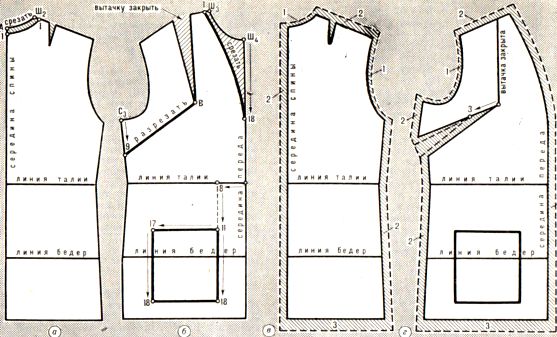
The presented patterns are suitable for both options. We present possible options for patterns for a fur vest.
How to sew a fur vest
First, you need to decide what kind of fur your new item will be made of - natural or artificial.
Choosing good fur for a vest
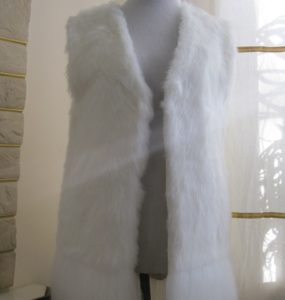
 If you are not sure that you can handle real fur, try sewing a vest from faux fur. Its base is softer than animal skin, and it will be easier to sew with a zigzag stitch on a regular machine.But the pile also crumbles a lot if not processed correctly, this will give you an idea of the difficulty of working with natural fur.
Advice! Do not try to grind down the parts of the skins on a machine! This treatment is not suitable for natural fur; the base becomes loose and quickly breaks. It is recommended that before assembling the parts, grind small pieces of fur and try to stretch them. If they pass this test, feel free to sew the main parts together. And if not, the product will turn out fragile and is unlikely to last long.
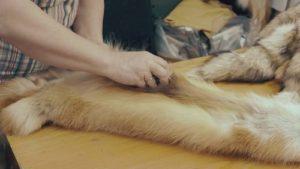
 To evaluate your strength, you should try altering an old fur coat. If you think that to do this you need to rip off the sleeves and cut off the bottom, then you are very mistaken. When re-cutting the product, absolutely all old seams are removed, the pattern pieces are laid out on the most preserved and strongest parts of the fur. In order to save money, even the back is divided into two parts in order to choose the most successful ones from the entire fur coat.
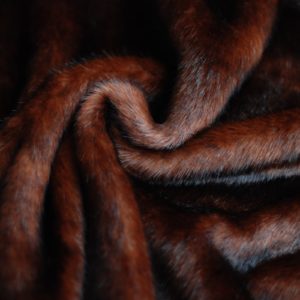
When choosing dressed skins, pay attention to the length, color and density of the pile. All these indicators should be as similar as possible. After all, sometimes visually identical fur can turn out to be radically different to the touch.
We prepare tools and materials
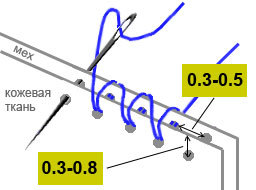 To work with fur, experienced seamstresses have a furrier's machine in their arsenal; it greatly facilitates the process of sewing parts from natural skins. But since it is impractical to purchase such a tool for sewing one vest, you can simply learn how to sew with a furrier’s stitch.
Important! This type of seam is particularly strong; it is used when sewing backpacks and sewing crotch seams on pants. You should not choose thick threads, because the edge is processed almost twice and may turn out to be too rough.
You will also need a stationery or furrier's knife to cut out parts from fur.. It is better to cut on a prepared surface, such as a plastic panel or rubber mat. You need to cut the skin with short, quick movements, a little “in weight”. Cut strictly along the marked lines, do not wiggle, it will be difficult to correct!
Important! The blade should be very sharp, the leather should be cut without touching the hair, and not tear! First, practice on unnecessary pieces, do not immediately start with the main details! Be sure to remove any trapped hairs from the stitching seam; the seam should be clean and even. You can help yourself with a metal hook or awl.
 Lining fabric. If you are altering an old product, we recommend that you do not leave the original lining. Remaking it will not be difficult, but will significantly update the appearance of the future vest. It is better to choose natural fabric, perhaps printed, if you plan to wear the product at noticeably sub-zero temperatures. Tracing paper for patterns, threads to match the fur, pencil, measuring tape, special needle.
If you use skins, you will also need a piece of plywood on which to pre-stretch them, post nails, a hammer or a furniture stapler.
We sew a fur vest with our own hands: a step-by-step guide
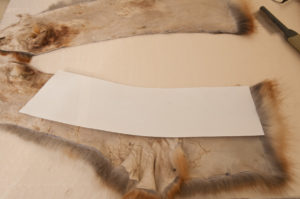
 Before you start working with natural fur, you need to stretch it a little; to do this, the side of the leather (the inner part) is moistened with water and, slightly stretching, nailed to a wooden board. After drying, the pattern pieces are transferred and the skins are removed.
Pattern layout
When working with fur, the main thing is to observe its direction - strictly downward to the product. Having selected the necessary parts of the fur, lay out the pattern pieces and pin them with safety pins.Be sure to leave a seam allowance of 1-2 cm.
Reveal the fur
The lining fabric is cut very simply if it is plain and there is no need to combine a pattern or pattern. Lay out the pattern pieces in the most rational way and cut along the contour, taking into account the allowances.
The edges of the fur can be reinforced with doublerin for strength and ease of use.
Important! After cutting out the parts from the lining fabric, make small cuts around the neckline, not reaching the outline, so that the product turns out well and does not tighten the fabric.
Sew down the details
The parts are folded in pairs, with the fur inward, and sewn together. It is necessary to leave a small area for turning, it will be better if this is the bottom seam of the product.
Final stage
Work through all the seams of the fur vest - remove any trapped hairs and threads. Turn right side out and comb the pile with a sparse brush. Sew up the remaining area.
Do I need to decorate a fur vest?
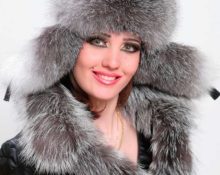
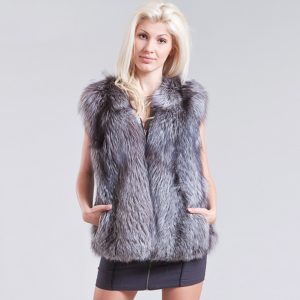
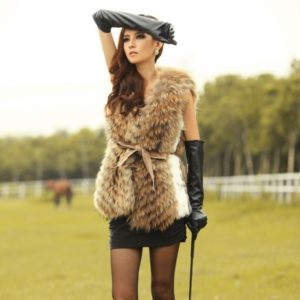 A fur vest, especially made from long-haired fur, is a completely independent wardrobe item that does not need additional accents. The finished suit can be complemented with long gloves or a scarf - a turban. Don't overload your Look so as not to look ridiculous.
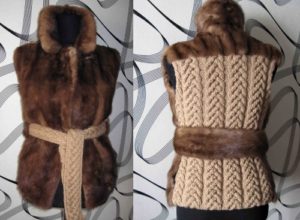
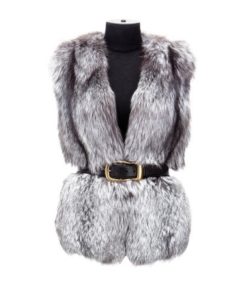
A few more options for decorating a vest made of short-haired fur:
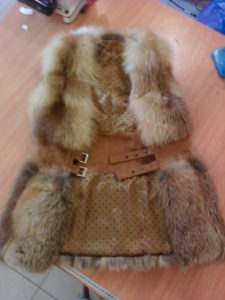
- Wide belt with a massive buckle in matching or contrasting fur tone.
- Large brooch.
- Embroidery. Suitable for models with fabric inserts. Bright flowers look great on plain fabric.
- Beads on a long chain in several rows. Pairs well with a plain turtleneck and skinny trousers.
In general, when decorating the finished product, remember to use a sense of proportion and keep in mind that the vest itself is a rather bright and accent item.
Tips from an experienced seamstress on how to sew a fur vest
 Working with fur is quite difficult, so take the following tips into account.
- Never cut the fur with scissors! They cut the hairs, as a result of which the fur falls off greatly and the appearance of the product deteriorates.
- If you use used fur, then you need to quilt it on the side, thanks to this the fur will not tear under load.
- The shoulder seams should be sewn with a strong tape that does not stretch. The main load will be on this part of the product.
- When assembling parts, pay special attention to the seams and the direction of laying the fur; if the seams are visible, the appearance will look unpresentable.
Now you can make your own pattern for a fur vest and sew a product using it. You can also easily turn an old fur coat into a fashionable vest.
 0
0