Before sewing a vest, you need to decide not only on the color and pattern, but also on the materials used. Fabrics such as raincoat, membrane, fleece and other dense materials are suitable for the vest. You need to decide right away whether the vest will be insulated or not. If you decide to make the vest insulated, then as insulation you can choose synthetic winterizer, Thinsulate, Slytex, sherstepon, or purchase a padding polyester lining. The last of the listed insulation materials is good because it is already quilted and sewn to the lining and, accordingly, will not bunch up if you decide not to quilt the vest.
What materials should I use for the lining?
If you decide to sew an insulated vest, then you should also take care of purchasing lining fabric.You can buy special lining fabric made from synthetic fibers for sale in specialized stores, but natural fabrics such as cotton and silk are also used as lining, which are good because they are more hygroscopic and hypoallergenic. Knitwear such as viscose, stretch mesh, and oil is also used for lining. Knitwear is not as slippery as synthetic fabrics, but it does not accumulate electricity. Price plays an important role, but it is worth considering that cheap, low-quality materials are hard and thin, and this can affect the quality and comfort of wearing the vest.
What to pay attention to when cutting insulation?

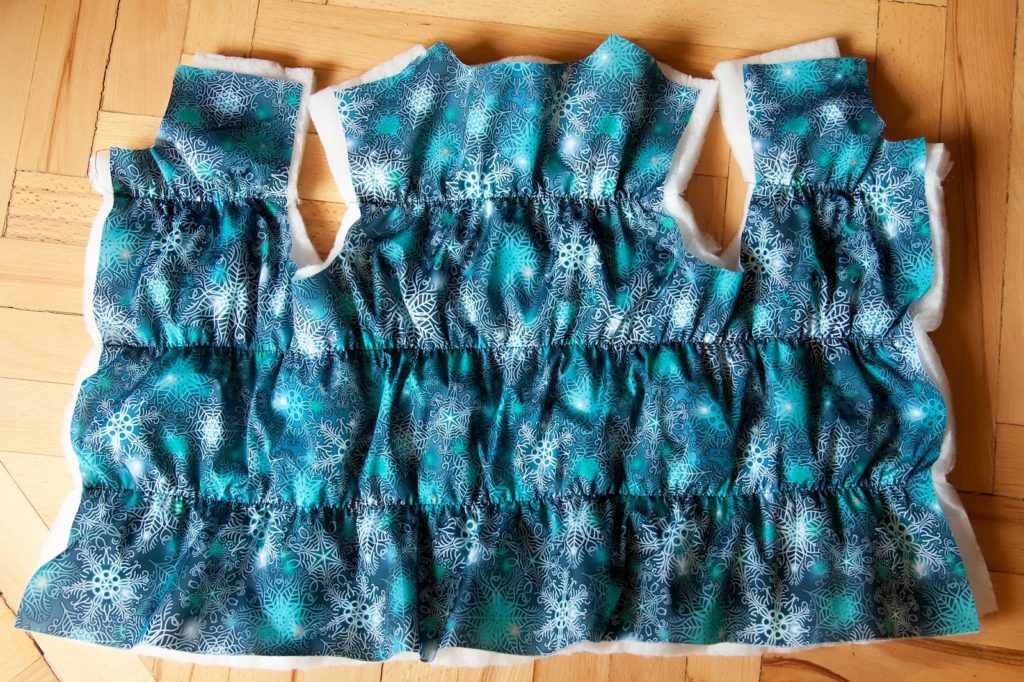
When cutting insulation, you need to focus on the main patterns of the back and front, that is, if the lining needs to be cut a few millimeters smaller than the pattern, then the top fabric and insulation are cut out the same way. After cutting, the insulation is basted to the upper fabric using stitches, which subsequently, after removing the basting threads, will not leave marks.
Step-by-step guide to insulating a vest with your own hands
To sew a vest, you need to perform all the necessary steps step by step. First, all the parts from the base material, insulation and lining are cut out. Then the insulation is basted to the upper fabric and quilted using a special ruler foot. If such a foot is not available, then you can draw stitches on the fabric with chalk or soap, along which you can then sew the insulation to the upper fabric.
How to connect the lining to the top
Next you need to sew the shoulder seams on the top fabric together. Then do this operation with the lining parts of the back and shelf.Place the lining on the top fabric with the right side facing inward and stitch along the armhole line, making notches at the curves.
How to sew side seams
You also need to stitch the side seams - separately connect the parts of the back and shelves on the top fabric and separately on the lining.
How to process the bottom
If you want the vest to be gathered, then along the bottom you can sew an elastic band to the wrong side of the lining, while stepping back from the cut by about 2 cm.
How to process the sides
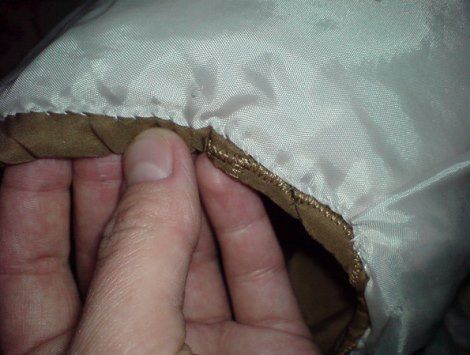
Processing the sides will be necessary if you decide to sew a vest with buttons or press studs. Fold the lining with the top fabric along the sides with the wrong side inward and stitch. The lining should be a few millimeters narrower than the material of the vest top. Then the vest is turned right side out and buttons are sewn on or buttons are nailed on. Before stitching, you can pass an edging between the main and lining materials, then the edge of the bead will look organic.
How to fasten a collar
The collar, like the vest, is cut out from the main fabric, lining fabric and insulation. When cutting the collar, the lining also needs to be cut 2-3 mm smaller than the pattern. Connect the outer fabric to the insulation with stitches, which must be removed after sewing the collar. Then place the lining on the top fabric with right sides facing inward and stitch along the top and side seams. Then turn it right side out.
Place the collar with the main fabrics on the neck line and stitch, while also capturing the insulation. Turn the vest inside out and stitch the lining of the collar and vest along the neckline. Make notches along the neckline for a comfortable fit of the product. Then turn the vest right side out.
How to sew a zipper (if you have one)
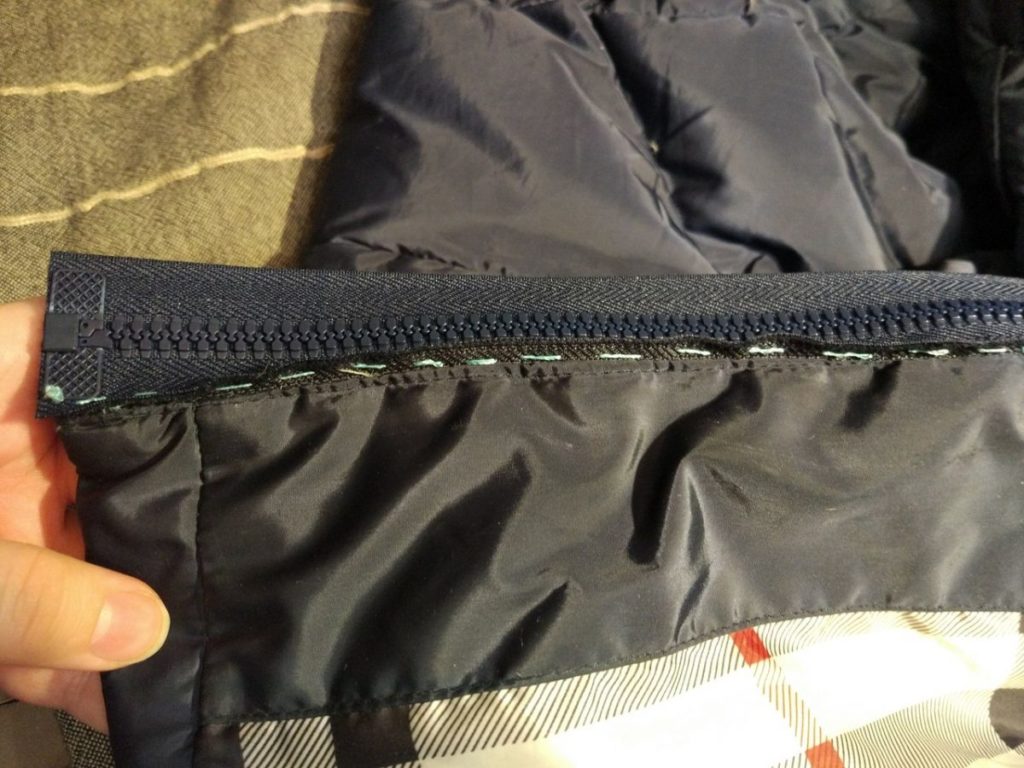
If a vest with a zipper is planned, then it is necessary to secure the left and right parts of the zipper with pins on the sides of the shelves on the main material and insulation. Then check to see if everything fits together - seams, parts, edges. If everything is correct, then grind. Next, fold the lining under the zipper inside and sew it to it. This stitching will be visible on the front side of the shelf, so it needs to be neat.
How to properly sew a lining to a vest?
In order to properly sew the lining to the vest, you need to take into account the order of work - first you need to connect the shoulder and side seams on the lining and the main material, then connect the lining to the main material along the lines of the armhole and neckline, and then close everything with a seam along the bottom of the product. In this case, the product will look neat.
Is it better to quilt or not necessary?
If you are sewing a vest for a small child, then it is not necessary to quilt it. But it is recommended to quilt vests for adults - in this case they will keep their shape better after long-term use. Also, the stitch has not only a useful purpose, but also an aesthetic one - the product looks concise and finished.
 0
0