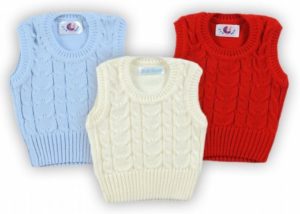
 The baby's wardrobe is constantly being supplemented with new and new things. This is understandable: the child is growing, and he needs things in different sizes. Each mother solves this problem in her own way. You can buy things for growth, but while they are large, their bulkiness causes inconvenience, limiting the freedom of action of children.
Another way is to make children's things with your own hands. One of the most convenient ways of such needlework is knitting. Hand-knitted clothes are an original product and allow a child to look beautiful. At the same time, mom can take care of warmth and comfort, making walks enjoyable, despite the cool weather.
Another advantage of knitting is the ability to unravel the product after the baby has grown. By adding a certain number of threads, you will be able to knit a new thing, which will again become an exclusive new thing.
The easiest model to make and very practical to use is a vest.
We'll tell you how to knit a children's vest with your own hands.
Preparing for work
Yarn selection
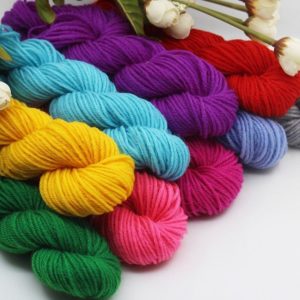
Today, mommy has a wide selection of threads that can be used to create baby items.
Types of yarn
- Wool: Warm yarn can be pure wool, or blended fibers that are made by adding acrylic or viscose to wool threads are also suitable.
- Cotton: natural threads that provide warmth and comfort. Suitable for babies who have an allergic reaction to wool yarn. It exists both in pure form and mixed with viscose fibers.
- Synthetic materials: acrylic and viscose are also widely used in the manufacture of children's clothes.
Yarn requirements for children
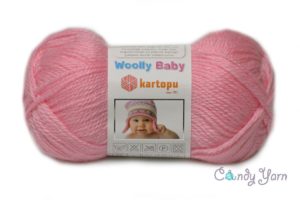
Many manufacturers Today they produce threads designed specifically for knitting children's clothing. They are suitable not only for things of children of school and senior preschool age, but also for babies aged 1-2 years and newborns.
Choosing yarn Make sure it meets the following requirements.
- No allergic reactions. For work, you should choose only threads that do not cause irritation when in contact with the child’s skin. If the slightest irritation, redness, rash, etc. occurs when threads are applied to a small area of skin, you should stop using this yarn.
- Softness. For your baby to enjoy wearing the new thing you knitted, it should not be prickly, rough or even hard. Especially if you are preparing a little thing for a baby. In this case, you cannot do without soft and delicate yarn.
Advice: To make sure that the selected threads are suitable for the baby, apply them to the baby’s lips for a few moments. A negative reaction to the barbed thread will appear immediately.
- No lint. Another requirement - fibers must be smooth. If lint gets into the baby's mouth or nose, it can cause breathing problems.
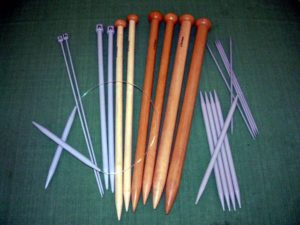
Selection of knitting needles for work
Doing work with knitting needles is the most common type of needlework. A simple and reliable way is to do the work with the knitting needles indicated on the yarn label.
But this option is suitable when knitting from new threads. What if you took an existing ball, the label for which has already been lost?
In principle, anyone can do the job. Just keep in mind that The thicker the thread, the larger the diameter of the knitting needles should be.
And one more thing: medium or small thickness of tools is suitable for making thicker clothes, thick knitting needles are useful for creating an openwork item.
Product sizing
To knit a vest for a child, you will need to check its dimensions.
- Chest, waist, hips.
- Back length to waist line.
- Baby's growth.
When choosing a model for knitting, you will notice that most often they are indicated taking into account one parameter - the height of children.
In this case, it will be useful to clarify in this table which measurements are taken into account in this product.
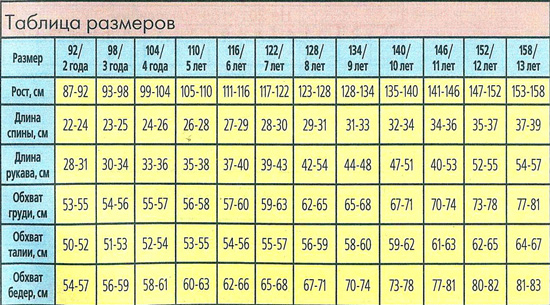
And if necessary, they can be adjusted.
How to knit a vest with knitting needles
Creating a baby vest opens up endless creative possibilities for moms.
We'll show you how to make several models. Once you understand the main points, you can easily be “creative” on your own.
With clasp
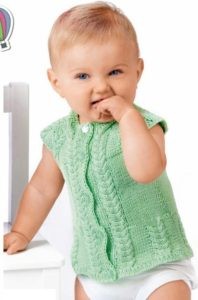
One of the common models is distinguished by the fact that it the front consists of two shelves that are connected by a clasp.
We offer the option of a warm vest that will warm a one-year-old baby. And if the sizes change, it may be suitable for older people.
Our mThe dress has a high neckline, so it will completely cover not only the back, but also the chest. Another feature is raglan.
Pattern
The work is performed using the following patterns.
- Rubber: alternating 1 knit stitch and 1 purl stitch from the face of the work. From the inside, the loops are knitted accordingly to preserve the pattern.
- Braids: made from 12 loops.
Rows 1–4 – knit 12. 5th row: transfer 1-3 loops to an additional needle and send to work. 4–6 knit stitches. Then we knit 3 knit stitches from an additional needle. We transfer the next 3 loops of fabric (7–9 from the braid) to an additional knitting needle and place them before work. We knit the remaining loops of the braid (10–12), and then put into work those that were before the product. In the future, repeat rows 2 to 5. - Purl stitch: from the face - purl loops, from the wrong side - knit stitches.
Back (of 89 loops)
- Rows 1–8 – elastic band.
- Main pattern: 7 purls, repeat (12 braids + 9 purls) repeat throughout the entire fabric, 12 braids, 7 purls.
- We knit the braids to a height of 7 cm.
- Let's move on to the smooth surface. At the same time, for a tight fit, we perform a decrease: 1 loop on each side, a total of 20 times on the right and left.
- Raglan. At a height of 17 cm from the bottom edge, make a bevel. Remove 1 stitch 4 times in every 2nd row.
Having knitted 21 cm in height, bind off the remaining loops.
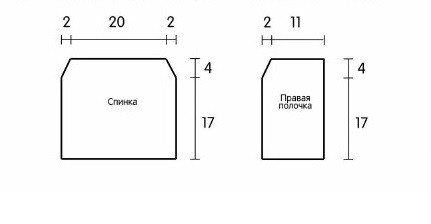
Shelf
The work is done in the same way. Initially, we cast on 48 sts on the knitting needles.
Assembly
- Left and right sew the shelves to the back.
- For armhole processing cast on 41 sts and knit 4 r. with an elastic band.
- Plank – 41 loops for the strap are evenly cast along the height of the shelf. Loops are made on one of the shelves (depending on the gender of the child). The distance between them is 5 cm.
- Neck also decorated with an elastic band.To make it look neat on the entire product, we put on loops for it like this: 37 stitches from each shelf, 41 stitches from each armhole, 61 stitches on the back. We decrease several times, knitting 2 stitches at a time. The number of decreases is determined individually, depending on the thickness of the yarn.
- Sew on the buttons, wash and dry the product.
The vest is ready.
Without clasp
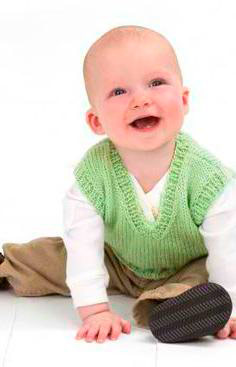
A vest that does not have a fastener - simpler model. Even a beginner knitter can successfully handle it.
We'll tell you how to make such a product without complex patterns.
Since there will be no division into shelves, the clothes consist of only of 2 parts: back and frontA.
Patterns
- Rubber 1x1.
- Garter stitch: all loops, regardless of the side of the product, are purl.
Back model for a baby aged 1 year
- We dial 69 p.
- 4 cm in height - elastic band.
- The next fabric is garter stitch.
- For an armhole at a height of 22 from the elastic, in each 2nd row we reduce 1 time 4, 3, 2 p.p. and 3 times 1 p.
- Close the remaining 62 stitches 19 cm from the first decrease.
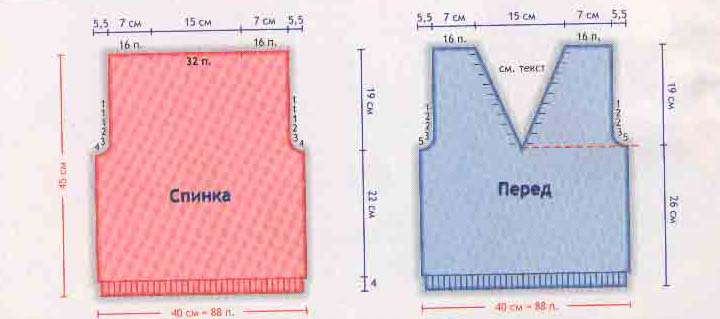
Before
- Up to 26 cm in height we carry out the work in the same way.
- Armhole: decrease on each side 1 time by 5, then 3 p., 2 times by 2 p. and 1 time by 1 p.
- Neck. At the same time we cut the neckline. We knit 64 sts. Leave the 65th unknitted. Next, we perform each part separately. From the central loop in each row we decrease 1 stitch 12 times. Close off the remaining loops. We perform the second upper half of the front in the same way.
Assembly
We sew the details. On the armholes and neckline we collect loops and make an elastic band.
No seams
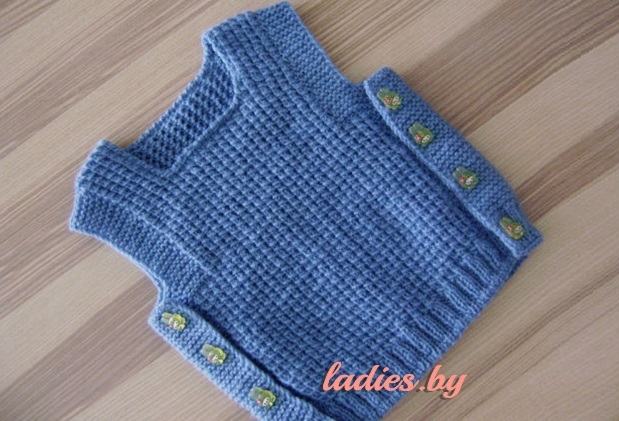
Many mothers appreciated the production of a seamless knitted vest without seams.
Reference: the entire product is knitted in one piece, starting from the front or back.
Patterns
- Rubber 1x1 or 2x2.
- Garter stitch: purl all stitches.
- Wattle: in 1 rub. - edging, rapport (yarn over: the loop is brought out before work, thrown over 2 knitted loops), edging. At 2 p.m. Purl only.
Knitting pattern
The sleeveless vest is knitted from the front; in the photo this is the top part.
- Dial 66 p.
- Elastic band – 3 cm. In the last row add 6 stitches.
- Front: 17 cm: hem, scarf - 7 p., pattern - 56 p., scarf - 7 p., hem.
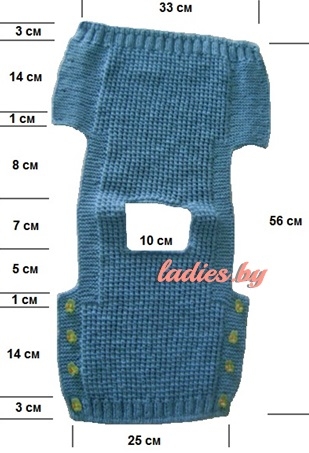
Important: loops for fastening are made on each side of the product.
- 1 cm: elastic - edge, elastic - 15 p., pattern - 40 p., elastic - 15 p., edge.
- For the armhole: deduction of 7 points on both sides.
- 5 cm: edge, elastic 8 p., pattern - 40 p., elastic - 8 p., hem.
- 7 cm: the same knitting is done, but a hole is made in the center for the neck. Edge, elastic 8 p., pattern - 9 p., close 22 p., pattern 9 p., elastic 8 p., edging.
- After 7 cm, 22 stitches are picked up again in the center and the pattern is restored.
- Increase the fabric by 15 stitches on each side and continue knitting according to the pattern.
When finished, all that remains is to sew on the buttons and crochet the neckline.
Useful tips for knitting a vest for a baby
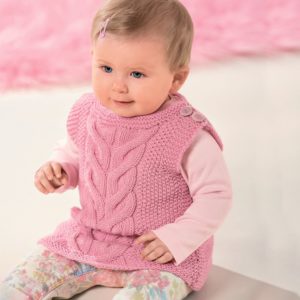
- If you decide to surprise everyone with a new pattern or yarn, do not be lazy to make a sample: a 10x10 cm square. This way you can see if your needlework differs from the size given in the diagram. This will help you more accurately calculate the number of loops.
- You can determine the size of the elastic band yourself. To make the finishing detail look good on a sleeveless vest, remember: the longer the product, the narrower the elastic can be made.
- When you're finished, don't forget to rinse your new item and then let it dry in a horizontal position.
- When washing further, do not twist or hang the vest vertically to dry. This way you can avoid unnecessary stretching.
Happy knitting!


 0
0