 A vest is one of the most versatile wardrobe items. A vest is not a mandatory item of clothing, but it is always useful in the cool season and as an addition to any look.
Until the middle of the 19th century, the vest was exclusively men's clothing, but later it migrated into the women's wardrobe.
Choosing a women's vest style
For several seasons now, the vest has been one of the main attributes of fashionistas and fashionistas. At the peak of their popularity, maxi vests are long - up to mid-calf or even to the floor.
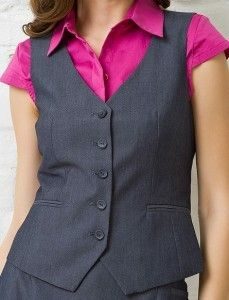
The most interesting thing about a vest is that it can complement any look, make you irresistible, and perfectly shape your figure. For example, An elongated vest perfectly elongates the silhouette, making us look taller and slimmer.
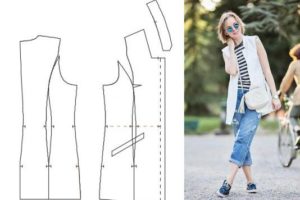
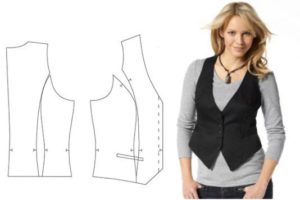
To sew a vest yourself, you must first acquire a pattern of the desired model, which can be found in special magazines or on the Internet.
First you need to decide what function the vest will perform - purely decorative or practically useful, retaining heat, or both at once.
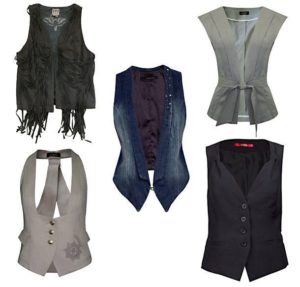 Vests can be divided into the following groups:
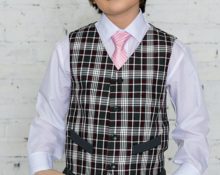
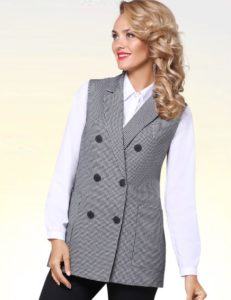
1. Fabric vests
2. Knitted vests
3. Leather and fur
4. Combined vests
It is not at all necessary to know how to sew; you can simply take an old item, for example, a coat, and, by cutting off the sleeves and adjusting the length, turn it into a vest. Next, the only thing left to do is to refine all the cuts and decorate the resulting item.
Taking measurements
Without pulling the measuring tape, we begin to take measurements. They are necessary for accurately determining your size when sewing using ready-made patterns or for creating a pattern.
 Main measurements:
- Og - chest circumference
- From - waist circumference
- About - hip circumference
- Dizd - product length
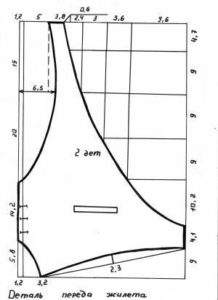
Preparing patterns and sewing a vest
To create a vest with your own hands, you can use a ready-made pattern for a coat, jacket or dress, adding or subtracting the volume and length of the product, depending on what model you want to create.
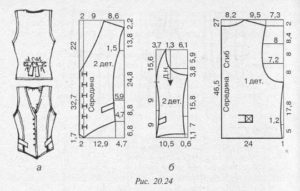
To create a pattern for a classic vest you can take an old dress, a little larger in size or a jacket. Next, follow the most convenient method: open the product, this method is more acceptable if there are darts that also need to be opened, having first noted their location, or turn it inside out and transfer all the lines:
 We take the product from which we will remove patterns and iron it.
- Fold it in half, matching all the seams.
- We put tracing paper or transparent construction PVC film on the inside-out product and with a marker we begin to transfer the patterns, first from the back, then from the shelf.
- Further already You can model the desired style on the finished pattern, for example, open the back or make flounces on the shelf.
- If necessary, you can also translate other decorative elements, such as: hood, pockets, collars, etc.
- Extend the resulting patterns to the desired length and cut them out.
 We take the product from which we will remove patterns and iron it.
 When the patterns are ready, you can proceed directly to sewing the vest:
- Take the ironed fabric and fold it in half, facing inward. Place the material on a flat, smooth surface. The edge of the fabric must be cut off.
- We apply the back pattern to the fold of the fabric so that there is room for allowances in the area of the shoulder seams.
- We pin the pattern to the fabric with tailor's pins and trace all the lines along the contour with chalk or soap, leaving seam allowances.
- We apply the shelf pattern to the cut of fabric, taking into account the material and model. If the fabric does not fray, then it is not necessary to process its edges, so allowances should be left only for stitching.
- On the remaining sections of the fabric we mark all the decorative elements, also leaving allowances.
Now you can cut out all the parts and proceed to assembling the product!
Attention! If The vest is planned to have a warm lining, then the main parts should be made one size larger, and the lining should be made to your size. You can use the same patterns, just adding a little volume to the main details.
Assembling the details of the vest
 Stages of work:
- First you need to sweep away the parts of the shelf and back and try on the product to adjust it.
- During fitting, we attach pockets to the product to accurately adjust its location.
- If everything fits well, then you can proceed to stitching - fastening the parts of the product with permanent seams.
- Sew the vest starting from the shoulder seams, then move on to the side ones.
- Next, you need to process the neckline, armhole, bottom of the product and its front part.
- Depending on the model, we complete the sewing by decorating the product, for example, embroidery or processing the sections with pieces of leather or fur.
Secrets in creating different models of vests
 Depending on the desired style of vest, it is necessary to take into account some rules for working with materials used in a particular model; consider some options:
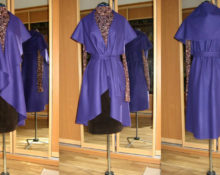
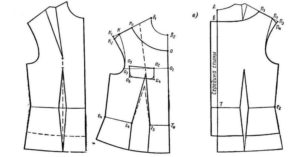
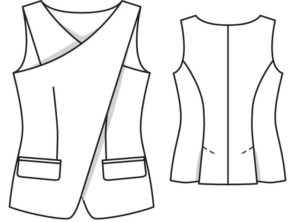
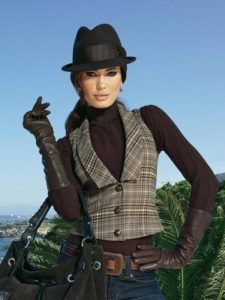
Vest with open back
A vest with an open back for girls and women can be like with or without a collar, lapels that are constructed similarly to the lapels of a jacket would also be appropriate. Often such vests have a belt, which is stitched to the front of the vest and fastened at the back.
Materials used when sewing a vest with an open back can be very different: leather, natural or eco; suede leather; suit fabric; velvet or corduroy, denim and many others.
Knitted vest
To create a pattern for sewing a knitted vest, it is not at all necessary to have special knowledge of sewing. All you need is to have the right size a piece of fabric, preferably containing elastane, the cut of which does not crumble and a little free time.
 To sew a jersey vest, you need to lay the fabric face down on a flat surface. Next, we retreat from the midline by an amount that is equal to 1⁄2 the width of the back + 2 cm in both directions. Make a mark with soap or chalk.
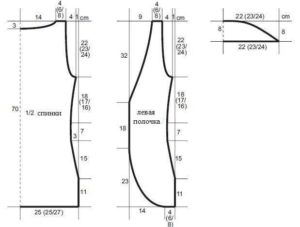 From the top cut of the material on both sides we retreat down 15 cm and put marks that should coincide with the previous ones.
Now we retreat down 20 cm from the last marks and draw lines parallel to the side sections of the fabric.
The resulting lines are the armhole of the vest, so they need to be cut. We attach bartacks on both sides of the armhole either by machine or by hand.
All cuts can either be left open or processed, for example: overlocked with an overlocker, edged with bias tape, and a decorative stitch placed at a distance of 1 cm from the edge.
 The clasp for such a vest can be a button, a brooch, a button, or just a belt.
Advice! You can easily change the shape of this vest by simply rounding its corners or making it into a circle if you have enough fabric.
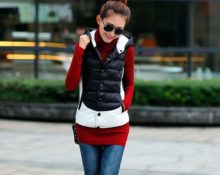
Quilted vest with padding polyester or other insulation
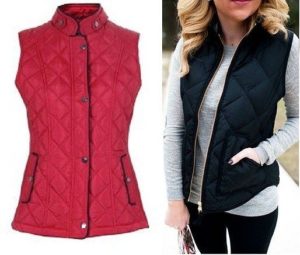 Necessary materials to create an insulated quilted vest:
- to sew a quilted vest, you can use fabrics such as raincoat, cotton or membrane, you can even use bright and colorful scarves;
- as insulation you can use synthetic winterizer or any of the new generation insulation materials, such as wool or isosoft;
- You also need a backing for the stitch itself, for example, madapolam;
lining fabric; - zippers and other accessories provided for the model.
 When all the necessary materials are at hand, you can start creating a quilted vest:
- First, all the parts are cut out according to one pattern, but the top 3 layers need to be made about 2 cm larger.
- Then everything is swept away without strong tightening so that you can start stitching.
- On the back layer, you need to draw lines with chalk along which the stitching will then be laid. If you have a special foot with a ruler in stock, then there is no need to draw all the lines, just draw a couple of central lines, and then stitch along the ruler, focusing on them.
- After stitching, it may be necessary to correct the resulting parts with scissors.
- Now we assemble the vest for fitting to fit it to your figure.
- We make pockets according to the model.
- We sew all the details of the vest.
- We combine the base with the lining facing each other and pin it together.
- We start the connection from the armhole, align all the cuts and grind them down.
- We turn the vest inside out, and, bending the main fabric by 0.5 cm, creating an edging on the wrong side, thus basting the armhole.
- Sew the shoulder seams in one line (base and lining).
- Now carefully attach the collar or hood, depending on your model.
- We sew in the zipper in a way convenient for ourselves, with or without the use of a strap and a valance.
- We return to the collar, if we have one. It is necessary to connect the outer and inner collars with a zipper.
- We attach the lining with the inner collar and also sew it down.
- We sew the lining to the zipper.
- Aligning all the layers of the vest, we process the bottom and everything is ready.
Fur vest
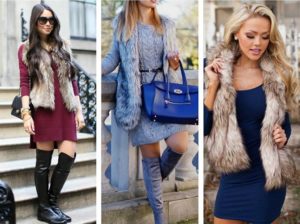 Working with any fur is a painstaking and difficult task. It is best for beginners to start trying their hand at working with faux fur or an old fur coat.
The main thing when cutting parts is to remember that The pile should always face down!
To sew a fur vest, you can take any pattern and add extras for freedom of movement, because such products are usually worn with sweaters or over jackets.
If you cut a vest from natural fur, then first you need to moisten it with water from the inside and nail it with the fur down to a wooden board, then let it dry. Only after this can you start cutting.
The patterns are pinned as usual and markings are made. After that, each detail is cut out using a knife or blade.
 Fur products are sewn either with furrier's seams manually or on a special furrier's machine.
Important! When sewing parts, you must ensure that the fur does not get into the seams of the product.
The seams of the product are usually punched with a hammer. The lining and main fabric are assembled last, and the lining must have some slack to turn inside out.
Turn the product inside out with special care.
The bottom is hand-stitched with hidden stitches, after which the entire product is smoothed by hand and care is taken that the joints of the parts are not noticeable.
At the end, all the hairs caught in the seams are pulled out with a special hook or awl and the entire product is combed.
The vest is ready!
 0
0