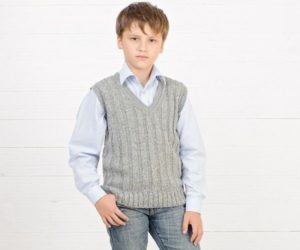
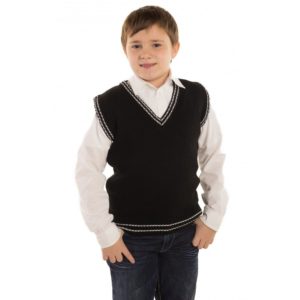
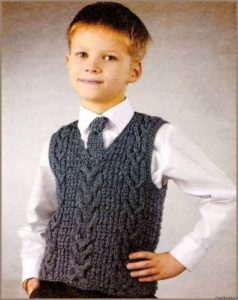
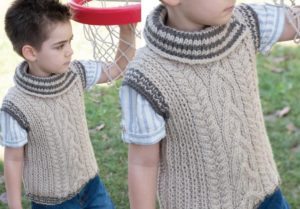
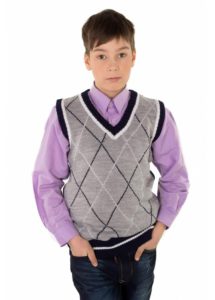
 It's autumn outside - it's time to think about warm clothes for our young gentlemen. Handmade items are always relevant in any wardrobe, especially if they are associated with a good mood and caring for a loved one. Your son will be grateful to you for a knitted sleeveless vest, which will serve as a warm addition to his school suit. It does not restrict movement, and has not yet gone out of fashion.
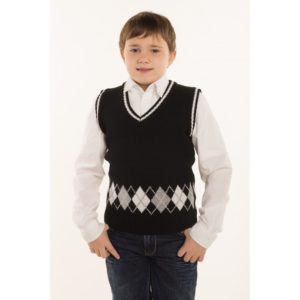
If you are a fan of the English style, then you know that Europeans prefer colors for boys: dark green, gray, black, blue, white and sand. We will try to follow fashion trends.
DIY school vest
Where to begin? We will try to give you a universal algorithm of actions so that in the future you can use any pattern and thickness of yarn (knitting needles) to make this everyday product. So…
- We start by constructing a pattern. The proposed pattern is suitable for children 7–8 years old. If your guy is larger or petite, make adjustments accordingly.
 We knit a sample. Whatever yarn you choose and whatever knitting needles you take, you can’t do without a sampler. The sampler will show how many loops we need to cast on to knit the parts, and how many rows we need to knit. Usually the sampler is knitted with the same motif that was chosen for the planned masterpiece. Size – 10 cm wide and 10 cm high. When it is ready, wash it in warm water, straighten it, and dry it. Ironing is not recommended - the sample may become deformed, and the pattern will lose volume, which cannot always be restored.
- We count how many loops we need to cast on, focusing on the sample sample. In my case, the width I got was 21 loops per 10 cm, or 2.25 loops per 1 cm. From these indicators, we subsequently calculate the number of loops to be cast on.
Back
The width of the back on the pattern is 40 cm, so we multiply 40 by 2.25 and get 85 loops for the back. Knitting needles with a size of 3 mm are quite suitable. Progress:
 We cast on 85 loops and knit with a 4 cm rib pattern. Usually this is alternating 1 front loop and one purl. You can make the elastic band more embossed - alternate 2 knits with 2 purls.
- After the elastic we knit with the main pattern up to a height of 30 cm.
- This is where the armhole begins. We close 4 loops on both sides of the fabric. Next we decrease (again on both sides) after 1 edge loop 5 times. As a result of these actions, we will be left with 67 loops. At a total height of 51 cm, we finish knitting the back.
Front (shelves)
 For the right front, cast on 45 stitches and again knit an elastic band 4 cm high, as was the case when knitting the back.
- Next 30 cm with the main pattern - until the beginning of the armhole. Cast off 4 stitches again after the edge stitch and decrease 5 times, 1 stitch in each row.
- On the other side of the fabric, at a height of 43 cm from the beginning of knitting, we close 5 loops for the neckline, in the next row 4 loops, then 3 loops, and three times 2 loops.
- At a height of the knitted fabric of 51 cm, close the loops, finishing making the right shelf.
- The left front is knitted symmetrically to the right. If you need a one-piece front part, then at the level of the beginning of the neck in the middle of the row we close 10 loops and knit the left and right parts separately.
Assembly
- We slightly moisten the parts and dry them. We sew shoulder and side seams.
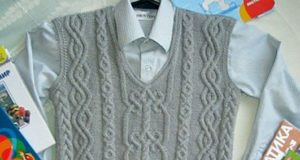
- The neckline and armhole can be tied with 2 cm elastic bands using knitting needles slightly smaller than the product itself was knitted, for example, if all the details are made with knitting needles number 3.5, then for the neckline and armholes you can use knitting needles 3 or even 2.5. We close the elastic at the armholes and neckline.
- We sew a detachable zipper to the shelves. You can try it on!
Boy's vest with a hood for every day
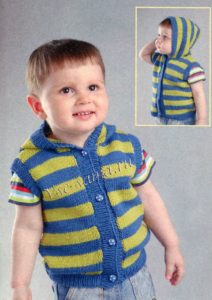
If you want more specifics, and the first option does not provide it enough, then we offer the option of a vest with a hood, with a universal pattern for ages 2-4-6-8-10 years (respectively - a-b-c-d-e). For this vest option recommended yarn with a composition of acrylic - 40% and cotton 60%, quite thick, which is why knitting needles are used with a size of 4 mm. Begin:
- a sample from such a thread 10 cm by 10 cm turns out to be 17 loops for 24 rows - if we knit with stockinette stitch. Multiply the number of cm by 1.7 and get the required number of loops for casting on any size;
- for option a) 1.7 by 33 cm = 56 loops, similarly for other sizes.
Back
 Cast on 57-61-67-69-75 stitches for the back (respectively – a-b-c-d-e). And we knit an elastic band, 1 knit, 1 purl. 3 cm wide is enough.
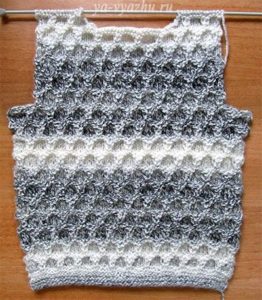
- Next is the front stitch. To armhole 18-20-23-24-27 cm.If we want a striped pattern, then we alternate 6 rows of yarn of the same color, then 6 rows of yarn of a different color. After the elastic band we get 4 blue stripes as in the photo and 3 gray ones. Then wide gray stripes and narrow stripes at the top of the back, 2 rows of different colors.
- To make an armhole, you need to make decreases in every second row: According to the sizes: a – once three loops, twice 2 loops and 2 times 1 loop; b - c - d - the same - once 3 loops, 2 times 2 loops, and three times 1 loop; e – 1 time three loops, three times 2 loops, twice 1 loop.
- After the armhole we knit the shoulder and neckline.
Front (or shelves)
- To start the front, cast on 4 mm needles accordingly: 27/29/32/33/35 stitches. We knit an elastic band 3 cm wide.
- After the elastic band, we knit the same pattern as on the back. We make sure that the stripes on the shelf coincide with the shelves on the back.
- The armhole on the shelves is designed in the same way as on the back. For the neckline, at a fabric height of 32-36-41-43-47 cm from the bottom edge, we begin to decrease loops in every second row: a – 2 times 5 loops, b – 1 time 5 loops, and 1 time 6 loops, c – two times 6 loops; d- once 6 and once 7 loops; e – twice 7 loops.
Hood
 Cast on 83-87-93-97-101 stitches and knit 2 cm with an elastic band.
- Next 2 rows can be knitted with yarn of a different color.
- Having knitted 16-17-18-20-20 cm, we divide the fabric into two equal parts, marking the center, we begin decreasing: once in one loop, then through the row we make 4 more decreases in 1 loop. By knitting 22-23-24-26-26 cm from the beginning of the elastic band, you can close the loops. The hood is ready.
Assembly
On the front and armhole sides, we knit 3 cm in garter stitch from the neckline and arm holes. Sew on the zipper.You can do this by hand, or you can use a sewing machine, pinning the zipper to the edge of the shelf, so that its edge does not stretch when sewing and the seam is uniform, did not tighten the canvas.
Tips for beginners
 If you can’t buy yarn that matches the instructions for the model, buy one that is at least similar in length to the recommended one. The thickness of the knitting needles must be selected as indicated in the description.
- Read the description of actions to the end before starting work; perhaps some points will become clear during the reading process.
- If there are many sizes in the diagram, mark the numbers you need in advance with a marker to avoid mistakes.
- If you use different types of threads, check whether they are the same length in the skein, and read “yarn care”; the characteristics should be close, otherwise the product may become deformed after the first wash.
- Do not throw away samples for products; 10 by 10 cm scraps can later be used for a plaid or cardigan in the patchwork style.
- In the case when you want to knit an item for the first time, you will prefer a simple model that does not fit closely to the figure.
- When making large parts or using thick and heavy threads, it is easier to do this on circular knitting needles, then the fabric does not hang on the knitting needles and your hands get less tired.
- When using cotton yarn, wash the swatch in hot water to allow for any shrinkage that will occur in the finished garment.
- Cut the eraser into cubes and use it as a knitting needle tip when you need to put your work aside, and it will prevent the stitches from slipping while you're away.
- For the cuffs, choose knitting needles half a size thinner than for the other parts, and to prevent them from stretching later, add a thin elastic to the yarn.
 Please note the fit allowances in the instructions.They may be larger than your body needs.. And if you like things that fit tighter, choose a smaller size.
- Stainless yarn will not get dirty when knitting; put the ball in a bag and seal it, leaving a small hole for the thread to come out.
- When working with black yarn, place a white fabric under the knitting to reduce eye fatigue.
- To prevent the edge from curling during stockinette stitch, knit the first row with a 1x1 rib.
- To avoid stretching the neckline when you close the loops, knit a thin elastic band along with the working thread.
- Yarn can be used for knitting or crocheting. For a hook, it is twisted more tightly to prevent stretching of the finished product.
- It is better to buy one skein of yarn more than recommended in the description, rather than then have to look for the right thickness and color.
- For beginners in knitting, avoid knitting needles made of bamboo, plastic and wood. They can be slippery and bendy. Steel in this case is an ideal option.
- It is easy to hide the ends of the threads and the places where they are tied using a crochet hook.
To make children's clothes, we prefer to choose natural fabrics; there is an old surefire way to make sure the composition of the yarn:
- you can read the ingredients on the label;
- you can set fire to the thread and watch how it burns: Bright and fast - this is cotton. It goes out quickly, charring, smells of burnt wool - wool thread. It melts, melts like a candle, the tip turns into a ball when it cools - it's synthetic.
Which yarn to choose?
 Wool thread. Natural, usually made from sheep's wool. Various colors. For winter things. You can knit any patterns.
- Cotton yarn. Hypoallergenic. Skin-friendly. Gives the product an aristocratic look.
- Melange yarn. A mixture of synthetic and natural fibers. Texture gives things a lush look.An excellent option for three-dimensional drawings.
- Mohair. Very fluffy, natural, may shrink after washing. For things that are not adjacent to the body. For small drawings.
- Fancy yarn. It may contain different threads both in texture and composition. For models with trims, for thick knitting needles.
Combined colors for choosing yarn
 White – goes with all colors. Especially good - red, black, blue.
- Beige - with white and brown.
- Gray goes well with blue and pink.
- You can try pink color with blue and white.
- Red is friends with yellow, blue, black, white.
- Brown – beige, cream, pink.
- Orange – white, blue, charcoal.
- Olive – orange, shades of brown.
- For green – charcoal, gold, gray shades.
- For dark blue – gray, blue, brown colors.
- To purple - gray, gold and green colors.
- Black practically combines without problems with all other colors.
How to combine yarn color and pattern
 Colored and variegated yarn hides the pattern, not allowing it to appear in all its glory. It is better to knit from variegated yarn with a fabric without patterns or with small motifs.
- If different colored threads are used, check if they are the same thickness?
- The color should not tire the eyes, be pleasant and unobtrusive.
- Think in advance about what items you will combine your knitted clothes with.
- It is not at all necessary to have a high level of skill to make such a vest. Skills in handling knitting needles and performing knit and purl stitches will be sufficient in our case.
- When choosing yarn, choose options with natural wool as part of the thread, because this model is for the cold season.
- If you want to knit a summer version of a vest, then a cotton thread is better, then you will need less yarn, and you will have to cast on more loops.
We hope that our recommendations will be useful to you, and new masterpieces of your own creation will appear in your wardrobe!


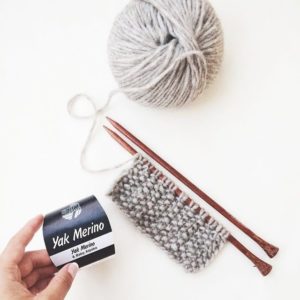 We knit a sample. Whatever yarn you choose and whatever knitting needles you take, you can’t do without a sampler. The sampler will show how many loops we need to cast on to knit the parts, and how many rows we need to knit. Usually the sampler is knitted with the same motif that was chosen for the planned masterpiece. Size – 10 cm wide and 10 cm high. When it is ready, wash it in warm water, straighten it, and dry it. Ironing is not recommended - the sample may become deformed, and the pattern will lose volume, which cannot always be restored.
 We cast on 85 loops and knit with a 4 cm rib pattern. Usually this is alternating 1 front loop and one purl. You can make the elastic band more embossed - alternate 2 knits with 2 purls.
 For the right front, cast on 45 stitches and again knit an elastic band 4 cm high, as was the case when knitting the back.
 Cast on 57-61-67-69-75 stitches for the back (respectively – a-b-c-d-e). And we knit an elastic band, 1 knit, 1 purl. 3 cm wide is enough.
 Cast on 83-87-93-97-101 stitches and knit 2 cm with an elastic band.
 If you can’t buy yarn that matches the instructions for the model, buy one that is at least similar in length to the recommended one. The thickness of the knitting needles must be selected as indicated in the description.
 Please note the fit allowances in the instructions.They may be larger than your body needs.. And if you like things that fit tighter, choose a smaller size.
 Wool thread. Natural, usually made from sheep's wool. Various colors. For winter things. You can knit any patterns.
 White – goes with all colors. Especially good - red, black, blue.
 Colored and variegated yarn hides the pattern, not allowing it to appear in all its glory. It is better to knit from variegated yarn with a fabric without patterns or with small motifs.
 0
0